
Marbled Beet & Turmeric Swirl Sourdough Loaf
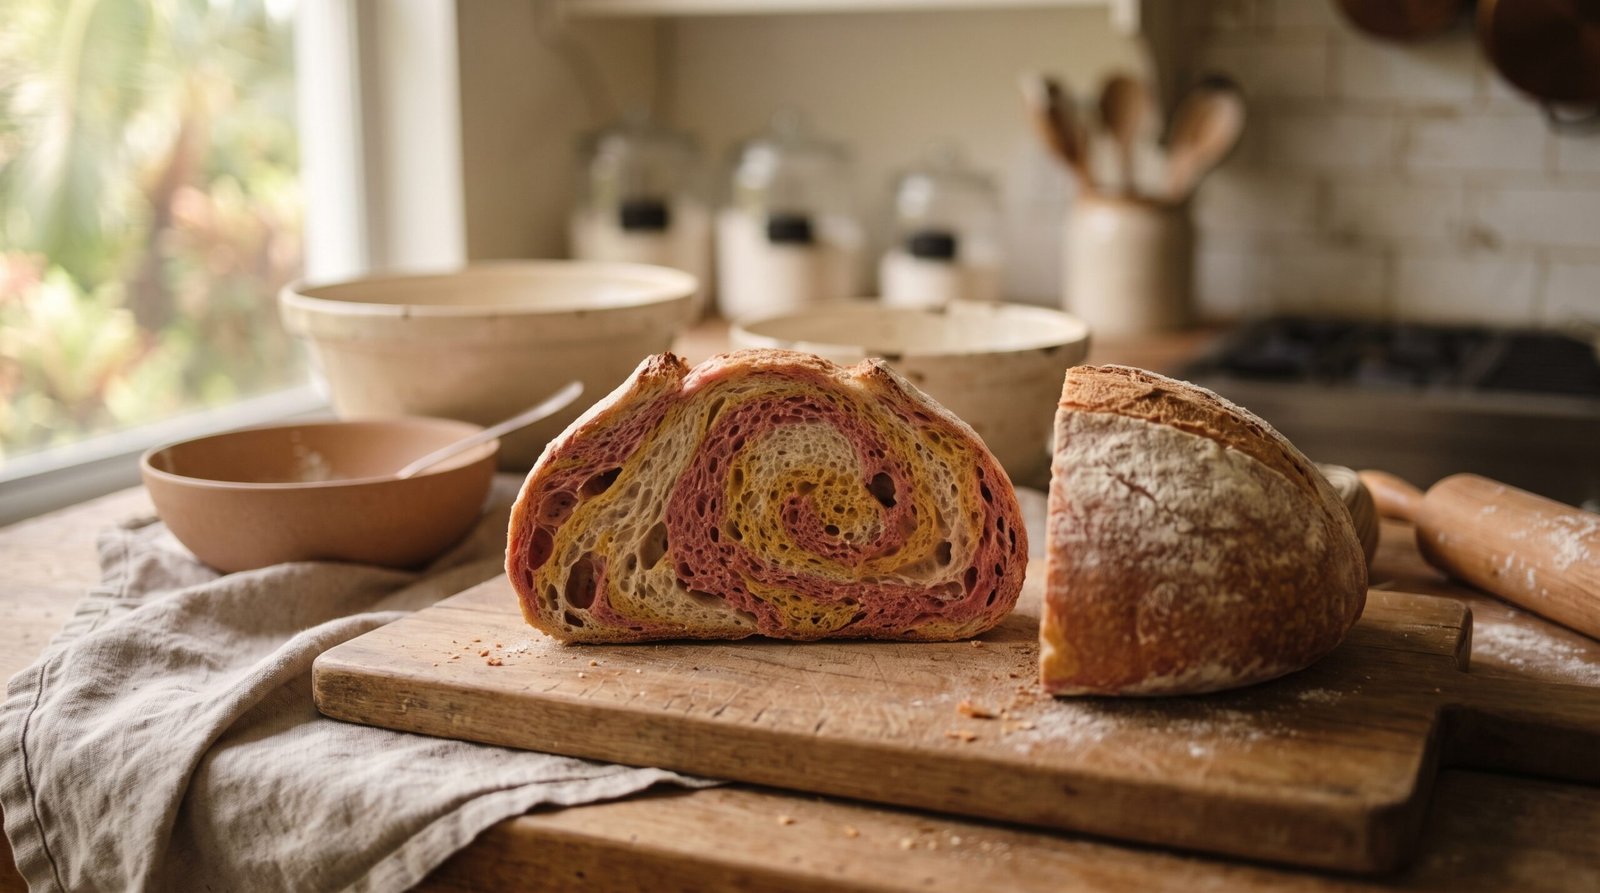
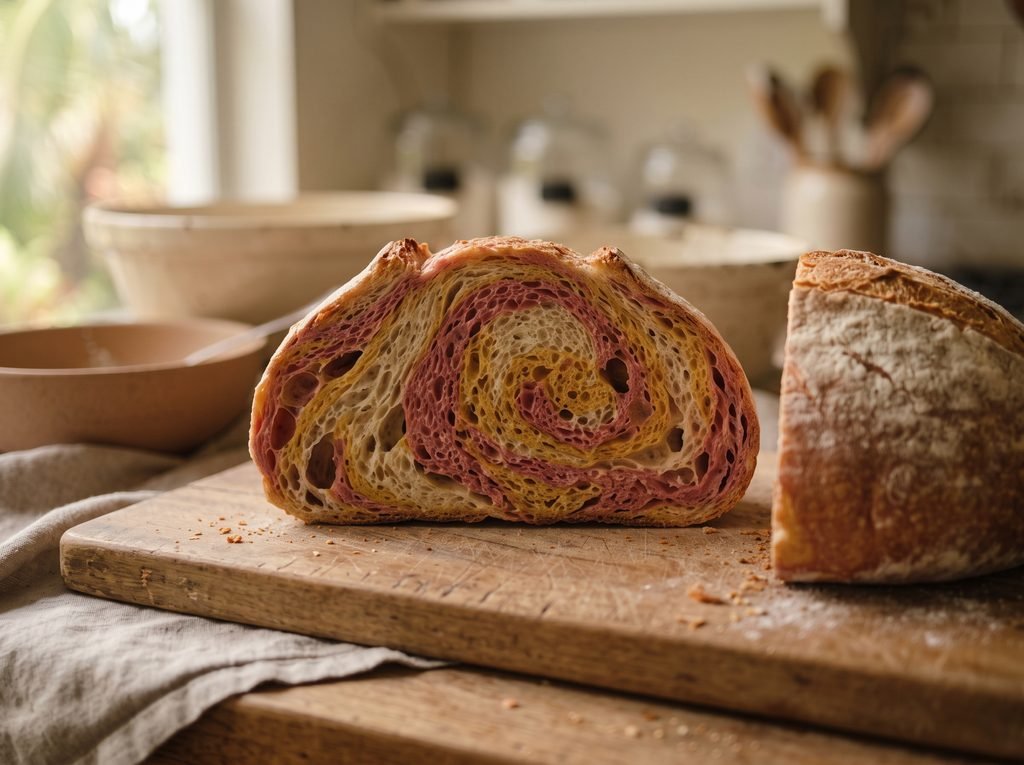
Every other piece of sourdough art on this site decorates the crust – this one hides its best trick inside. Beet powder and turmeric, each kneaded into their own piece of dough and then loosely swirled together at shaping, bake into a genuinely marbled pink-and-gold crumb with no artificial color anywhere near it.
The crust stays deliberately plain. All the drama is saved for the first slice.
Why You’ll Love It
- A genuine marbled crumb, not just a decorated crust – the “reveal” is in the slicing
- Two natural colors from pantry spices, no food coloring
- A completely different sourdough art technique from scoring, painting, or appliqué
- A dramatic centerpiece loaf for a brunch table or a gift
- A hands-on lesson in how little mixing it takes to get a true marble pattern
Ingredients
Volume measurements are included for convenience, but they’re approximate – for the most consistent results, weigh your ingredients on a kitchen scale, especially the flour.
Dough
- Bread flour (500 g / 4⅛ cups)
- Water, room temperature (400 g / 1⅔ cups)
- Active sourdough starter (110 g / ⅓ cup + 2 Tbsp)
- Fine sea salt (10 g / 1¾ tsp)
Colors
- Beet powder (1½ tsp)
- Turmeric powder (1½ tsp)
- Water (3 tsp, about 1½ tsp per color): to make each powder into a paste
Equipment
- Kitchen scale
- Dutch oven, 5-6 quart
- Banneton (proofing basket) with cloth liner
- Small bowls, for mixing the color pastes
- Bench scraper
- Sharp bread knife, for a clean slice that shows the marbling
Sample Schedule (2-Day)
Day 1
- Mix and autolyse 30 minutes
- Add starter and salt; knead 8-10 minutes
- Bulk ferment 4 hours with 3 sets of folds
- Divide into 3 pieces and knead in the colors
- Rest, swirl together, shape, and refrigerate overnight
Day 2
- Preheat the oven with the Dutch oven inside
- Score simply
- Bake covered, then uncovered
- Cool at least 2 hours before slicing
Marbled Beet & Turmeric Swirl Sourdough Loaf
Method
- In a large bowl, mix the bread flour and water together by hand just until no dry flour remains. Cover and rest (autolyse) for 30 minutes.
- Add the starter and salt. Mix and knead until smooth and elastic, 8–10 minutes by hand or 6–7 minutes with a stand mixer.
- Cover and bulk ferment at room temperature for 4 hours, with 3 sets of stretch-and-folds in the first 2 hours, until puffy and about 50% risen.
- Divide the dough into 3 roughly equal pieces, about 335 g each.
- Mix the beet powder with 1½ teaspoons water to form a paste, then knead it into one piece of dough until the color is even throughout, 2–3 minutes. Repeat with the turmeric powder and a second piece. Leave the third piece plain.
- Cover all three pieces and let them rest for 20 minutes — kneading in the color is itself a mini workout for the gluten, and they need a moment to relax.
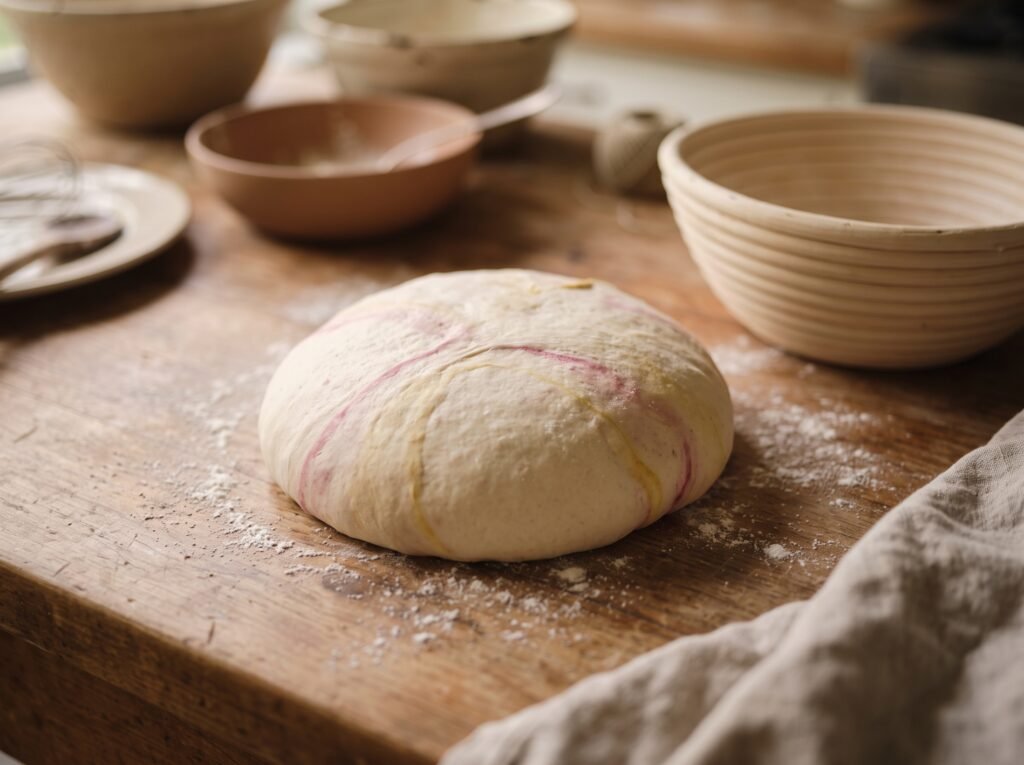
- Flatten each piece into a rough oval. Stack the three on top of each other in any order, then gently fold and roll the stack together just 3–4 times — enough to swirl the colors into distinct layers, not so much that they blend into a single muddy tone.
- Shape gently into a tight round, keeping the swirl pattern intact. Place seam-side up in a well-floured banneton, cover, and refrigerate overnight (12–15 hours).
- The next day, preheat the oven to 475°F (245°C) with the Dutch oven inside for at least 30 minutes.
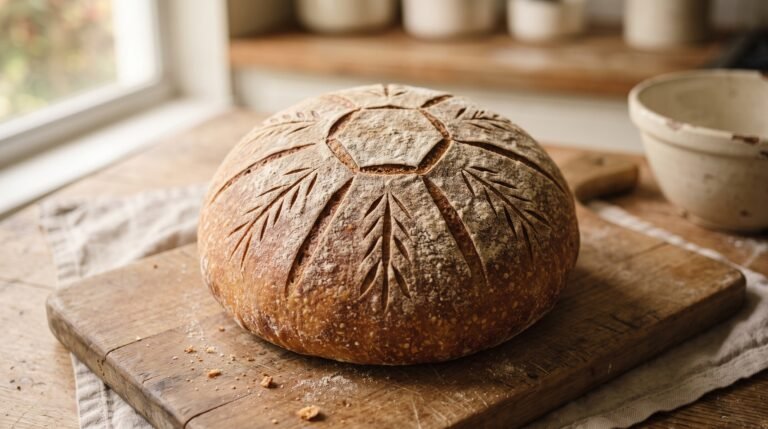
- Turn the cold dough out onto parchment paper and score with a single simple slash — keep the crust design plain so it doesn’t compete with the marbled crumb.
- Lower the dough (on its parchment) into the hot Dutch oven, cover, and bake for 20 minutes.
- Remove the lid and bake another 20–25 minutes, until deeply golden.
- Cool completely on a wire rack, at least 2 hours, before slicing — cutting in too early smears the marbled pattern instead of showing clean swirls.
Notes
Save This Recipe
Get it emailed to you now, plus new recipes as they go up.
Your email is safe with me. I’ll send this recipe straight over. No spam, ever—and you can unsubscribe anytime.
How to Make It
1Mix and autolyse. In a large bowl, mix the bread flour and water together by hand just until no dry flour remains. Cover and rest (autolyse) for 30 minutes.
2Add starter and salt. Add the starter and salt. Mix and knead until smooth and elastic, 8-10 minutes by hand or 6-7 minutes with a stand mixer.
3Bulk ferment. Cover and bulk ferment at room temperature for 4 hours, with 3 sets of stretch-and-folds in the first 2 hours, until puffy and about 50% risen.
4Divide. Divide the dough into 3 roughly equal pieces, about 335 g each.
5Color two of the three. Mix the beet powder with 1½ teaspoons water to form a paste, then knead it into one piece of dough until the color is even throughout, 2-3 minutes. Repeat with the turmeric powder and a second piece. Leave the third piece plain.
6Rest. Cover all three pieces and let them rest for 20 minutes – kneading in the color is itself a mini workout for the gluten, and they need a moment to relax.
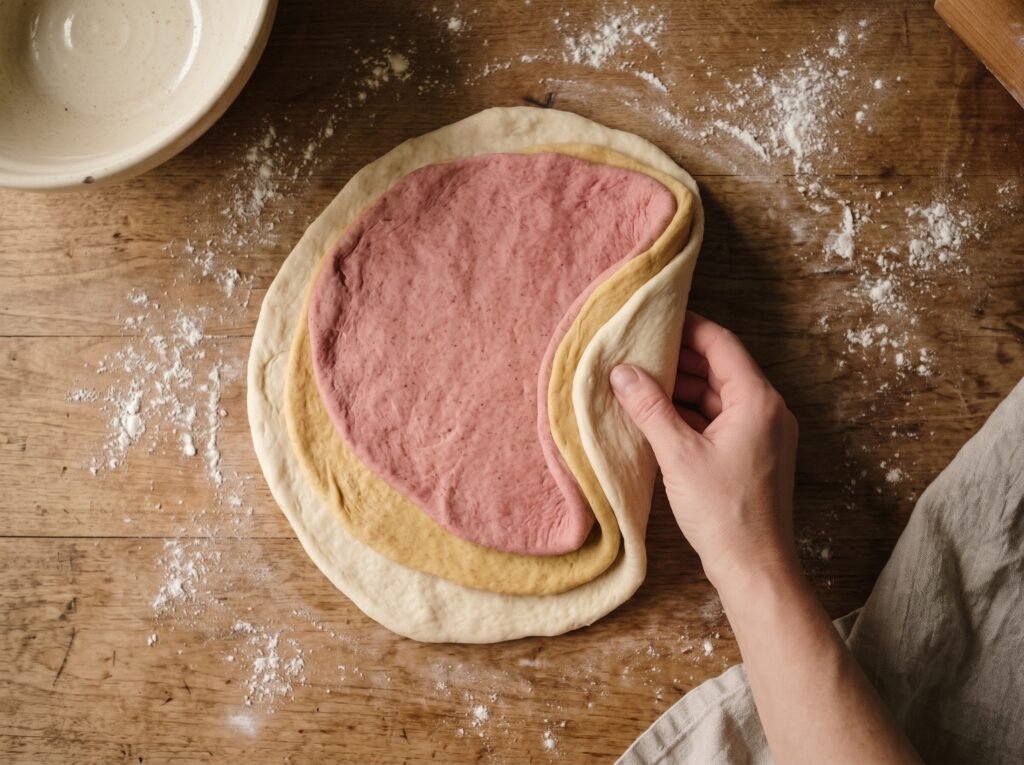
7Stack and swirl. Flatten each piece into a rough oval. Stack the three on top of each other in any order, then gently fold and roll the stack together just 3-4 times – enough to swirl the colors into distinct layers, not so much that they blend into a single muddy tone.
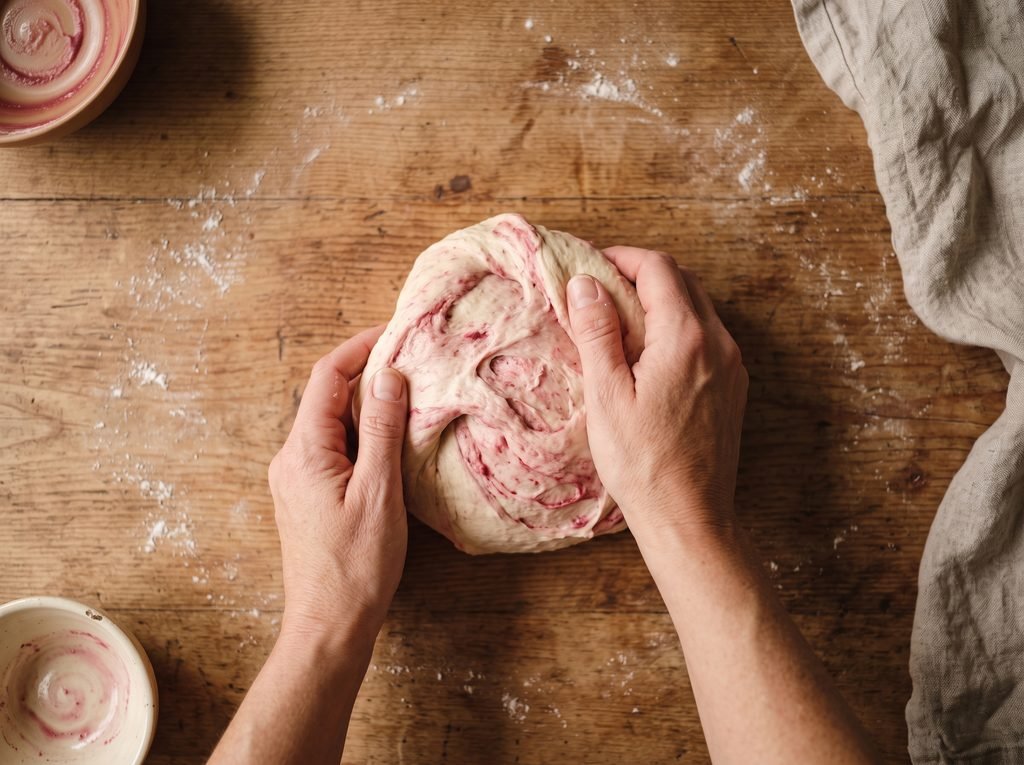
8Shape and refrigerate. Shape gently into a tight round, keeping the swirl pattern intact. Place seam-side up in a well-floured banneton, cover, and refrigerate overnight (12-15 hours).
9Preheat. The next day, preheat the oven to 475°F (245°C) with the Dutch oven inside for at least 30 minutes.
10Score simply. Turn the cold dough out onto parchment paper and score with a single simple slash – keep the crust design plain so it doesn’t compete with the marbled crumb.
11Bake, covered. Lower the dough (on its parchment) into the hot Dutch oven, cover, and bake for 20 minutes.
12Bake, uncovered. Remove the lid and bake another 20-25 minutes, until deeply golden.
13Cool completely. Cool completely on a wire rack, at least 2 hours, before slicing – cutting in too early smears the marbled pattern instead of showing clean swirls.
Tips & Troubleshooting
- Less mixing is more marbling: 3-4 folds is genuinely enough – keep folding and the colors blend into a flat tan instead of staying distinct.
- Knead each color fully into its own piece first: a streaky, half-colored piece going into the swirl step just muddies things further; get each piece to one even color before combining.
- Patience pays off at the slice: cutting into this loaf while it’s still warm is the single most common way to ruin the marbling – give it the full 2 hours.
- Keep the crust plain: a fussy scoring pattern on top of a marbled crumb competes with itself – one clean slash is all this loaf needs.
- Natural colors fade slightly in the oven: both the beet pink and turmeric gold mellow somewhat during baking, which is normal and still shows up clearly once sliced.
How to Store
To store: in a paper bag or bread box at room temperature up to 4 days.
To freeze: slice first, then freeze in an airtight bag up to 3 months; toast slices straight from frozen.
Nutrition
Per slice, based on 12 slices per loaf. Estimated from the ingredients used – provided for convenience and not a substitute for a precise calculation.
140
Calories
27g
Carbs
5g
Protein
1g
Fat
1g
Fiber
190mg
Sodium
Desi’s Notes
This is the one piece of sourdough art on the site where the crust barely matters – the whole point reveals itself when you cut into it. I keep the scoring deliberately plain here so nothing competes with the crumb for attention.
The temptation is to knead the colored and plain pieces together until it’s one smooth, even color. Resist it. A genuine marble pattern comes from minimal mixing – a few folds, not a full knead – so the colors stay as distinct swirled layers instead of blending into a flat, muddy tan.
Let this one cool longer than you think you need to. Slicing into a warm marbled loaf smears the colors into each other at the cut edge instead of showing clean, defined swirls.
Before You Bake
Scaling this recipe up or down? Run your numbers through the Sourdough Calculator. And if you want a printable reference for troubleshooting your crumb and crust, grab the Crumb & Crust Diagnostic Quicksheet.
Knead to Know?
New recipes, baking tips, and sourdough troubleshooting — delivered before your starter even finishes its next rise.
Get the latest insights, no spam — just new recipes and baking tips. Unsubscribe anytime. See our Privacy Policy.

Tried this recipe? Leave a star rating below — it takes 10 seconds and helps other bakers decide what to make next.
Baked this recipe your way? Share it in Community Bakes and inspire other readers.