

Sourdough Pita Bread
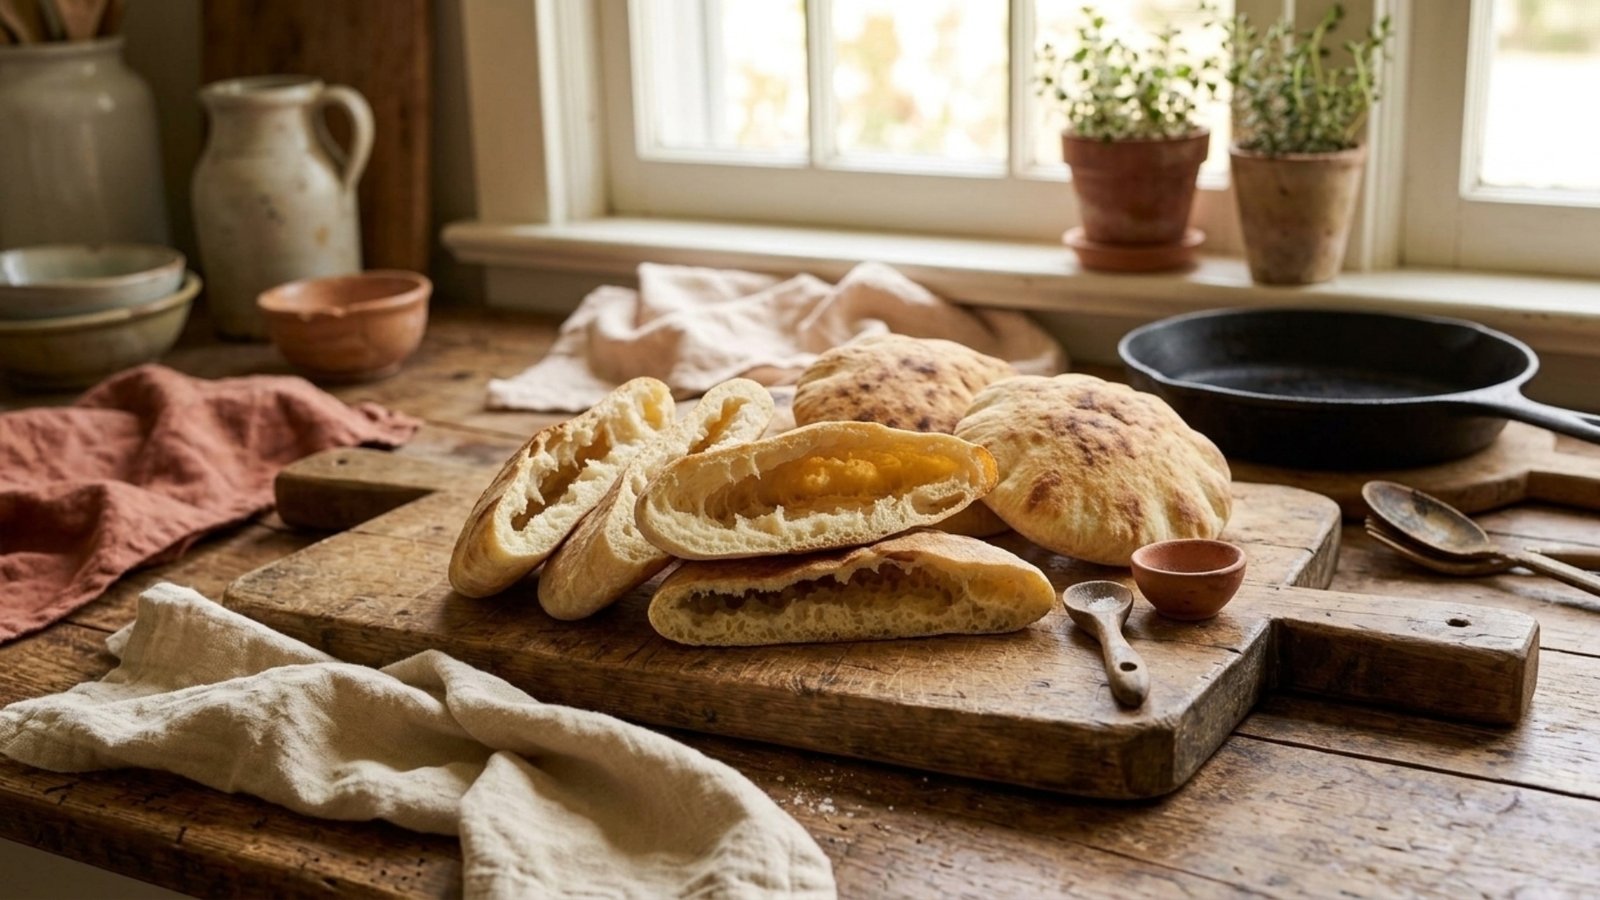
Watching a pita puff up into a perfect pocket in a screaming-hot pan is one of those small kitchen wins that never gets old. This dough is a simple five-ingredient mix that takes an overnight rest in the fridge, then gets divided, rolled thin, and cooked fast and hot, whether that’s on a preheated stone in your oven or right on the stovetop in a cast iron pan. The real secret isn’t the ingredients, it’s rolling evenly and giving the dough enough rest so it doesn’t fight you.
Why You’ll Love It
- Just five ingredients, no special additions
- An overnight cold rest fits around your schedule
- Works in the oven on a stone, or right on the stovetop in cast iron
- A genuine puffed pocket when the dough is rolled and rested right
- Freezes well for pulling out one or two at a time
Ingredients & Equipment
Volume measurements are included for convenience, but they’re approximate – a kitchen scale will always get you a more consistent dough, especially for the flour.
- Active sourdough starter (120 g): needs to be bubbly and active before it goes into the dough
- Lukewarm water (300 g): combined with the starter and oil first, before any flour goes in
- Olive oil (25 g): adds tenderness and a little richness to the dough
- High-protein bread flour, 12-14% protein (500 g): Caputo Chef 00 is recommended, though any high-protein bread flour will work here – watch your hydration and fermentation if you swap flours
- Fine sea salt (10 g): added along with the flour, weighing it keeps things consistent
- Extra flour, for the work surface: for rolling – the amount you need will depend on your flour and how sticky the dough feels
Equipment
- Kitchen scale: non-negotiable here – weighing the ingredients and the 15 portions is what keeps this dough consistent
- Stand mixer (optional): handy for the initial mix and for a 7-minute knead, though this dough can be worked entirely by hand
- Mixing bowl: for combining the starter, water, and oil, then the dry ingredients
- Shower cap or a reusable bowl cover: keeps the dough from drying out while it ferments, both on the counter and in the fridge overnight
- Bench scraper or a sharp knife: for dividing the dough into 15 portions
- Rolling pin: for flattening each portion into a thin, even round
- Cast iron baking plate or pizza stone, or a flat cast iron pan: any of these will cook the pitas, oven or stovetop, your choice
- Kitchen towel: for stacking cooked pitas so they stay soft while the rest finish cooking
Sample Schedule (2-Day)
Day 1
- Mix the starter with the water and olive oil until dissolved
- Add the flour and salt, mix until incorporated (by hand or in a stand mixer)
- Rest 30 minutes
- Knead in a stand mixer for about 7 minutes, or do 3 rounds of stretch and folds
- Bulk ferment at room temperature until domed and risen about 50%, roughly 2-2.5 hours in a warm kitchen, up to 4-5 in a cooler one
- Refrigerate overnight
Day 2
- Take the dough out and let it sit on the counter 30 minutes to 1 hour, until relaxed
- Divide into 15 equal portions (adjust the count for larger or smaller pitas)
- Shape into smooth rounds and rest, covered, for 20 minutes
- Roll each round into a thin, even circle
- Let the rolled rounds rest about 15 minutes to relax again before cooking
- Preheat the oven to 475°F with a stone or cast iron plate inside for about 30 minutes, or preheat a flat cast iron pan on the stovetop over medium-high heat until a few drops of water sizzle on contact, about 15 minutes
- Cook each pita until puffed, flipping once, about 1-2 minutes per side depending on your surface
- Stack cooked pitas in a kitchen towel to keep them soft
Sourdough Pita Bread
Method
- Dissolve the starter. In a mixing bowl, combine the active starter, lukewarm water, and olive oil. Mix until the starter is fully dissolved into the liquid.
- Add the flour and salt. Add the flour and salt to the bowl and mix until the dry ingredients are fully worked into the wet ones. This can be done by hand or with a stand mixer, whichever you prefer.
- Rest. Let the dough rest, undisturbed, for 30 minutes.
- Develop the dough. From here you have two options: run the dough in a stand mixer for about 7 minutes, or do three rounds of stretch and folds by hand. Either works, pick whichever fits your time.
- Bulk ferment. Let the dough ferment at room temperature until it looks slightly domed and has risen about 50%. In a warm kitchen that’s roughly 2 to 2.5 hours, a cooler kitchen can take 4 to 5.
- Cold retard overnight. Once bulk fermentation is done, move the dough to the fridge and let it rest there overnight.
- Let the dough relax. The next day, take the dough out of the fridge and let it sit on the counter for 30 minutes to an hour, depending on how warm your kitchen runs, until it’s relaxed and easier to work with.
- Divide. Divide the dough into 15 equal portions. You can adjust the number depending on how large you’d like your pitas.
- Shape into rounds. Shape each portion into a smooth ball by gathering the edges into the center, then cupping it with one or both hands and dragging it against the counter to build tension on the surface. Let the shaped rounds rest on the counter for about 20 minutes. If the dough feels sticky, a little extra flour on your work surface will help.
- Roll into rounds. Using a rolling pin, flatten each ball into an even, thin circle, rotating it as you go to keep the shape round. Don’t roll them too thin, the dough needs enough thickness to trap air and puff. If the dough resists and springs back as you roll, let it rest longer before trying again. Handle it gently and roll evenly – any thin spots, tears, or small holes will let steam escape and keep the pita from puffing.
- Rest the rolled rounds. Let the rolled circles rest for about 15 minutes before cooking. This lets them relax once more after rolling, which helps them puff up better in the oven or pan.
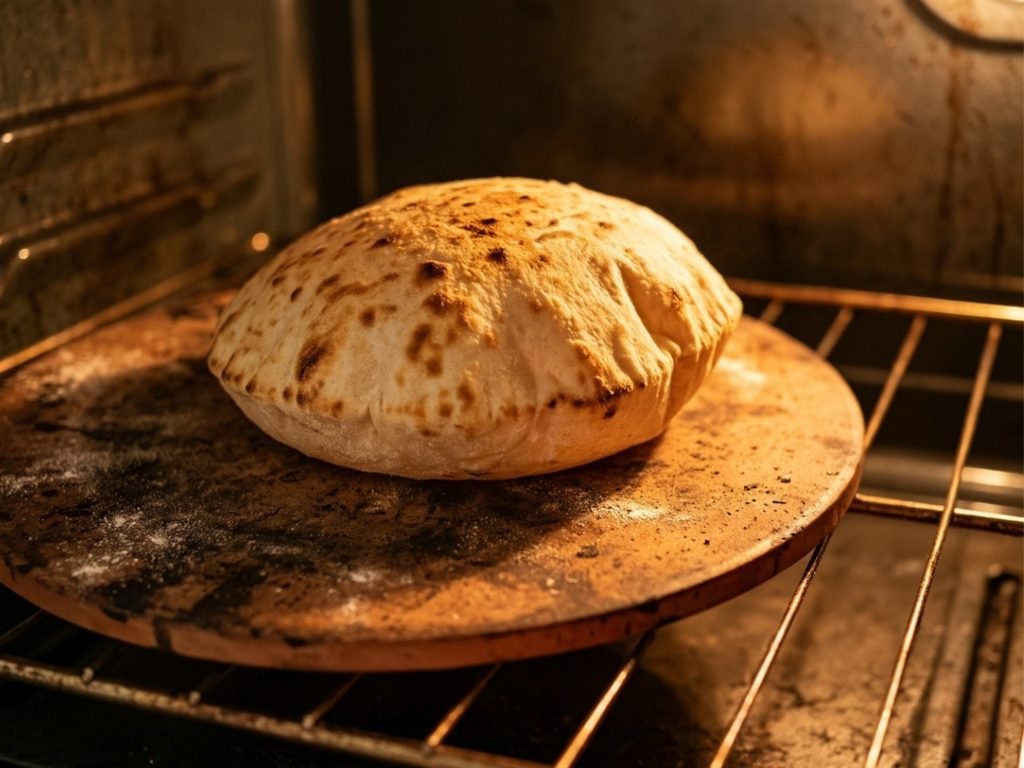
- Preheat your cooking surface. If you’re using the oven, preheat it to 475°F with a cast iron baking plate or pizza stone inside for about 30 minutes. If you’re using a flat cast iron pan on the stovetop, heat it over medium-high heat for about 15 minutes – it’s ready when a few drops of water flicked onto the surface sizzle immediately.
- Cook the pitas. Place a rolled round onto your heated surface. As soon as it puffs up, flip it to the other side – this usually happens within about 2 minutes on the first side and another 1 to 2 minutes on the second, though exact timing depends on your oven or pan.
- Stack and repeat. As each pita finishes, transfer it into a kitchen towel and stack the next one on top as it’s done. Keeping them wrapped in the towel prevents them from drying out while you work through the rest of the dough.
Notes
Save This Recipe
Get it emailed to you now, plus new recipes as they go up.
Your email is safe with me. I’ll send this recipe straight over. No spam, ever—and you can unsubscribe anytime.
How to Make It
1Dissolve the starter. In a mixing bowl, combine the active starter, lukewarm water, and olive oil. Mix until the starter is fully dissolved into the liquid.
2Add the flour and salt. Add the flour and salt to the bowl and mix until the dry ingredients are fully worked into the wet ones. This can be done by hand or with a stand mixer, whichever you prefer.
3Rest. Let the dough rest, undisturbed, for 30 minutes.
4Develop the dough. From here you have two options: run the dough in a stand mixer for about 7 minutes, or do three rounds of stretch and folds by hand. Either works, pick whichever fits your time.
5Bulk ferment. Let the dough ferment at room temperature until it looks slightly domed and has risen about 50%. In a warm kitchen that’s roughly 2 to 2.5 hours, a cooler kitchen can take 4 to 5.
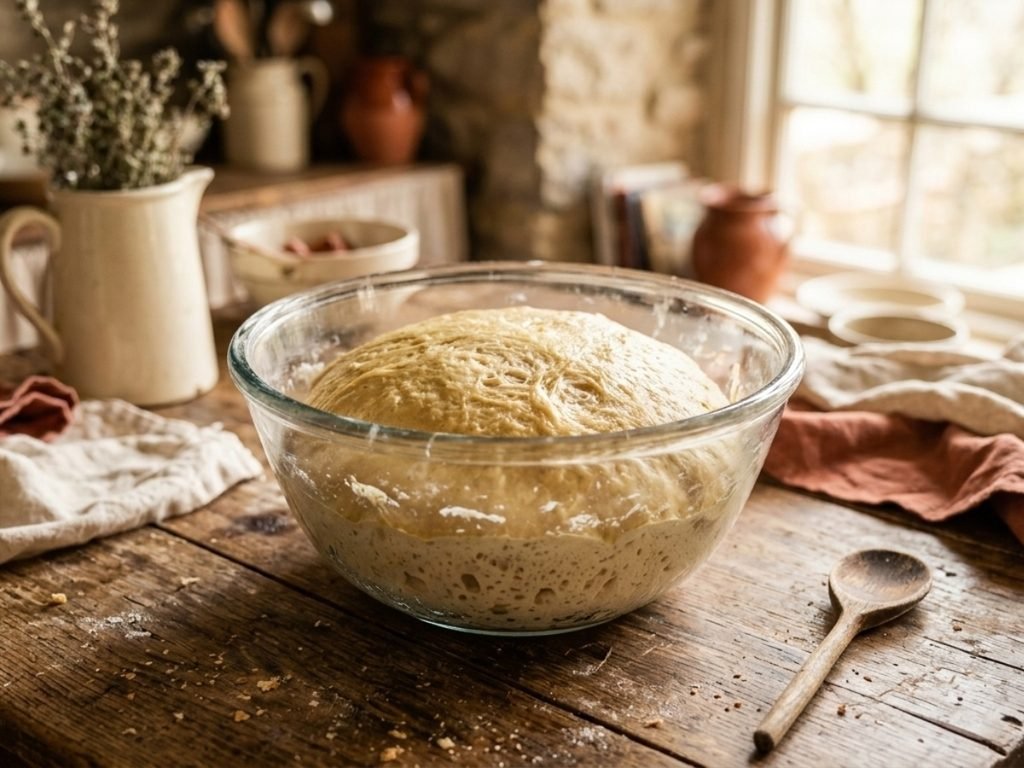
6Cold retard overnight. Once bulk fermentation is done, move the dough to the fridge and let it rest there overnight.
7Let the dough relax. The next day, take the dough out of the fridge and let it sit on the counter for 30 minutes to an hour, depending on how warm your kitchen runs, until it’s relaxed and easier to work with.
8Divide. Divide the dough into 15 equal portions. You can adjust the number depending on how large you’d like your pitas.
9Shape into rounds. Shape each portion into a smooth ball by gathering the edges into the center, then cupping it with one or both hands and dragging it against the counter to build tension on the surface. Let the shaped rounds rest on the counter for about 20 minutes. If the dough feels sticky, a little extra flour on your work surface will help.
10Roll into rounds. Using a rolling pin, flatten each ball into an even, thin circle, rotating it as you go to keep the shape round. Don’t roll them too thin, the dough needs enough thickness to trap air and puff. If the dough resists and springs back as you roll, let it rest longer before trying again. Handle it gently and roll evenly – any thin spots, tears, or small holes will let steam escape and keep the pita from puffing.
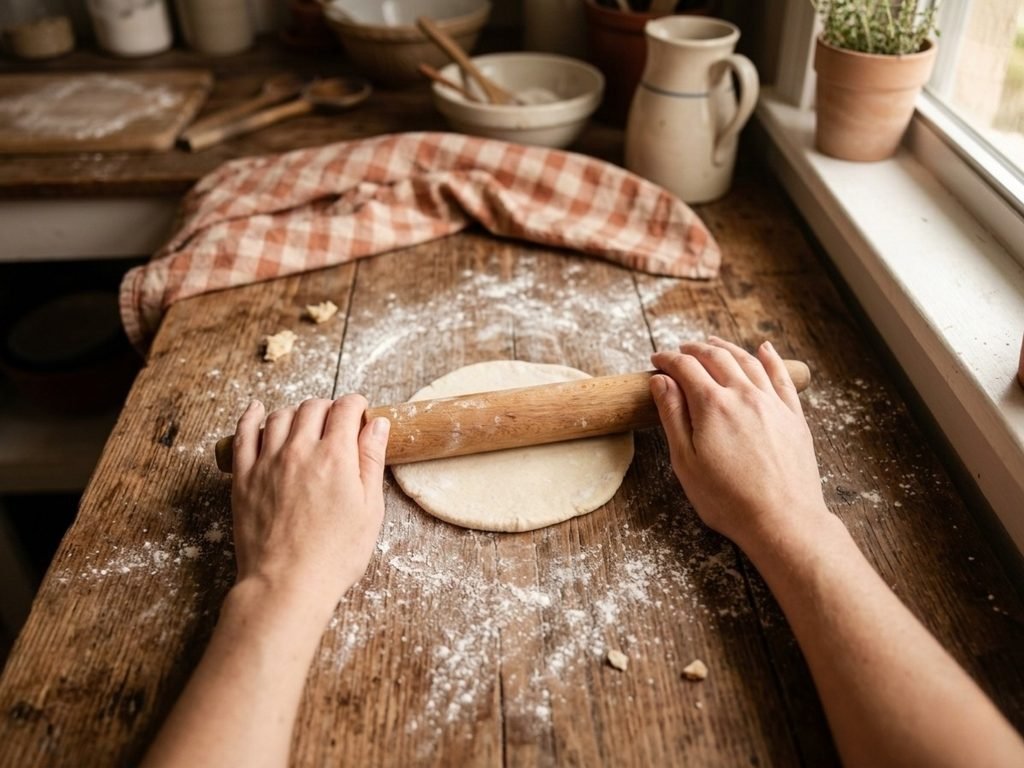
11Rest the rolled rounds. Let the rolled circles rest for about 15 minutes before cooking. This lets them relax once more after rolling, which helps them puff up better in the oven or pan.
12Preheat your cooking surface. If you’re using the oven, preheat it to 475°F with a cast iron baking plate or pizza stone inside for about 30 minutes. If you’re using a flat cast iron pan on the stovetop, heat it over medium-high heat for about 15 minutes – it’s ready when a few drops of water flicked onto the surface sizzle immediately.
13Cook the pitas. Place a rolled round onto your heated surface. As soon as it puffs up, flip it to the other side – this usually happens within about 2 minutes on the first side and another 1 to 2 minutes on the second, though exact timing depends on your oven or pan.
14Stack and repeat. As each pita finishes, transfer it into a kitchen towel and stack the next one on top as it’s done. Keeping them wrapped in the towel prevents them from drying out while you work through the rest of the dough.

Tips & Troubleshooting
- Dough won’t roll, keeps springing back: it needs more rest – let it sit longer on the counter before trying again.
- Pitas cooking flat instead of puffing: check your rolling for thin spots, tears, or small holes – any of these let steam escape before it can form a pocket.
- Oven versus stovetop: cast iron heats up faster and holds heat differently than a baking stone, so your timing will shift depending on which you use.
- Testing the stovetop pan: flick a few drops of water onto the hot cast iron – if they sizzle and evaporate immediately, it’s ready for the dough.
- Sizing: 15 portions is the usual count, but you can divide the dough into fewer, larger pitas or more, smaller ones.
How to Store
To store: keep finished pitas stacked in a kitchen towel so they stay soft, eat what you’ll finish that day.
To freeze (my real recommendation): freeze the rest for later. When you’re ready for one, let it thaw on the counter for a few minutes. Skip the microwave, bread and microwaves generally don’t mix well.
Nutrition
Per pita, based on a 15-pita batch. Estimated from the ingredients used – provided for convenience and not a substitute for a precise calculation.
150
Calories
28g
Carbs
4g
Protein
2g
Fat
1g
Fiber
260mg
Sodium
Desi’s Notes
The same 50%-risen rule from my other doughs applies here. In my hot kitchen that’s about 2 to 2½ hours on the counter, a cooler kitchen can take 4 to 5.
If the dough fights you while rolling, springing back instead of staying flat, that’s your sign it needs more bench rest. Give it more time rather than forcing it.
Puffing depends entirely on an even roll. Thin spots, tears, or small holes let the steam escape before it can push the dough apart into a pocket, so handle the rounds gently and roll with even pressure.
Before You Bake
Scaling this recipe up or down? Run your numbers through the Sourdough Calculator. And if you want a printable reference for troubleshooting or timing, browse all six Printable Quicksheets.
Knead to Know?
New recipes, baking tips, and sourdough troubleshooting — delivered before your starter even finishes its next rise.
Get the latest insights, no spam — just new recipes and baking tips. Unsubscribe anytime. See our Privacy Policy.



Tried this recipe? Leave a star rating below — it takes 10 seconds and helps other bakers decide what to make next.
Baked this recipe your way? Share it in Community Bakes and inspire other readers.