
Dense, Gummy, or Sticky Sourdough? Causes and Fixes
A dense loaf, a gummy crumb, and a dough that sticks to everything it touches feel like three different problems. They aren’t. Nearly all of them come back to the same few things: how active your starter was, how long the dough fermented, how much gluten it built, and how much water was in it. Find your symptom, match it to the cause, and change one thing at a time. A dense or gummy loaf isn’t a failure. It’s data.
The Short Answer
Dense sourdough is usually a weak or underfed starter, a bulk fermentation that was cut short, or too little gluten development. A gummy crumb is most often a loaf sliced before it finished setting, or dough that was underproofed or overproofed. Sticky dough is usually just high-hydration dough that hasn’t built enough strength yet, so resist the flour and use wet hands, folds, and time. Match your situation to the cause below before you change anything else.
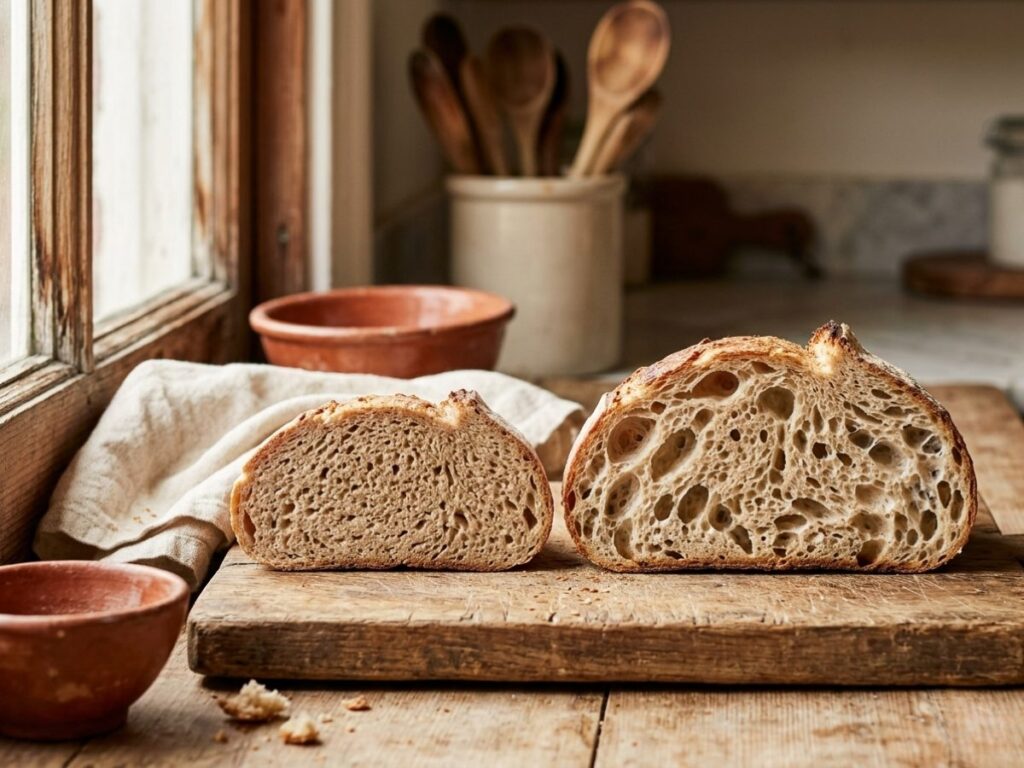
Start here: what is your bread doing?
- The baked loaf is heavy, tight, and doesn’t have much rise. Jump to “Dense sourdough: five causes.” It almost always traces back to fermentation time.
- The crumb is damp, sticky, or rubbery, even though the crust looks done. Jump to “Gummy crumb: five causes.” Start with how long you let it cool.
- The dough is a sticky mess before it ever reaches the oven. Jump to “Sticky dough: four causes.” Put the flour down.
Read the dough, not the clock (the fix behind most of these)
Several of the problems below end in the same fix, so here it is once. Recipe times are estimates. Your kitchen, your flour, and your starter decide how long the dough actually needs, so judge it by what the dough is doing.
- Look for a real rise. At the end of bulk fermentation the dough should have grown by about 50 percent in volume, not just sat for the number of hours a recipe gave you.
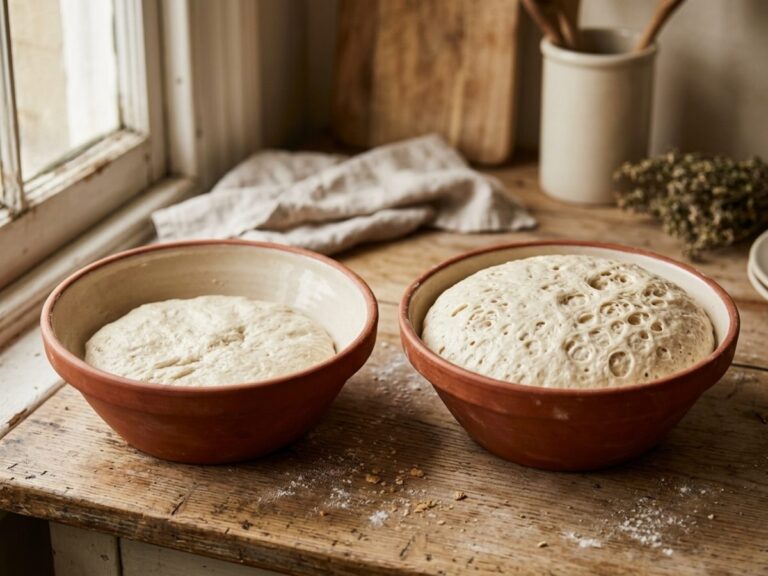
- Do the poke test. Poke the dough gently and watch the dent. Underproofed dough springs back immediately and fully, and needs more time. Properly proofed dough springs back slowly and leaves a shallow indent that stays, so it is ready. Overproofed dough barely springs back at all and leaves a permanent indent, because its structure has started to collapse. The photos below show all three.
- Build strength early. Do a few sets of stretch and folds during the first hours of bulk fermentation. They build gluten without extra flour and without kneading.
- Handle it gently. Once gas has developed, rough shaping knocks it back out.

Free Email Course
A starter that is not ready is behind many dense loaves. The free 7-lesson email course shows you how to build one and how to tell when it is ready, with one short email a day.
Reading your crumb: fermentation
Let the loaf cool for a full hour before you cut it, then find the closest match.
Swipe each row to see all three.
Under-fermented
Uneven bubbles and a dense, gummy crumb, with sometimes a few big tunnels under the top crust. The dough did not make enough gas before it went into the oven.
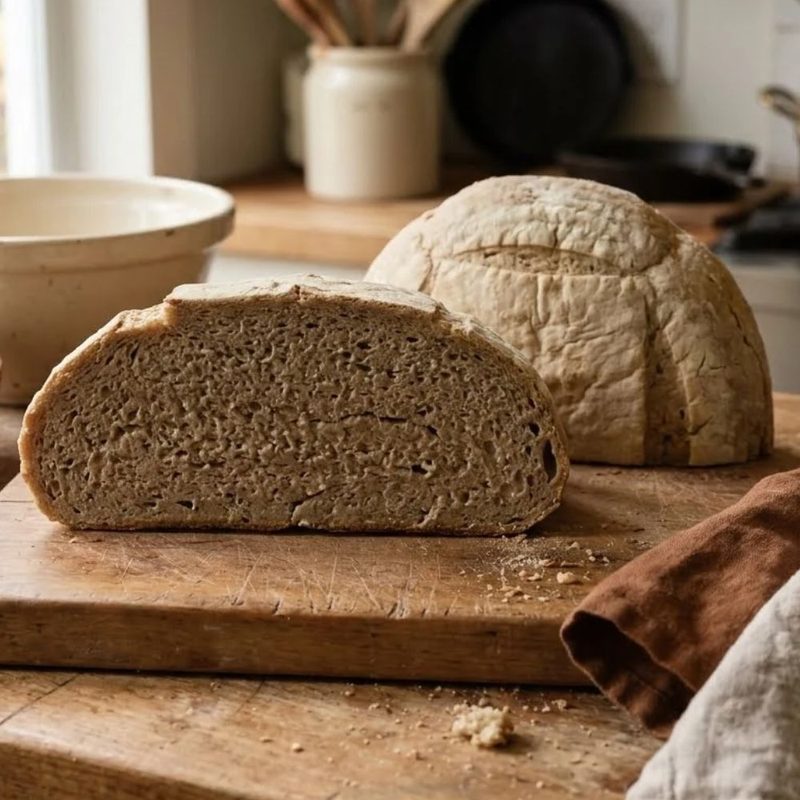
ExtremeVery dense and tight, with only tiny holes.
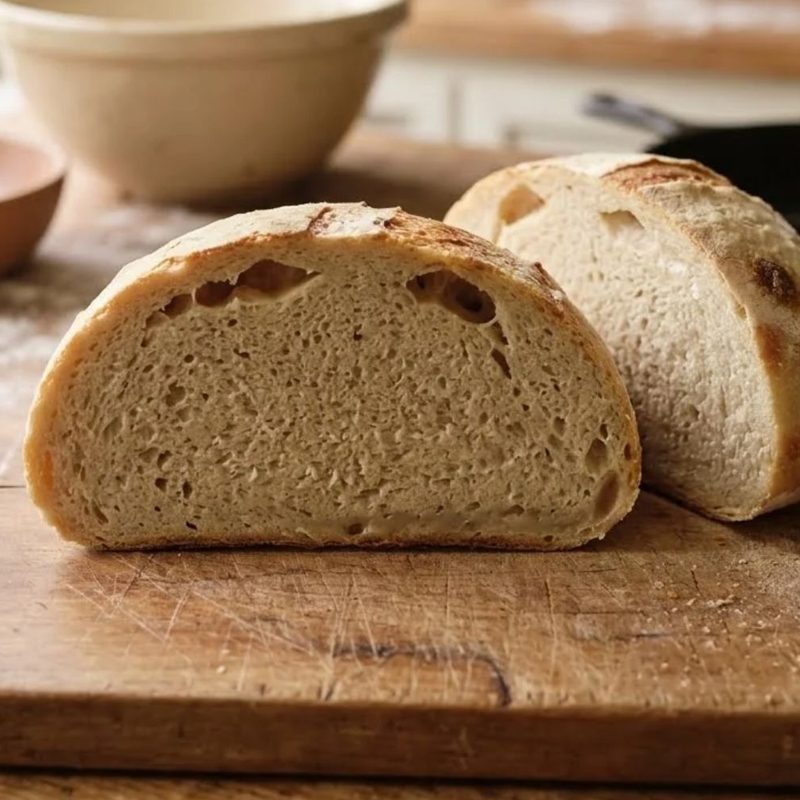
ModerateA few big tunnels over a tight, doughy crumb.
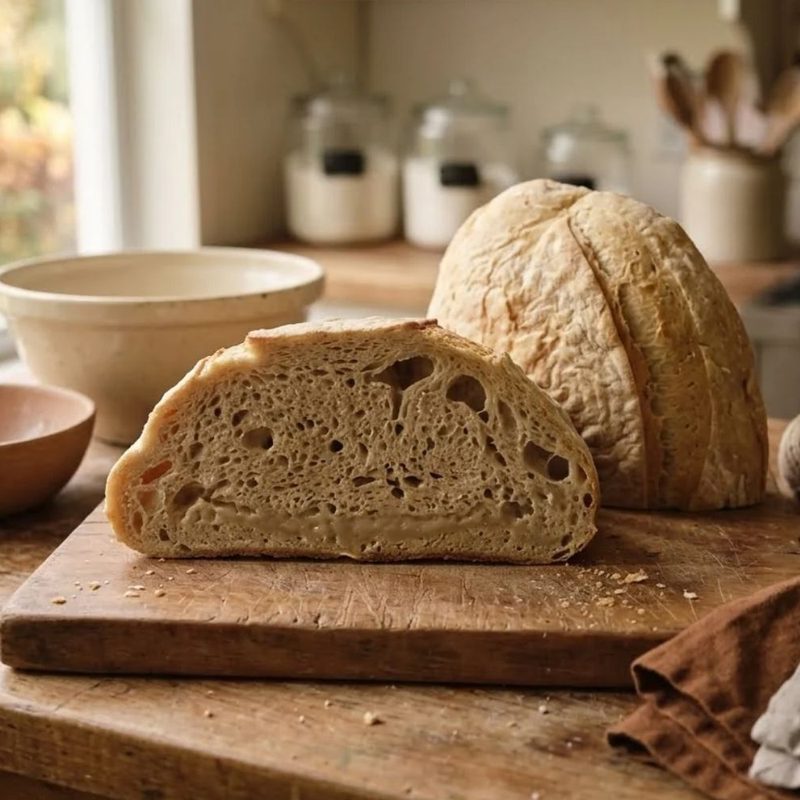
MildSome holes near the top and a gummy band along the bottom.
Nicely fermented
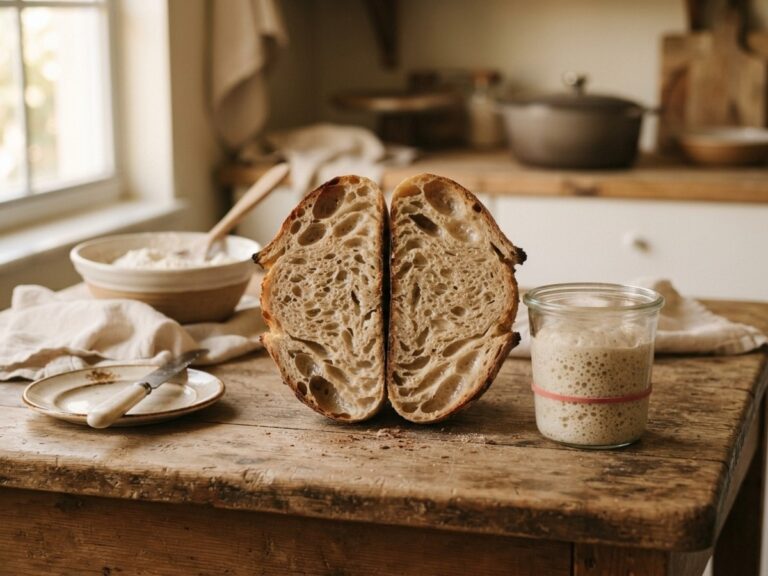
Bubbles of mostly similar size spread evenly through a light, springy crumb. An ear is a bonus, since a good loaf can bake without one.
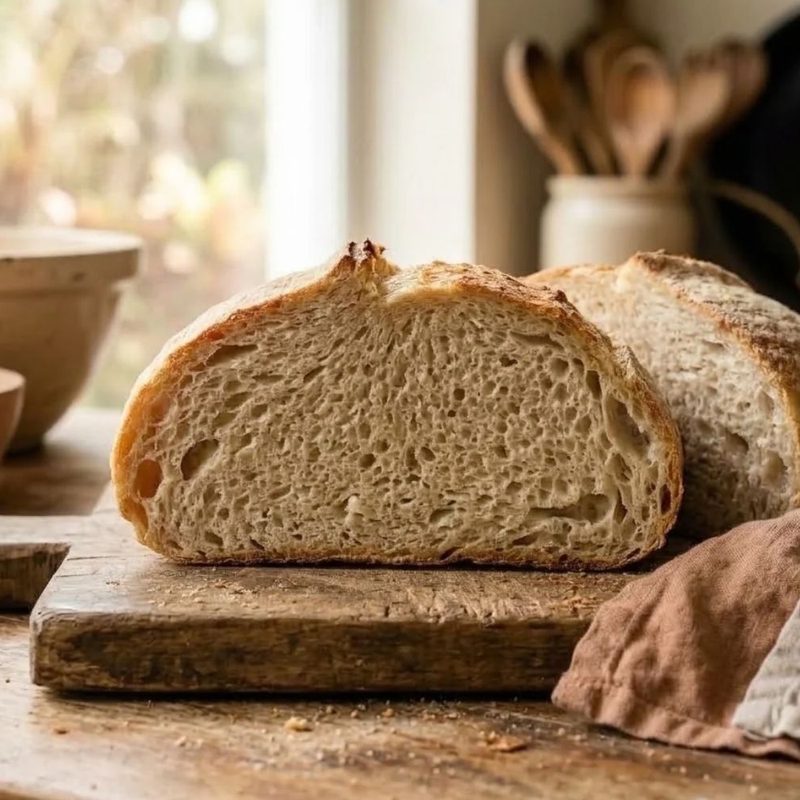
TighterA softer, tighter crumb with small, even holes.
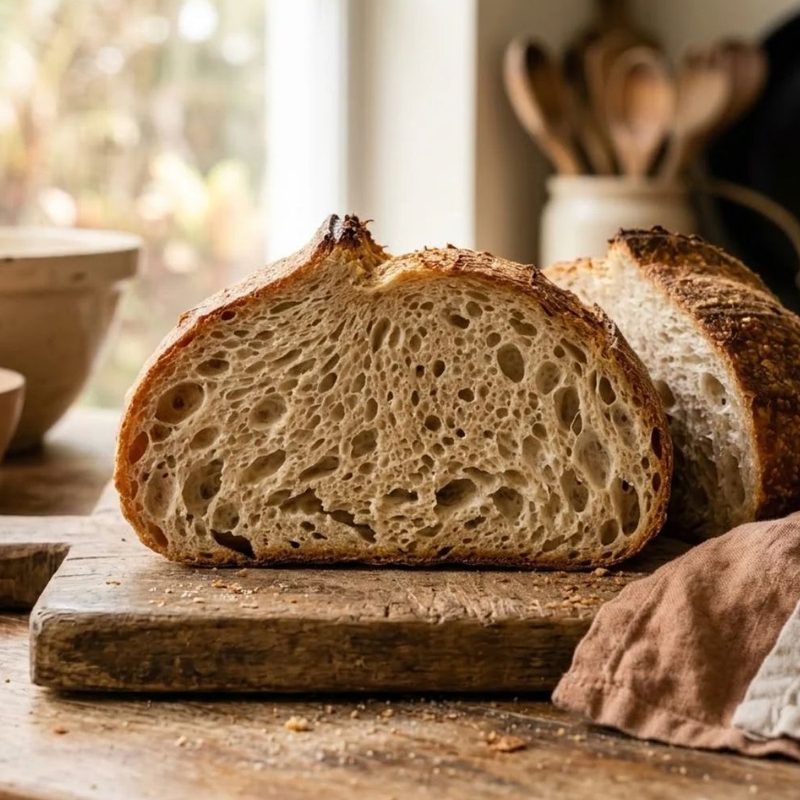
StandardEven, medium bubbles and a tall, rounded loaf. A good everyday crumb.
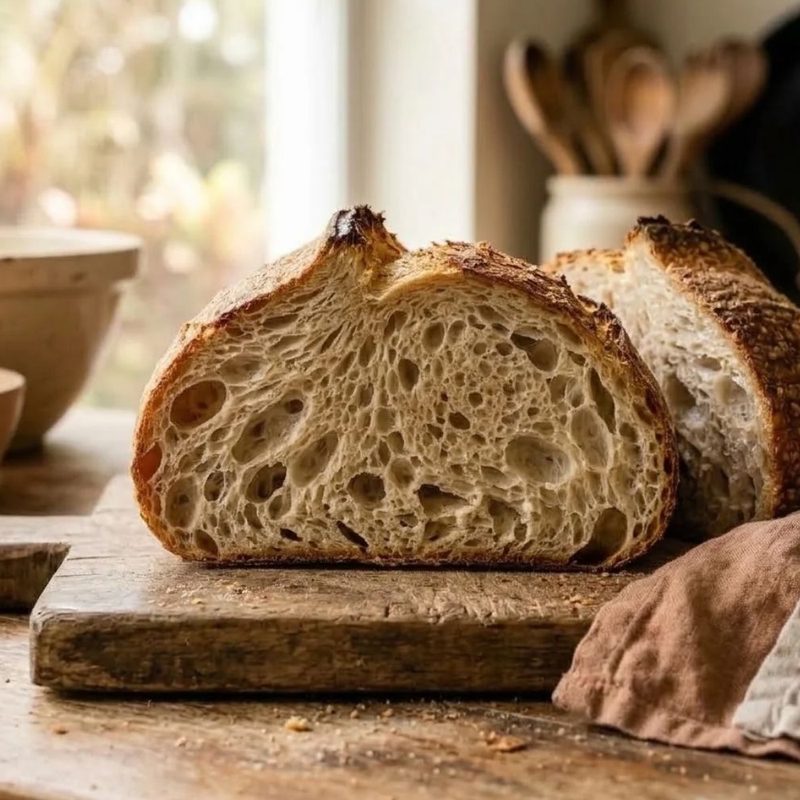
OpenLarge glossy bubbles with thin walls and an ear.
Over-fermented
The structure is weak and the holes are small and shriveled. The loaf spreads flat because the dough ran out of strength before it baked.
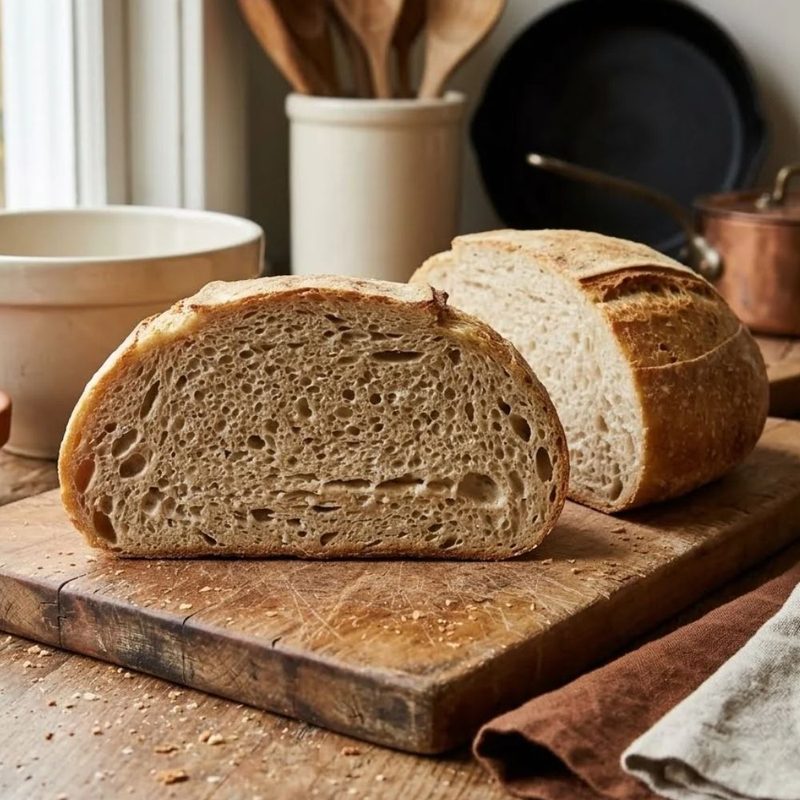
MildA soft, slightly damp crumb with small, tired-looking bubbles.
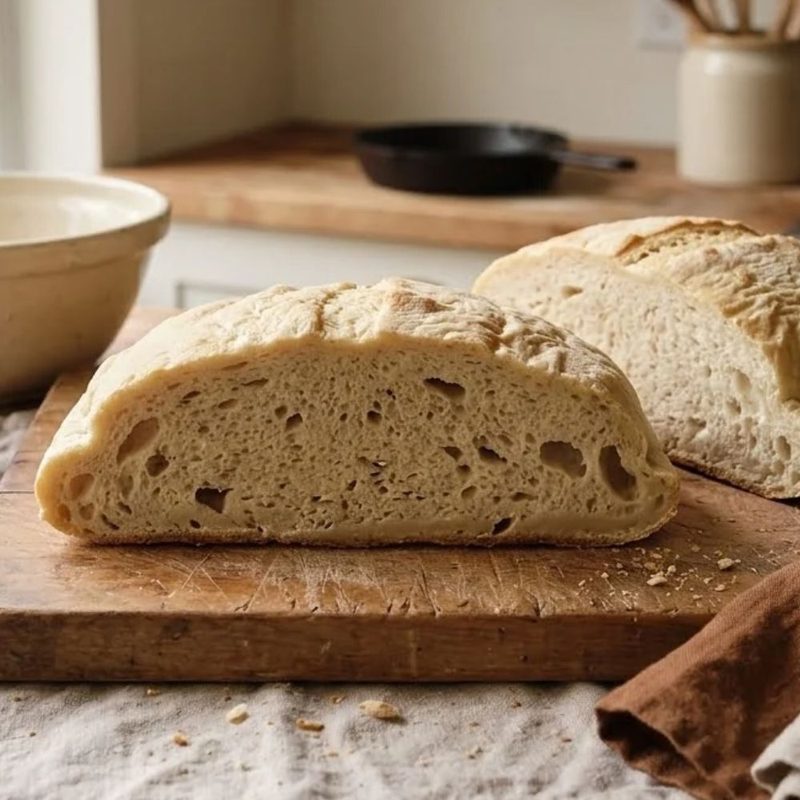
ModerateA pale, wide loaf with torn-looking holes and a gummy base.
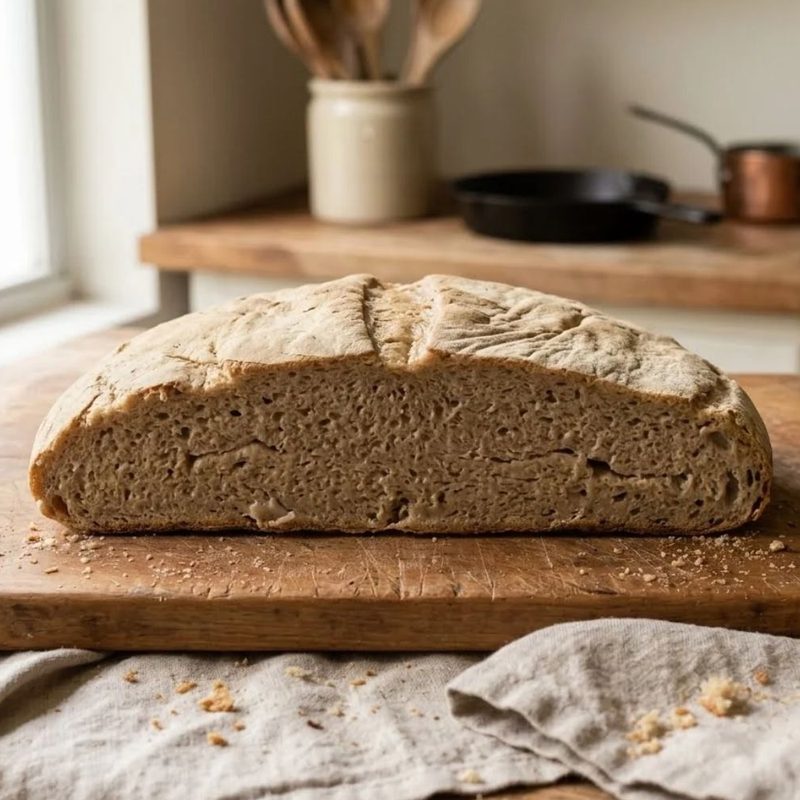
ExtremeA flat, spread loaf with a dense, damp crumb and no structure.
Dense sourdough: five causes
Cause 1
Your starter wasn’t active enough at its peak. A sluggish starter can’t lift a loaf.
The Fix
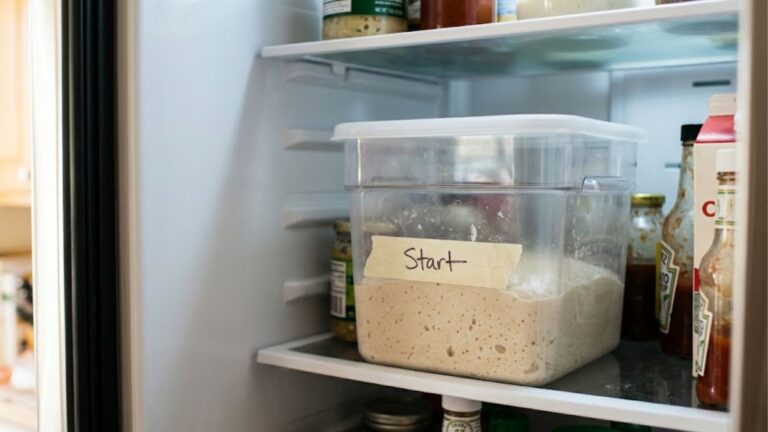
Make sure your starter is fully active before you mix. Feed it enough flour and water to give it room to grow, and confirm it has doubled or even tripled, with bubbles throughout and not just on the surface. If it never gets there, start with Sourdough Starter Problems.
Cause 2
Bulk fermentation was cut short, so the dough never built enough gas to create an open crumb.
The Fix
Extend bulk fermentation and confirm it’s actually done using the poke test and a real rise of about 50 percent, as described in the read-the-dough check above.
Cause 3
Gluten development was weak, from too little kneading, folding, or resting time.
The Fix
Add a few extra sets of stretch and folds during the first few hours of bulk fermentation.
Cause 4
Too much whole grain flour was used without adjusting hydration. Whole grains absorb more water and can weigh down a loaf.
The Fix
For every 100 g of white flour you swap for whole wheat, add roughly 10 g of extra water. King Arthur’s own baking guide recommends about 2 teaspoons of extra liquid per cup of whole wheat flour, which works out to about the same ratio. Scale up or down depending on how much flour you’re actually replacing.
Cause 5
The dough was handled too roughly during shaping, knocking out gas that had already developed.
The Fix
Be gentle during your stretch and folds and while shaping.
Gummy crumb: five causes
Most people assume a gummy crumb means the bread is underbaked, but the cause is often something else entirely.
Cause 1
The loaf was sliced before it finished cooling. Sourdough keeps setting internally for at least an hour, sometimes two, after it leaves the oven.
The Fix
Let the loaf cool completely on a wire rack, ideally a full hour at minimum, before you cut into it.
Cause 2
The dough was underproofed, which leaves excess starch that hasn’t had time to be broken down.
The Fix
Check proofing with the poke test rather than the clock, and give it more time in bulk next time. See the read-the-dough check above.
Cause 3
The dough was overproofed, which can also give a dense, wet-feeling crumb even though the cause is the opposite problem.
The Fix
Pull your dough earlier next time. The poke test tells you which direction you’re off in.
Cause 4
The internal temperature wasn’t high enough when you pulled the loaf from the oven.
The Fix
Use a thermometer and bake until the center reaches roughly 205 to 210°F.
Cause 5
High-hydration dough without enough structure can bake up gummy even when timing is right.
The Fix
Do enough folds during bulk fermentation to build structure, especially with wetter doughs.
Sticky dough: four causes
Sticky dough drives new bakers to add flour by the fistful, which almost always makes things worse. Here’s what’s actually going on.
Cause 1
High-hydration dough is sticky by nature, especially early on, and handling it with dry hands or a dry surface makes it stick immediately instead of releasing cleanly.
The Fix
Wet your hands and lightly dampen your work surface instead of adding flour, and trust the process through a few folds. Dough that feels unmanageable at hour one is often smooth and elastic by hour three.
Cause 2
Gluten hasn’t developed enough yet. That happens through folding and time, not just mixing.
The Fix
Use the stretch and fold method rather than traditional kneading for high-hydration dough. It builds strength without needing extra flour.
Cause 3
Your flour absorbs water differently than the flour the recipe was developed with.
The Fix
Hold back about 10 percent of the recipe’s water when you first mix, then work it in gradually by hand or during your first few folds once the dough has come together. This technique is called bassinage. It lets you feel how much water your flour can actually handle, which is especially useful with a flour you haven’t used before.
Cause 4
Humidity in your kitchen is adding moisture the recipe didn’t account for.
The Fix
Use your local relative humidity as a rough guide. Between about 50 and 70 percent, reduce the recipe’s hydration by around 1 to 2 percent. Above 70 percent, reduce it by closer to 2 to 3 percent. On a 500 g flour formula, that is roughly 5 to 10 g less water in moderate humidity, or 10 to 15 g less in high humidity. Treat these as a starting point and fine-tune from there based on how the dough actually feels.
Tools for this step
Two tools connect to the fixes above. A decent loaf does not need either one.
Several fixes on this page come down to grams, like holding back about 10 percent of the recipe water or trimming 5 to 15 g in a humid kitchen. A scale makes those small changes repeatable. Any model that reads in 1 g steps will do.
Kitchen scale
Desi Recommends
Digital Kitchen Scale (1g precision)
- 1 g precision
- Digital
Baking by weight is the single biggest upgrade for consistent results, and a simple 1 g scale like this one covers nearly every home loaf.
For a gummy crumb, the center of the loaf should reach roughly 205 to 210°F before it comes out. A thermometer checks that in a few seconds, so you stop guessing from the crust color.
Instant-read thermometer
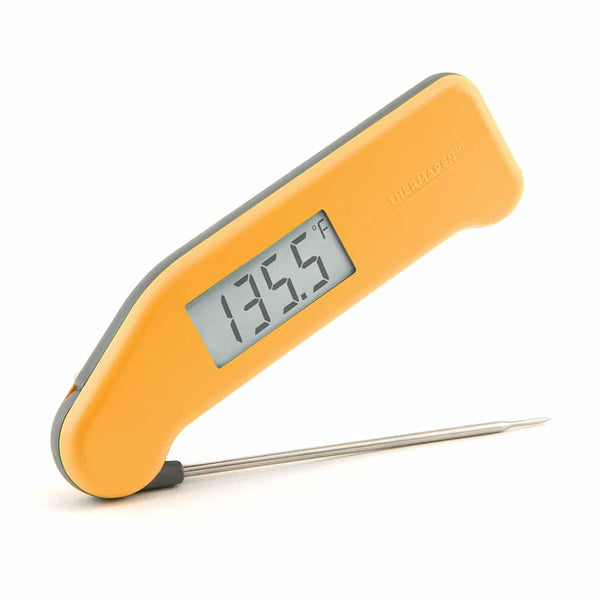
Classic Thermapen Instant-Read Thermometer
The time-tested Thermapen: full readings in 1 to 2 seconds, plus or minus 0.7 degrees F accuracy and a 1500-hour battery. A solid everyday step up from a budget probe, and it ships with a NIST-traceable calibration certificate.
As an Amazon Associate I earn from qualifying purchases.
Quick answers
Is a dense loaf a failure? No. Something in the process didn’t give the dough enough lift, and it’s usually an easy fix for next time.
Should I add flour to sticky dough? No. Wet your hands, fold, and give it time.
How long should I let a loaf cool before slicing? At least an hour. Sometimes two.
What temperature should the inside of the loaf reach? Roughly 205 to 210°F.
How do I know bulk fermentation is done? A poke test that springs back slowly, plus about a 50 percent rise in volume, not just the clock. See the read-the-dough check above.
Desi’s Note
Dense loaves usually trace back to one line item: not enough fermentation time. Everything else is a rounding error by comparison.
My rule with sticky dough is the same as my rule with a messy set of books: don’t panic and start throwing things at it. Slow down, use the right method, and it sorts itself out.
And the number one gummy crumb fix in my experience has nothing to do with the recipe at all. It’s patience. Let the loaf cool. I know it’s hard when the kitchen smells like that.
Want To Know The Science Behind This?
If you want the deeper “why,” three Sourdough Science articles go with this guide: “Ash Content: The Flour Number Nobody Explains, and Why It Predicts Your Bake Better Than Protein Does” (why whole grain behaves so differently), “Hydration and Climate: The Two Numbers That Actually Control Your Fermentation Time” (why water and weather matter), and “What Fermentation Actually Does to Your Flour (The Real Science, Not the Wellness-Blog Version)” (what time does to starch and gluten).
More Resources
For a printable reference, grab the Crumb & Crust Diagnostic Quicksheet. To sanity-check your hydration, run it through the Sourdough Calculator. New to the terms? Jargon like starter, bulk fermentation, gluten development, peak, crumb, poke test, hydration, fermentation, gluten, stretch and fold, proofing, and internal temperature is explained in plain English in the full Sourdough Glossary. Still not sure what is wrong? Go back to What’s Wrong With My Loaf? for the rest of the troubleshooting guides.
Knead to Know?
New recipes and sourdough troubleshooting, delivered before your starter even finishes its next rise.
Get the latest insights with no spam, just new recipes and baking tips. Unsubscribe anytime. See our Privacy Policy.