
Sourdough Proofing and Scoring Problems: Not Rising, Spreading, or Deflating
A dough that won’t rise, a loaf that spreads like a pancake, and a boule that sighs flat the second the blade touches it all tell the same story: how long the dough proofed, how much strength it had, and how it was shaped and scored. You fed your starter, did the folds, waited the time the recipe said, and something still went sideways. Find your symptom, match it to the cause, and change one thing at a time.
The Short Answer
Dough that won’t rise is usually an inactive starter, a cold kitchen, or a dough that simply needed more time than the recipe assumed. A loaf that deflates when scored or spreads instead of rising up is almost always overproofed, shaped too loosely, or scored too deeply. Learning to tell underproofed from overproofed with the poke test fixes more of these than any other single skill.
Start here: what is your dough or loaf doing?
- The dough looks exactly the way it did hours ago. Jump to “Dough not rising: five causes.” Check the starter first.
- You can’t tell whether it is underproofed or overproofed. Jump to “Underproofed or overproofed? How to tell.” The fixes are basically opposite, so this comes first.
- The loaf collapsed when you scored it. Jump to “Loaf deflates after scoring: five causes.” It is almost always overproofing.
- The loaf spread out instead of rising up. Jump to “Loaf spreads instead of rising up: five causes.” Look at proofing, shaping tension, and scoring.
Underproofed or overproofed? How to tell
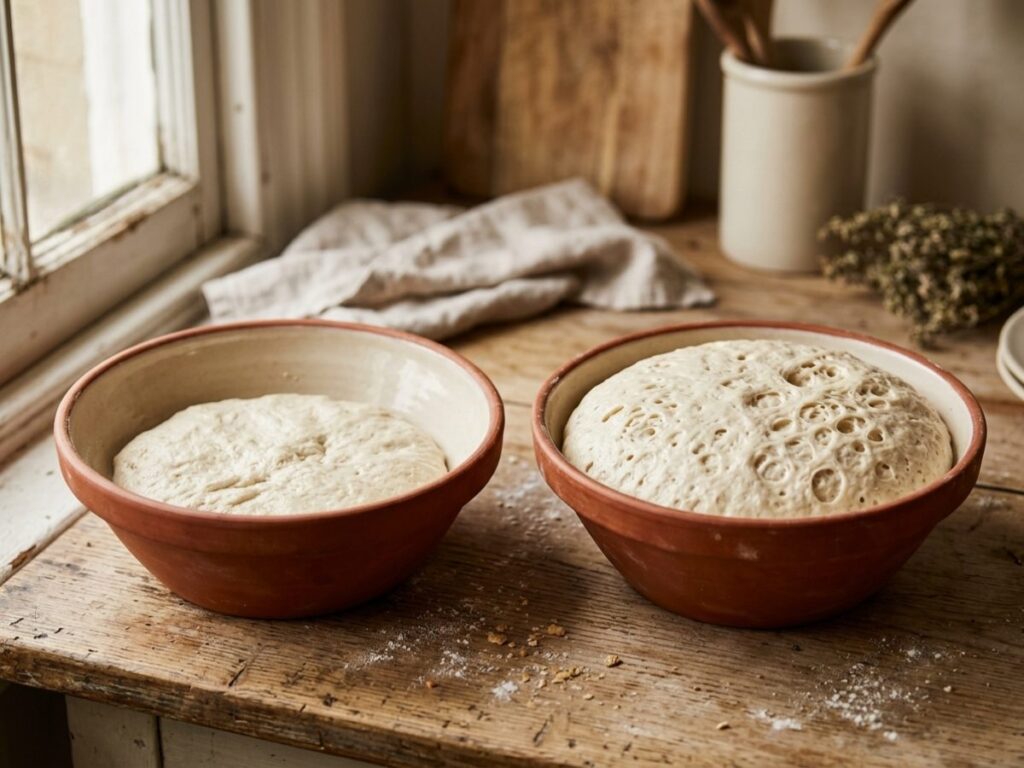
This is the question that trips up more home bakers than almost anything else, because the two problems can look confusingly similar, and the fixes are basically opposite. Get it wrong and you will chase the wrong solution for weeks. The poke test is the fastest way to tell them apart before you even bake.

Underproofed
The dough feels tight and elastic, springs back quickly and fully when poked, and usually bakes up with great oven spring but a dense, tight crumb, sometimes with a burst side seam. It is caused by not enough time or a sluggish starter.
The Fix
Give bulk fermentation more time and watch for a 50 percent volume increase rather than relying on the clock.
Overproofed
The dough feels slack and fragile, and it barely springs back when poked, or the indent just stays. Loaves tend to spread instead of holding their shape, with a gummy or overly open crumb near the crust. It is caused by too much time, too warm a kitchen, or a starter that is more active than the recipe assumed.
The Fix
Pull it earlier next time, or move it somewhere cooler during bulk fermentation to slow it down.
A few more things worth trying:
- Use the poke test every time until you learn what properly proofed dough feels like in your kitchen.
- Track your kitchen temperature for a week. It explains more inconsistency than any other single factor.
- When in doubt, slightly underproofed is more forgiving than overproofed. You can always give a loaf a longer rest before baking, but you can’t undo overproofing.
- If the surface of your dough dries out while it proofs, cover it before you reach for a humidifier. Do You Need a Humidifier to Proof Sourdough? shows how to tell whether dry air is the cause.
Reading your crumb: fermentation
Let the loaf cool for a full hour before you cut it, then find the closest match.
Swipe each row to see all three.
Under-fermented
Uneven bubbles and a dense, gummy crumb, with sometimes a few big tunnels under the top crust. The dough did not make enough gas before it went into the oven.
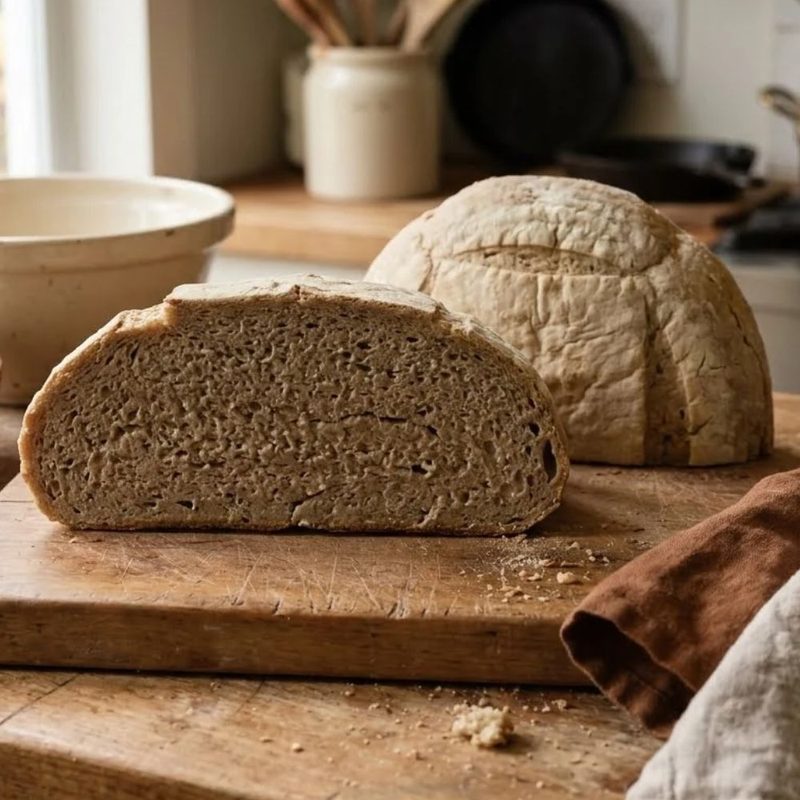
ExtremeVery dense and tight, with only tiny holes.
ModerateA few big tunnels over a tight, doughy crumb.
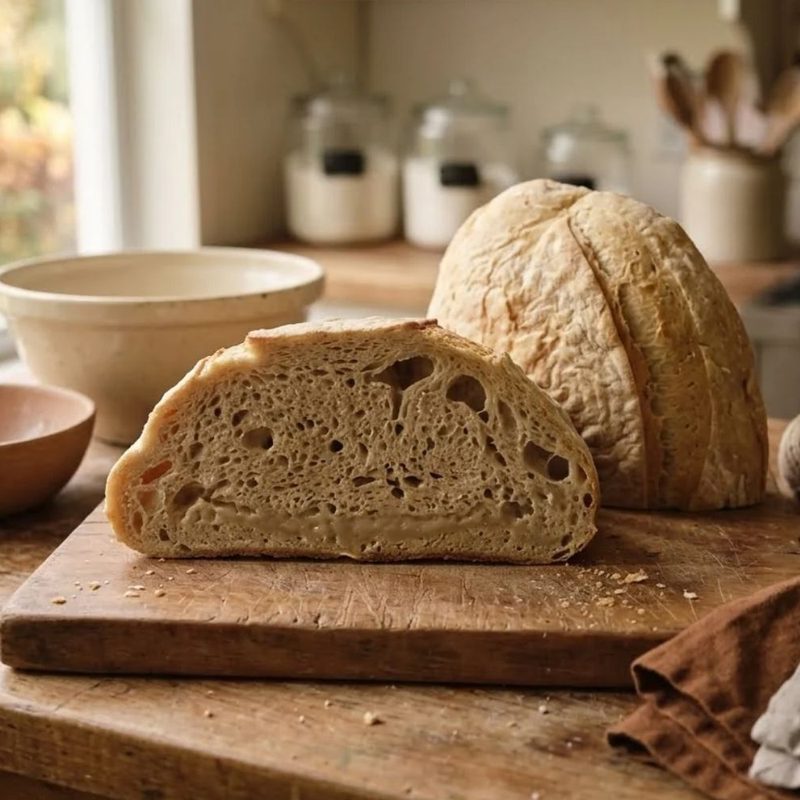
MildSome holes near the top and a gummy band along the bottom.
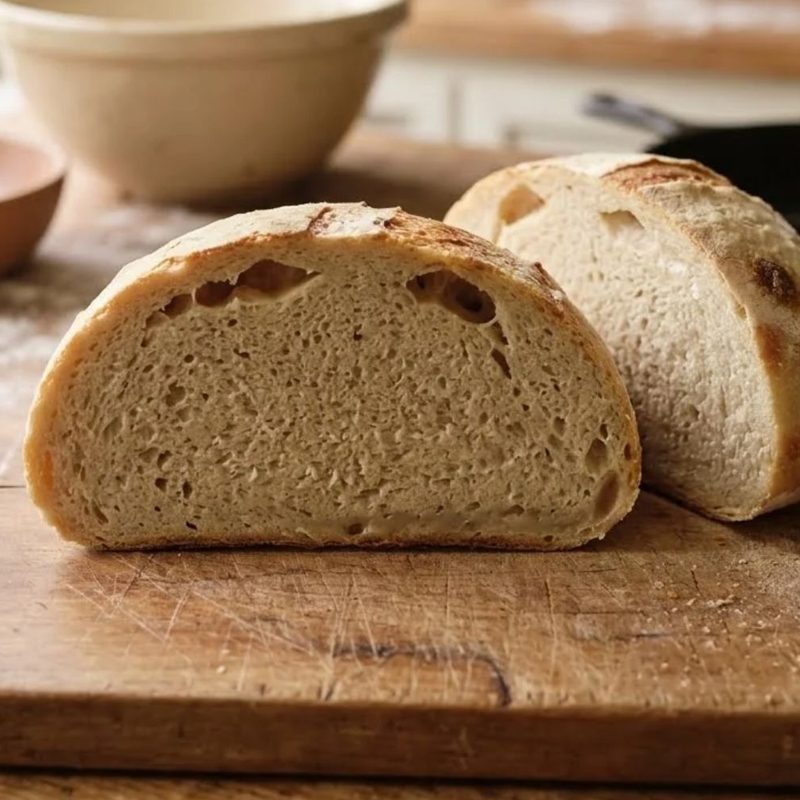
Nicely fermented
Bubbles of mostly similar size spread evenly through a light, springy crumb. An ear is a bonus, since a good loaf can bake without one.
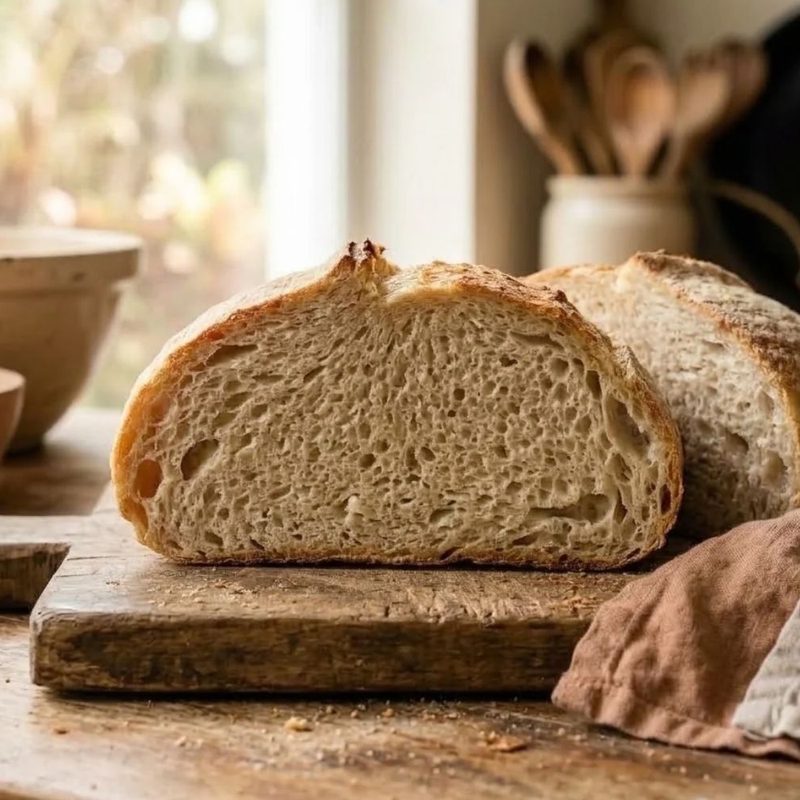
TighterA softer, tighter crumb with small, even holes.
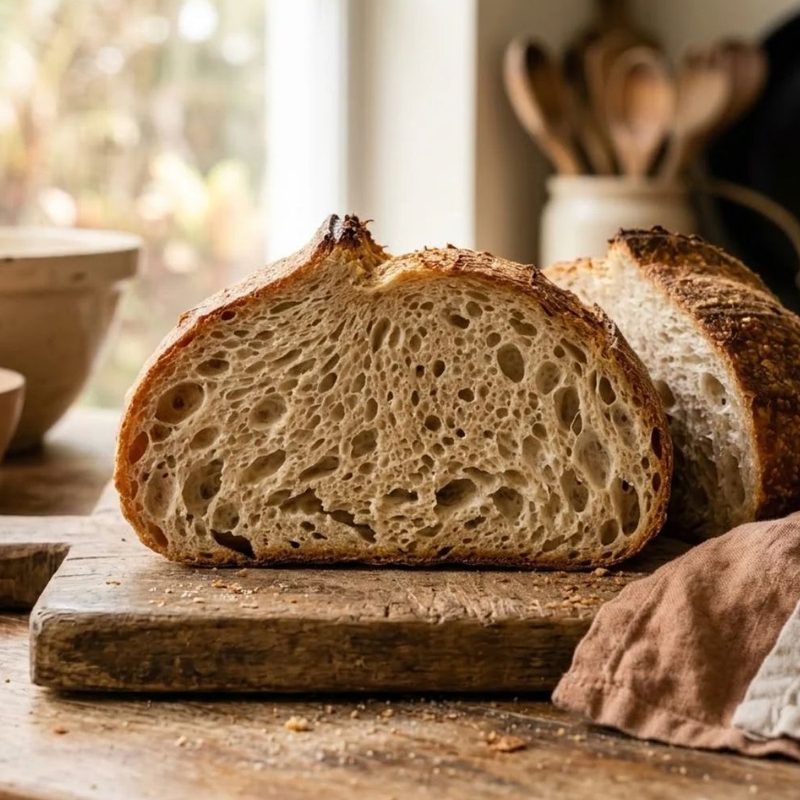
StandardEven, medium bubbles and a tall, rounded loaf. A good everyday crumb.
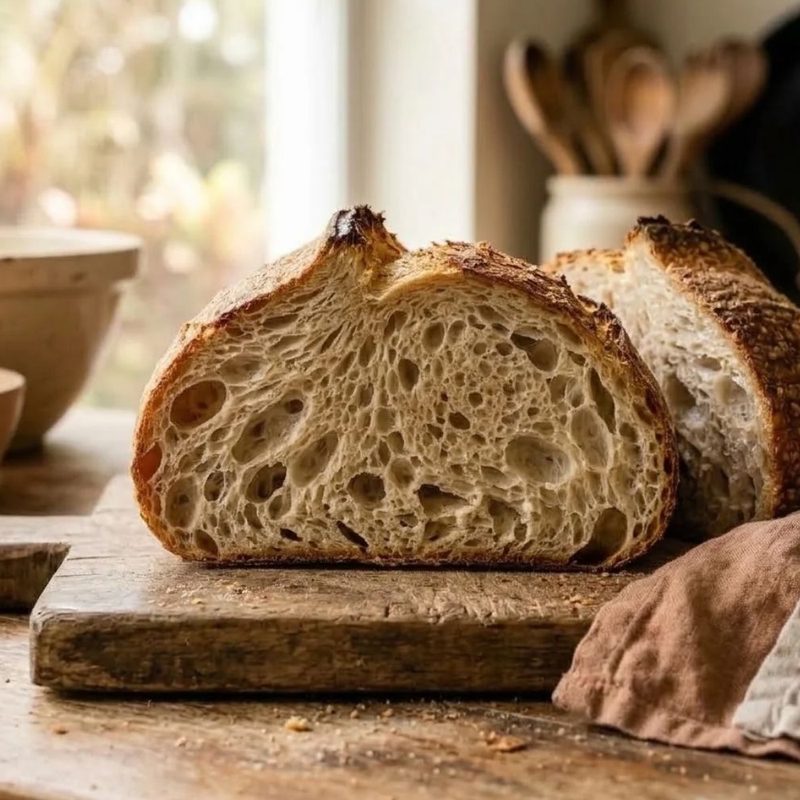
OpenLarge glossy bubbles with thin walls and an ear.
Over-fermented
The structure is weak and the holes are small and shriveled. The loaf spreads flat because the dough ran out of strength before it baked.
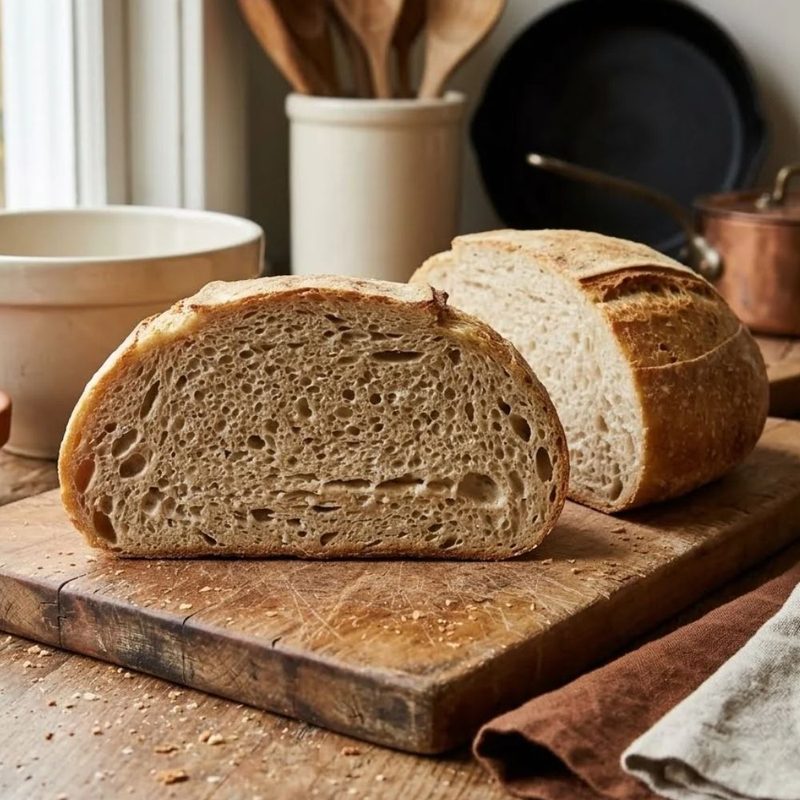
MildA soft, slightly damp crumb with small, tired-looking bubbles.
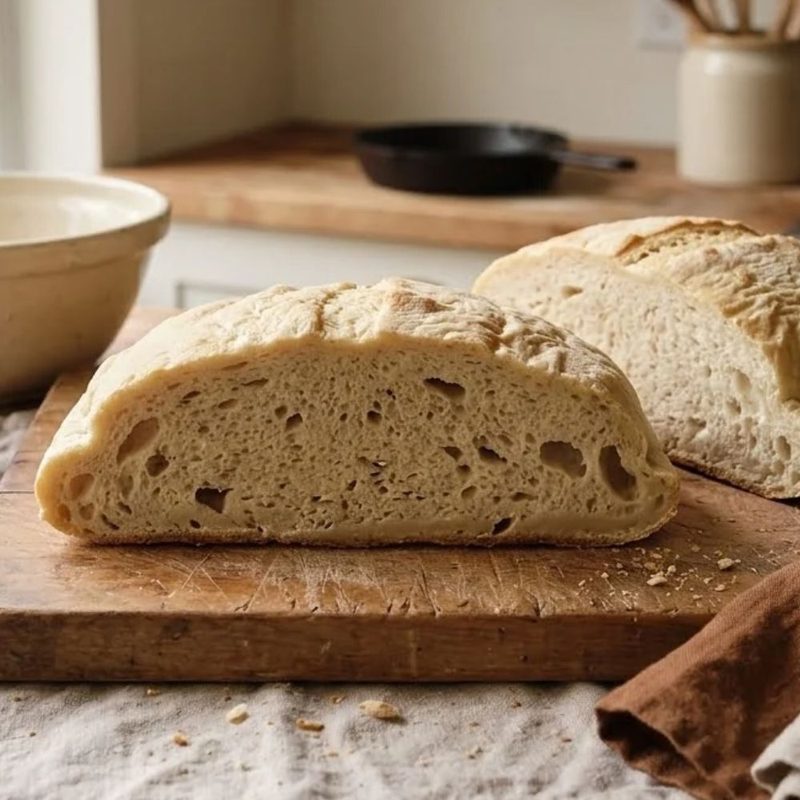
ModerateA pale, wide loaf with torn-looking holes and a gummy base.
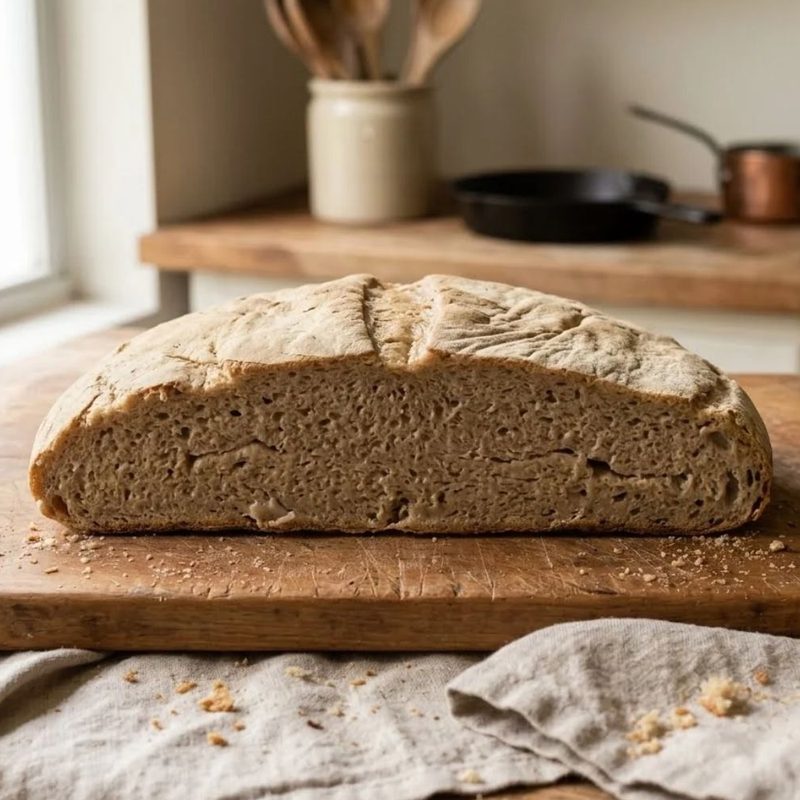
ExtremeA flat, spread loaf with a dense, damp crumb and no structure.
Shape tight, score light (the fix behind two of these)
The deflating and spreading problems below share the same handful of fixes, so here they are once.
- Shape with tension. Work on a lightly floured or bare countertop, not a heavily floured one, so the dough can grip the surface. Cup the dough with both hands and drag it toward you in short strokes, letting the underside catch friction against the counter while the top stretches taut over it. Rotate a quarter turn between drags until the whole surface feels smooth and snug, then pinch the bottom seam firmly closed so it doesn’t loosen back up during proofing.
- Build strength earlier, too. Add more sets of stretch and folds in the first few hours of bulk fermentation, so the strength is built into the dough throughout and not just on the surface.
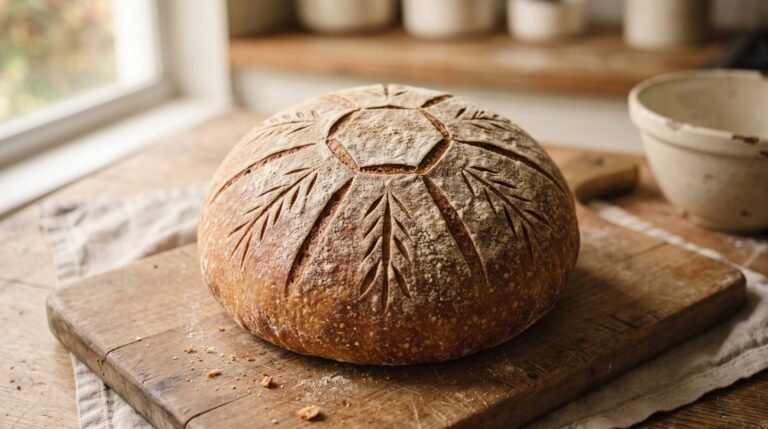
- Score once, with a light hand. Score quickly and confidently rather than with a slow, deep cut. Use one clean score at roughly a 45-degree blade angle for your main cut. If you want decorative patterns too, keep those extra cuts very light and surface-level, so they don’t cut into the dough’s structural skin.
- Chill it, or bake it promptly. Cold dough holds its shape much better under the blade, so try a cold retard in the fridge overnight before baking. Either way, get shaped dough into the oven or the fridge promptly, especially if your kitchen runs warm.
Free Email Course
Proofing times only mean something when the starter behaves the same way each bake. The free 7-lesson email course helps you build a starter you can predict, with one short email a day.
Dough not rising: five causes
You fed your starter, did the folds, and your dough looks exactly like it did four hours ago. Sourdough rise problems almost always trace back to one of these usual suspects.
Cause 1
Your starter wasn’t at peak activity when you mixed the dough, often because it’s underfed or hasn’t had time to build real strength yet.
The Fix
Only mix dough when your starter has doubled and looks domed and bubbly, ideally within its peak window (usually 4 to 8 hours after feeding). If it’s not reliably getting there, feed it more consistently for a few days before your next bake. If it never does, start with Sourdough Starter Problems.
Cause 2
Your kitchen is cooler than the recipe writer’s kitchen, which slows fermentation more than most people expect. Dough that is simply rising slower than expected can look like it is “not rising” if you are checking it on the clock’s schedule instead of the dough’s.
The Fix
Find the warmest consistent spot you can (the top of the fridge, inside the oven with the light on, or a proofing box). If you can’t control the temperature, that’s fine too, just give it more time. Let bulk fermentation run longer and judge readiness with the poke test and visual cues (about 50 percent risen, jiggly, bubbly) instead of the clock. See how to tell underproofed from overproofed above.
Cause 3
You used too little starter for the amount of flour in the recipe.
The Fix
If you’re following someone else’s recipe as written and rise is consistently sluggish, try increasing the starter by about 20 percent. If it calls for 100 g of starter, use about 120 g instead.
Cause 4
Your flour is old or your water is heavily chlorinated, both of which can quietly work against you.
The Fix
Use flour milled within the last few months when you can, and switch to filtered or bottled water if you suspect chlorine is an issue.
Cause 5
Too much salt for your recipe’s ratio. Salt doesn’t kill the yeast, but too much of it slows the clock down more than people expect.
The Fix
Double-check your salt against the recipe’s ratio, typically around 1.8 to 2.2 percent of the flour weight, and correct it if you’ve been running heavy-handed.
Loaf deflates after scoring: five causes
There is nothing quite like watching a beautifully proofed loaf go flat the second your blade touches it. It usually means one specific thing went wrong before you ever picked up the lame.
Cause 1
The dough was overproofed, meaning fermentation went on too long and the gluten network lost its strength. A weakened structure can’t hold gas, so any disturbance, including scoring, makes it collapse.
The Fix
Shorten your bulk fermentation and proof times, and rely on the poke test rather than the clock. See how to tell underproofed from overproofed.
Cause 2
The dough wasn’t shaped with enough tension, so it had a weak structural foundation.
The Fix
Shape with more tension, as described in shape tight, score light.
Cause 3
The score was too deep or too aggressive for how delicate the dough already was.
The Fix
Score quickly and confidently with a light hand rather than a slow, deep cut.
Cause 4
The dough sat out too long between shaping and baking, especially in a warm kitchen.
The Fix
Get your shaped dough into the oven, or into the fridge for a cold retard, promptly.
Cause 5
You skipped the cold retard, which normally firms up the dough and makes it easier to score without disturbing it.
The Fix
Try a cold retard in the fridge overnight before baking. Cold dough holds its shape much better under the blade.
Loaf spreads instead of rising up: five causes
You shape a nice round loaf, turn your back for the bake, and what comes out looks more like a pancake than a boule. It’s frustrating, but it’s very fixable.
Cause 1
The dough was overproofed, so it no longer has the strength to hold its shape once it hits the heat of the oven.
The Fix
Use the poke test to nail your proof timing rather than guessing, and pull it earlier next time.
Cause 2
Shaping was too loose, without enough surface tension built into the outer skin of the dough.
The Fix
Focus on your shaping technique, using the tension-building moves in shape tight, score light.
Cause 3
The dough never built enough strength during bulk fermentation itself. Without enough stretch and folds in the first few hours, even careful final shaping doesn’t have much underlying structure to work with.
The Fix
Add more sets of stretch and folds earlier in bulk fermentation, so the strength is built into the dough throughout, not just on the surface.
Cause 4
High-hydration dough without enough gluten development can lack the structure to hold a tall shape.
The Fix
Reduce your hydration slightly for a firmer dough, and still finish with a cold retard overnight in the fridge. The combination firms things up more than either step does on its own. For more on hydration, see the sticky dough section of our dense, gummy, and sticky guide.
Cause 5
The loaf was scored too deep, or covered in decorative cuts, which can compromise the dough’s structural skin and cause it to spread or slump as it bakes. Depths and angles that tend to work are in my sourdough scoring patterns guide.
The Fix
Stick to one clean, confident score at roughly a 45-degree blade angle for your main cut. If you want decorative patterns too, keep those additional cuts very light and surface-level only.
Quick answers
Is it better to slightly underproof or slightly overproof? Slightly underproofed. It is more forgiving, because you can always give a loaf a longer rest before baking, but you can’t undo overproofing.
How do I know bulk fermentation is done? Use the poke test and look for about a 50 percent rise in volume, not just the clock.
My dough rises slowly. How much more starter should I use? Try about 20 percent more than the recipe calls for.
How much salt is right? Typically around 1.8 to 2.2 percent of the flour weight.
Why did my loaf deflate when I scored it? Almost always because it was overproofed. Check the poke test, shorten your proof, and score with a light hand.
Desi’s Note
My notes always say the same thing when a loaf falls flat: check the starter first. Everyone wants to blame the flour or the weather, but nine times out of ten the real issue is sitting right there in the jar. Get your starter’s activity in order and the rest tends to follow.
I keep a little notebook by my proofing basket with the kitchen temp and rough proof time for every bake. It sounds excessive, but once you have a few data points, you stop guessing and start actually knowing your own kitchen. Consider it due diligence.
I’ve scored a loaf and watched it sigh like it just found out about a tax deadline. It happens. Bake it, eat it, and adjust your timeline for next time. One deflated loaf isn’t a failed audit, it’s a rounding error. And a loaf that spreads flat is still bread. It just won’t win any beauty contests. Tighten up your shaping and give it one more try before you write off the recipe entirely.
Want To Know The Science Behind This?
Two Sourdough Science articles go with this guide: “Hydration and Climate: The Two Numbers That Actually Control Your Fermentation Time” (why temperature changes your fermentation timeline so much) and “What Fermentation Actually Does to Your Flour (The Real Science, Not the Wellness-Blog Version)” (what time does to gluten structure).
More Resources
To match what you’re seeing, grab the Crumb & Crust Diagnostic Quicksheet, and use the Bake-Day Timeline Template to fix your timing going forward. Run your numbers through the Sourdough Calculator to double-check your schedule. New to the terms? Jargon like proofing, bulk fermentation, poke test, oven spring, scoring, lame, surface tension, cold retard, boule, gluten network, crumb, and crust is explained in plain English in the full Sourdough Glossary. If your loaf is dense, gummy, or sticky instead, read Dense, Gummy, or Sticky Sourdough? Causes and Fixes. Still not sure what is wrong? Go back to What’s Wrong With My Loaf? for the rest of the troubleshooting guides.
Knead to Know?
New recipes and sourdough troubleshooting, delivered before your starter even finishes its next rise.
Get the latest insights with no spam, just new recipes and baking tips. Unsubscribe anytime. See our Privacy Policy.