
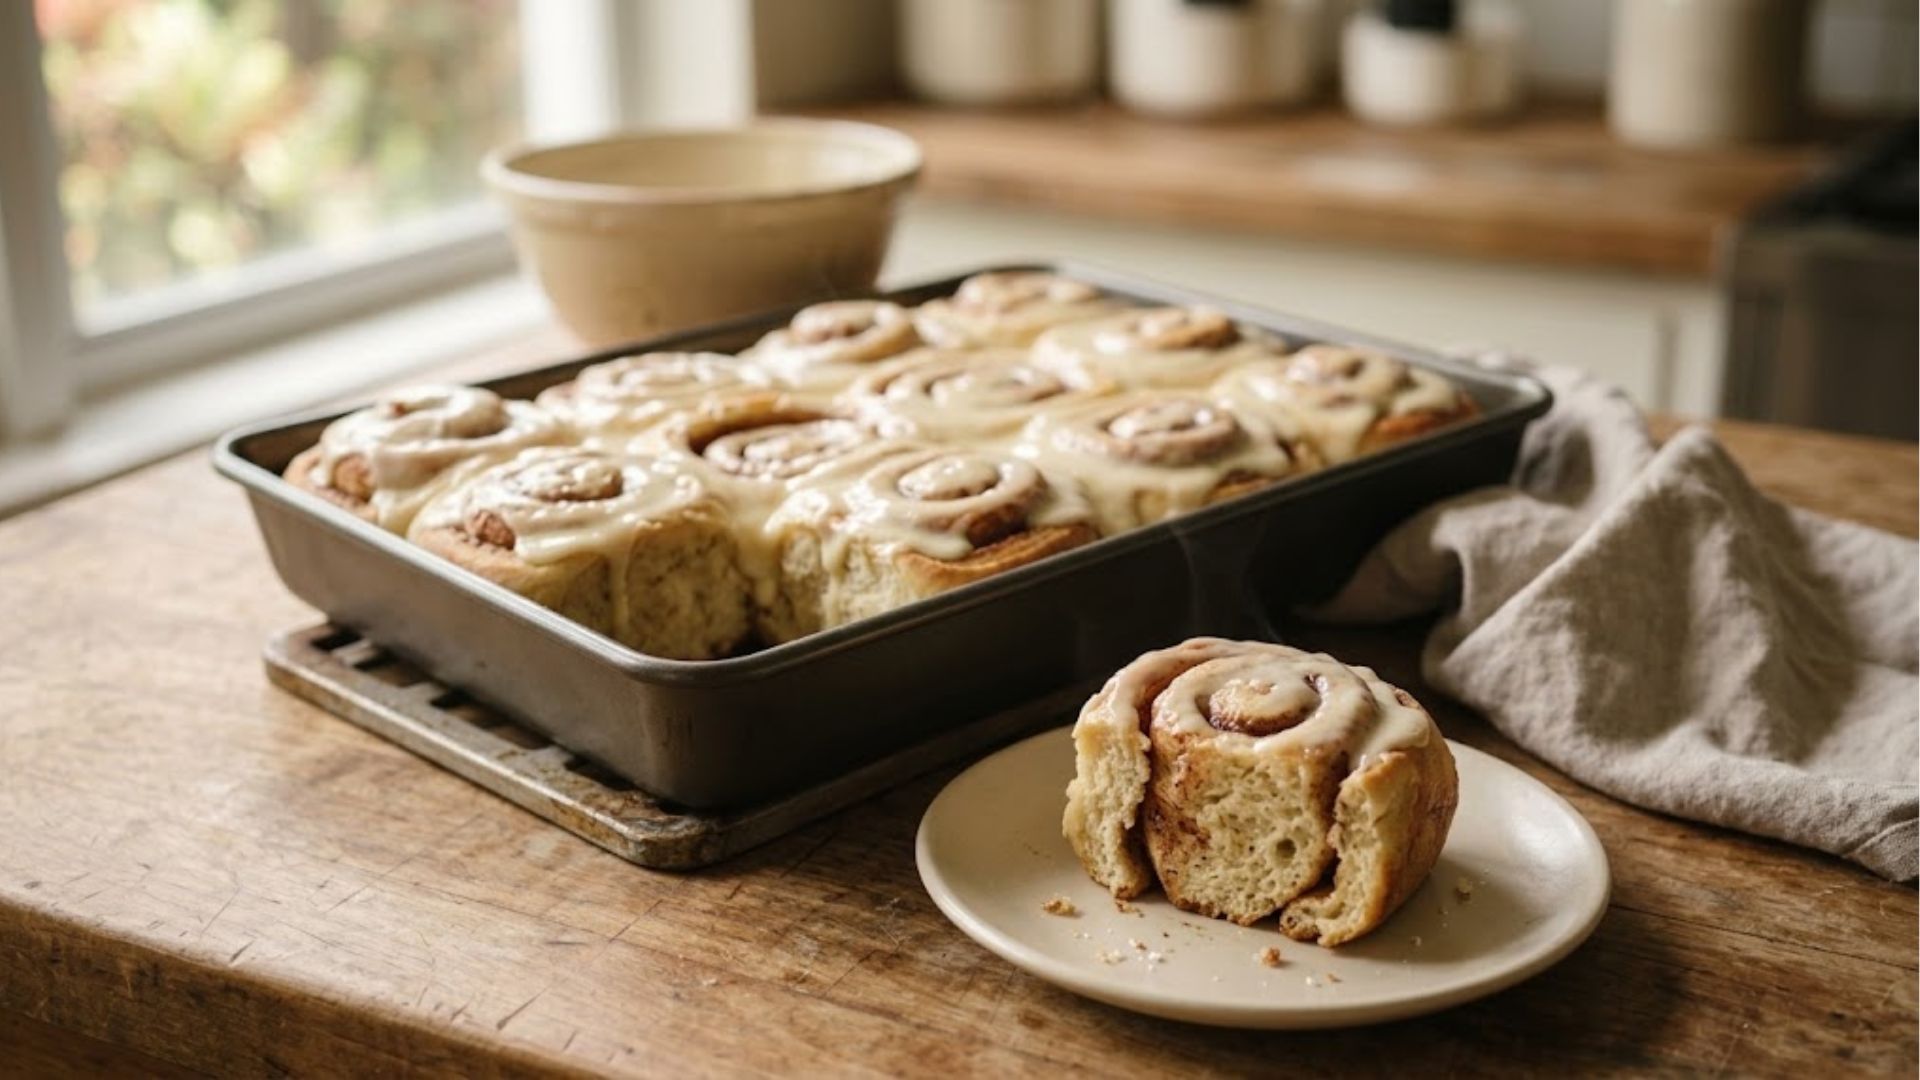
Gluten-Free Sourdough Cinnamon Rolls
These started as a question: could the sourdough cinnamon rolls get a gluten-free version that actually holds together and tastes like more than a consolation prize? The answer is yes, with three changes. King Arthur’s dedicated Gluten-Free Bread Flour instead of Measure for Measure, a little instant yeast alongside the starter for insurance, and a press-and-chill shaping method instead of a rolling pin. This dough is wetter, the schedule is same-day instead of overnight, and the texture is a touch denser than the original. The filling and cream cheese glaze are untouched.
Allergen note: King Arthur Gluten-Free Bread Flour contains gluten-free wheat starch (processed to meet the FDA’s under-20ppm gluten threshold). This recipe is gluten-free but not wheat-free. Ask your doctor first if you have celiac disease, and your allergist if you have a wheat allergy.
Starting from scratch? The gluten-free sourdough starter takes about a week to build (sometimes up to two), and the Gluten-Free Sourdough guide gathers every gluten-free recipe on the site in one place.
Which one is this?Compare all 6 cinnamon roll recipes
These 6 cinnamon roll recipes are close cousins. Here is how they differ, so you can pick the right one.
- Sourdough Cinnamon Rolls13 hr 1 min · Makes 12 rolls
Active starter, bread flour, softened butter and a cream cheese glaze.
You want the classic sourdough cinnamon roll and can plan ahead.
- Classic Overnight Yeast Cinnamon Rolls11 hr 37 min · Makes 12 rolls
Instant yeast and melted butter, with no starter.
You are a first-time baker or have no starter.
- Pumpkin Cinnamon Rolls13 hr 10 min · Makes 12 rolls
Pumpkin in the dough, raised with an active starter.
You want a fall version of the sourdough roll.
- Maple Pecan Sticky Buns6 hr 40 min · Makes 12 buns
An enriched all-purpose dough with active starter, baked over a maple pecan topping.
You want a sticky pecan bun instead of a glazed roll.
- Gluten-Free Cinnamon RollsYou are here4 hr 52 min · Makes 12 rolls
A gluten-free starter and a gluten-free flour blend.
You bake gluten-free.
- Gluten-Free Cinnamon Rolls (No Starter)3 hr 14 min · Makes 9 rolls
Instant yeast and a psyllium husk gel, no starter, with a gluten-free flour that has no wheat starch.
You want gluten-free and wheat-starch-free, without keeping a starter.
Why You’ll Love It
- Built on a flour actually meant for yeasted dough. King Arthur’s Gluten-Free Bread Flour already has xanthan gum in it and is sold for exactly this kind of bake, unlike Measure for Measure.
- Starter for flavor, yeast for reliability. The sourdough starter still does the flavor work. A measured amount of instant yeast means the rise doesn’t depend entirely on how strong your starter is that day.
- No rolling pin required. You press this dough into shape with wet hands, the same way King Arthur’s own gluten-free cinnamon rolls work. Less mess, less chance of tearing.
- Same-day, not overnight. No cold proof to manage. Mix, rise, shape, rise again, bake.
Ingredients
Volume measurements are included for convenience, but they’re approximate, and more so than usual here. A kitchen scale matters even more with gluten-free flour than it does with wheat.
This recipe makes 12 rolls in a 9×13-inch pan.
- King Arthur Gluten-Free Bread Flour (450 g / about 3¾ cups): the flour matters here. It’s built for yeasted dough and already contains xanthan gum, unlike Measure for Measure. Contains gluten-free wheat starch, so this is not a wheat-free recipe.
- Whole milk (215 g / scant 1 cup), lukewarm: more than the wheat version uses, since this flour drinks up more liquid.
- Active gluten-free sourdough starter (115 g / about ½ cup): built from rice or another gluten-free flour, not wheat. Needs to be bubbly and active.
- Instant yeast (9 g / about 2¼ tsp): the insurance policy. Gluten-free sourdough starters are slower and less predictable than wheat starters, especially in a rich, sugared dough.
- Granulated sugar (50 g / ¼ cup): sweetens the dough itself, separate from the filling.
- Unsalted butter (85 g / 6 Tbsp), softened and divided: part goes into the dough, part into the filling.
- Neutral vegetable oil (40 g / 3 Tbsp): keeps the crumb from drying out the way gluten-free bakes can. Not in the original recipe.
- Eggs (2 large): add richness and help the crumb hold together without gluten to do it.
- Fine sea salt (9 g / about 1½ tsp): balances the sweetness in both the dough and filling.
- Brown sugar (150 g / ¾ cup): mixed with the remaining softened butter and cinnamon for the filling. Unchanged from the original.
- Ground cinnamon (2 Tbsp): the other half of the filling.
- Cream cheese (115 g / 4 oz), softened: the base of the glaze. Unchanged from the original.
- Powdered sugar (120 g / 1 cup), plus a splash of milk: whisked into the softened cream cheese for the glaze.
Equipment
Gear guides: Sourdough Equipment Guide·Kitchen Scales·Banneton Sizing·Scoring Tools·Storing the Loaf·Pizza Stone vs. Baking Steel·Shop All Picks →
- Stand mixer: this dough is beaten, not kneaded by hand.
- 9×13-inch baking pan: sized for 12 rolls with a bit of room to expand.
- Unflavored dental floss or a sharp serrated knife: floss gives the cleanest slice through soft filled dough.
- Instant-read thermometer: the most reliable way to tell these are done. Color alone can be misleading on gluten-free enriched dough.
Sample Schedule (Same-Day)
Morning
- Mix the dough (about 15 minutes hands-on)
- Bulk rise at room temperature 1 to 1.5 hours, until puffy
- Press, fill, and roll into a log
- Freeze the log 20 to 30 minutes, then slice into rolls
Afternoon
- Arrange in the pan and let rise 1.5 to 2 hours, until puffy and touching
- Bake 24 to 30 minutes until golden, 205 to 210°F internal
- Cool 10 to 15 minutes, then glaze while still warm
Gluten-Free Sourdough Cinnamon Rolls
Method
- Feed your gluten-free starter the night before (or morning of) so it’s bubbly and active at mix time. A mature GF starter runs slower than a wheat one, so build in extra time if yours is young.
- In a stand mixer bowl, whisk together 215 g lukewarm milk, 115 g active GF starter, 50 g sugar, and 2 eggs. Melt 57 g (4 Tbsp) of the butter and whisk that in too, along with 40 g oil.
- Add 450 g King Arthur Gluten-Free Bread Flour, 9 g instant yeast, and 9 g salt. Beat on low to combine, then on medium-high for a full 3 minutes. Don’t shorten this step. It’s doing the structural job gluten would do in the wheat version.
- Scrape the bowl. The dough should look like a thick, smooth cake batter, not a kneadable wheat dough. If it’s closer to a thin paste, beat in another tablespoon of flour; if it’s stiff and dry, beat in another tablespoon of milk.
- Cover and let rise at room temperature (or in an oven with just the light on) for 1 to 1.5 hours, until visibly puffy. This is the one reliable bulk rise. It won’t double the way the wheat dough does, and that’s expected.
- Mix the remaining 28 g (2 Tbsp) butter with 150 g brown sugar and 2 Tbsp cinnamon for the filling. This part doesn’t change for gluten-free baking, since the filling never had flour in it to begin with. Stir it to a spreadable, damp-sand texture, the same as the original.
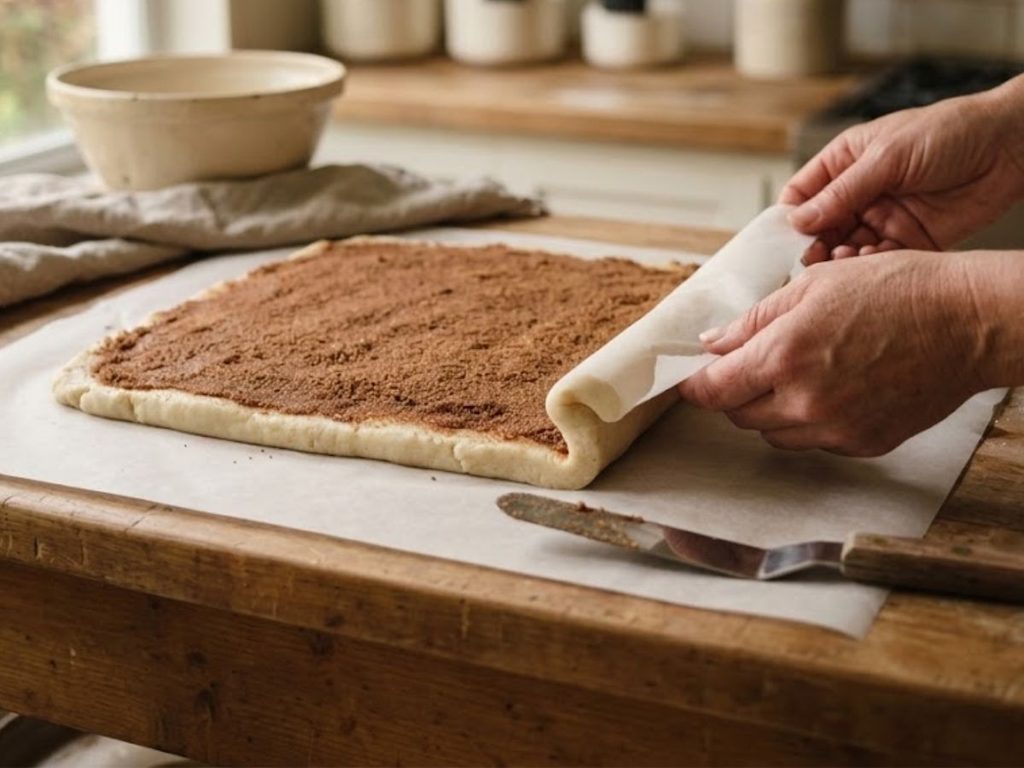
- Line a sheet pan or your counter with parchment. Turn the dough out and, with wet hands, press it (don’t roll it) into a rectangle roughly 16×12 inches and about ½ inch thick.
- Spread the filling evenly, leaving a bare 1-inch strip along one long edge. That clean strip is what the dough grabs onto when you roll it into a log, so the seam seals shut instead of popping open in the oven, which matters more here since gluten-free dough has less natural elasticity to hold a loose seam closed.
- Using the parchment to help lift, roll the dough into a tight log starting from the filled edge. Freeze the log, uncovered, for 20 to 30 minutes to firm it up. This matters more here than in the wheat version. GF dough is too soft to slice cleanly right after rolling.
- Slice into 12 rolls with unflavored dental floss or a sharp serrated knife, and arrange cut-side up in a greased 9×13-inch pan. A knife tends to compress this softer dough as it cuts, flattening the spiral, so floss gives the cleaner slice here. Slide it under the log and cross the ends over the top to pull through.
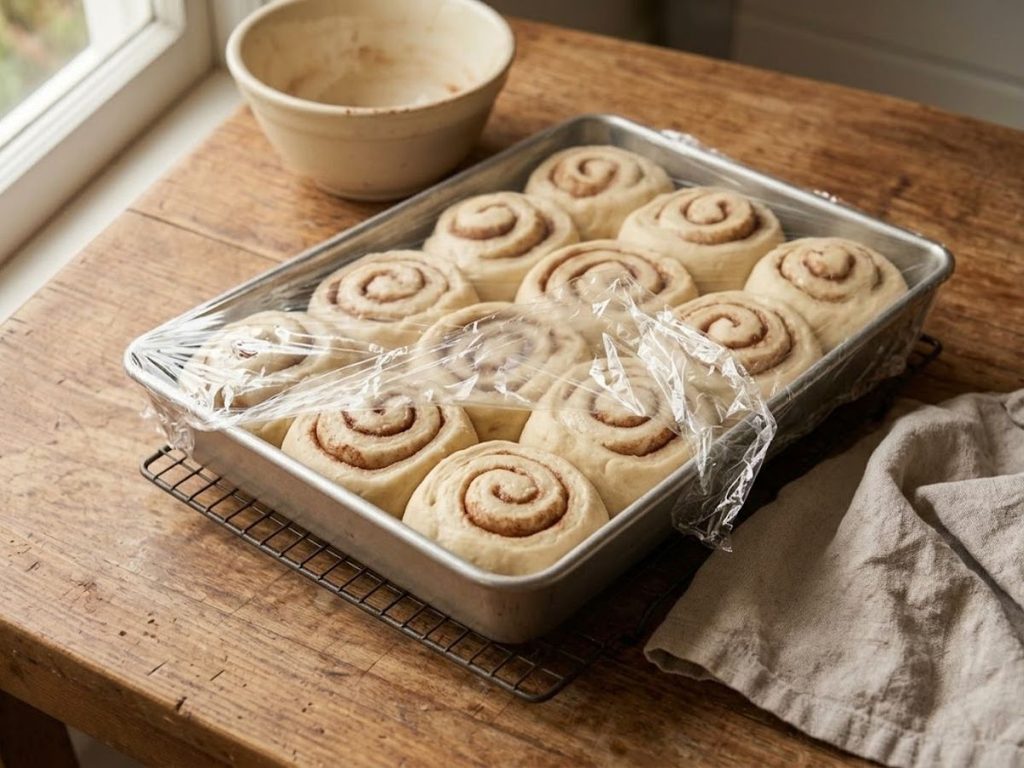
- Cover and let rise at room temperature for 1.5 to 2 hours, until puffy and the rolls are touching their neighbors.
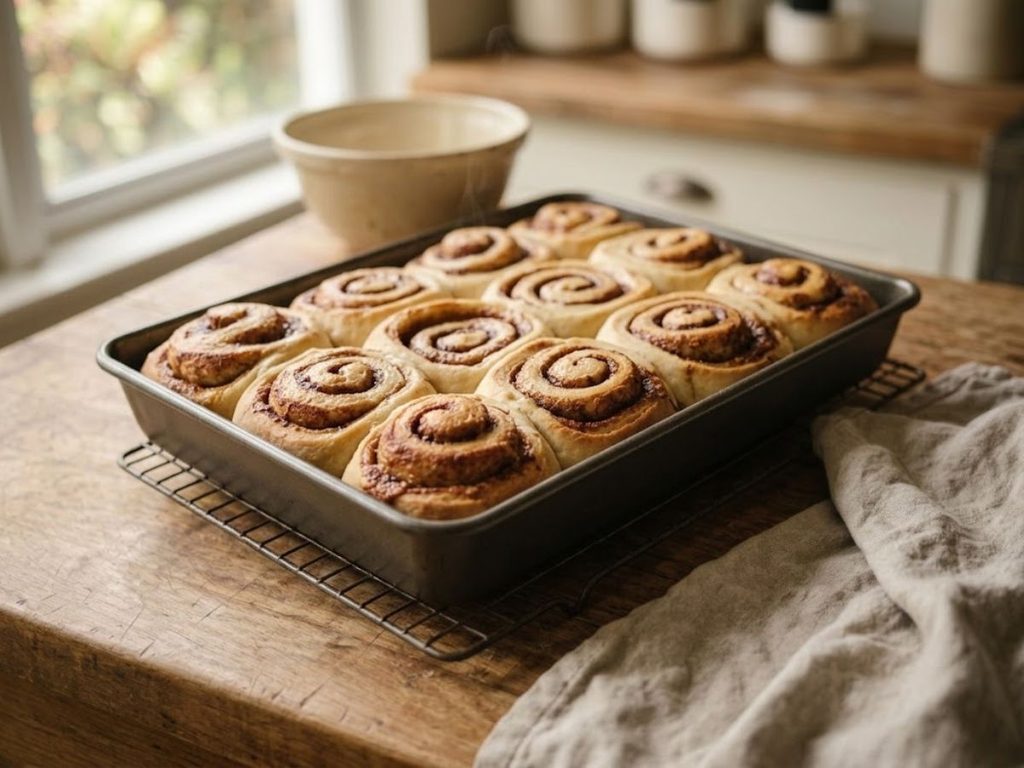
- Near the end of the rise, preheat the oven to 350°F. Bake 24 to 30 minutes, until golden on top. Check doneness with an instant-read thermometer in the center of a roll. Look for 205 to 210°F, since GF enriched dough can look done on top before the center fully sets.
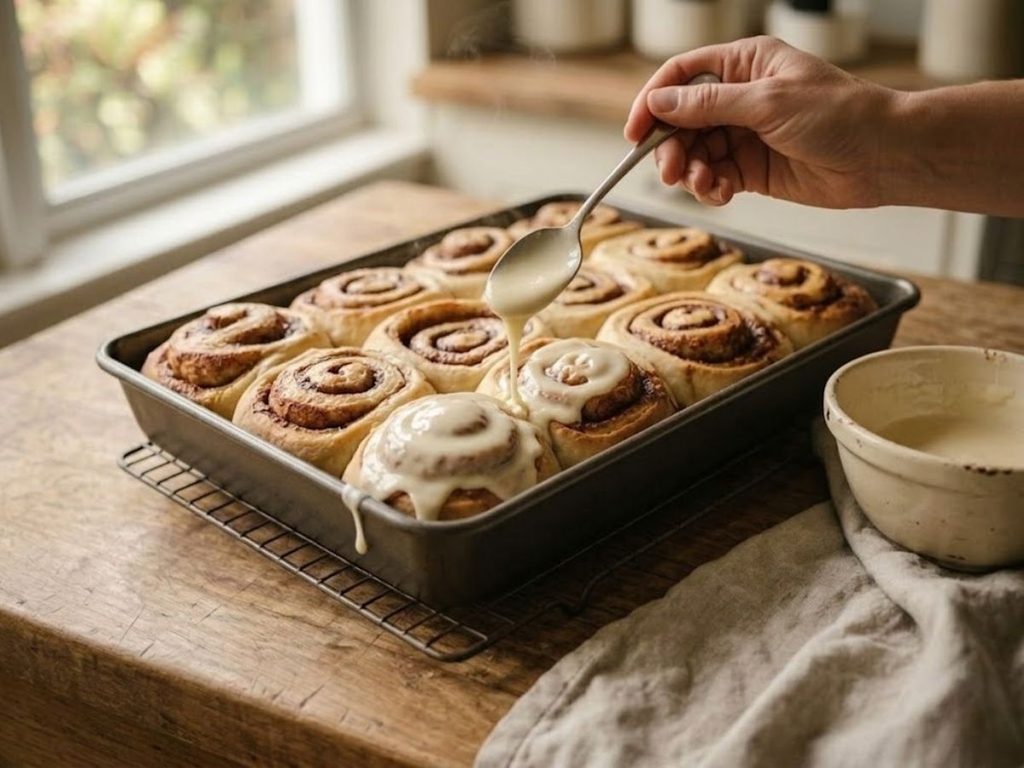
- Cool 10 to 15 minutes, then beat the softened cream cheese with powdered sugar and a splash of milk into a glaze, and spread it over the rolls while they’re still warm. Warm rolls let the glaze soak in slightly for a glossy coat. Rolls that are still piping hot will just melt it into a thin puddle instead.
Notes
Save This Recipe
Get it emailed to you now, plus new recipes as they go up.
Your email is safe with me. I’ll send this recipe straight over. No spam, ever. You can unsubscribe anytime.
How to Make It
1Feed your gluten-free starter the night before (or morning of) so it’s bubbly and active at mix time. A mature gluten-free starter runs slower than a wheat one, so build in extra time if yours is young. The starter should be domed or just starting to fall, full of bubbles and pleasantly tangy. Put a rubber band around the jar at feeding time so you can see how far it has risen before you use it.
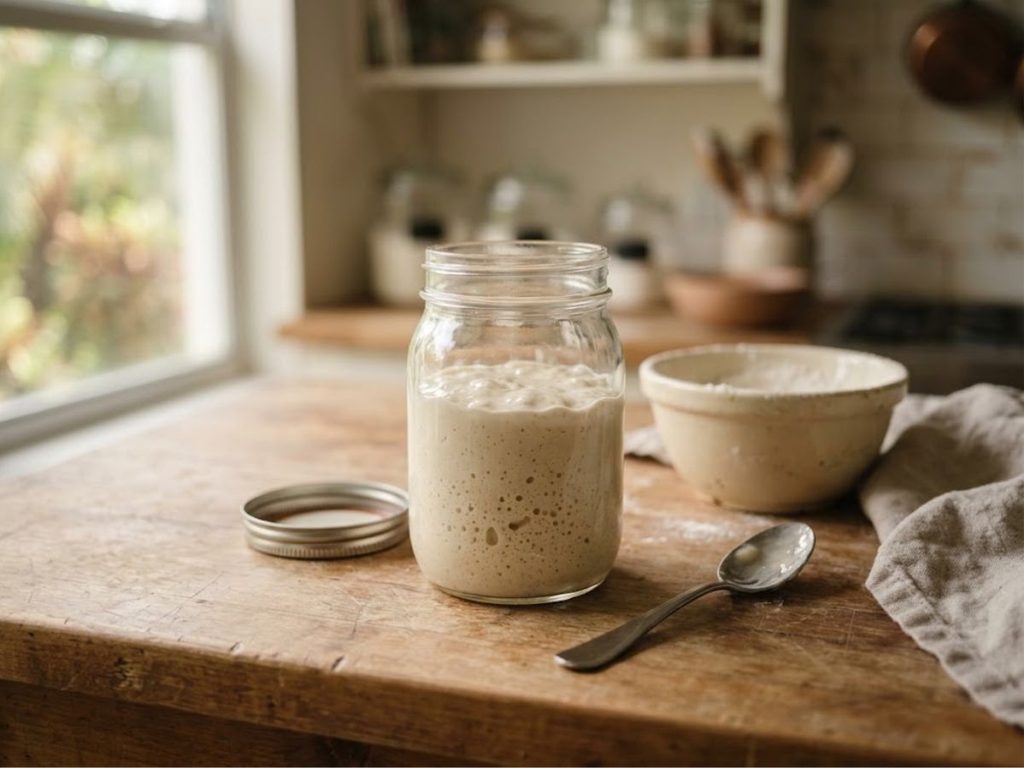
2In a stand mixer bowl, whisk together 215 g lukewarm milk, 115 g active gluten-free starter, 50 g sugar, and 2 eggs. Melt 57 g (4 Tbsp) of the butter and whisk that in too, along with 40 g oil. Whisk until the eggs and starter are smooth and no strings of egg white remain. Let the melted butter cool for a moment first so it does not scramble the eggs or shock the starter.

3Add 450 g King Arthur Gluten-Free Bread Flour, 9 g instant yeast, and 9 g salt. Beat on low to combine, then on medium-high for a full 3 minutes. Don’t shorten this step. It’s doing the structural job gluten would do in the wheat version. The dough should look thick, sticky and glossy as it wraps around the paddle. Keep the speed on medium-high for the whole 3 minutes, since beating is what builds structure in this dough.
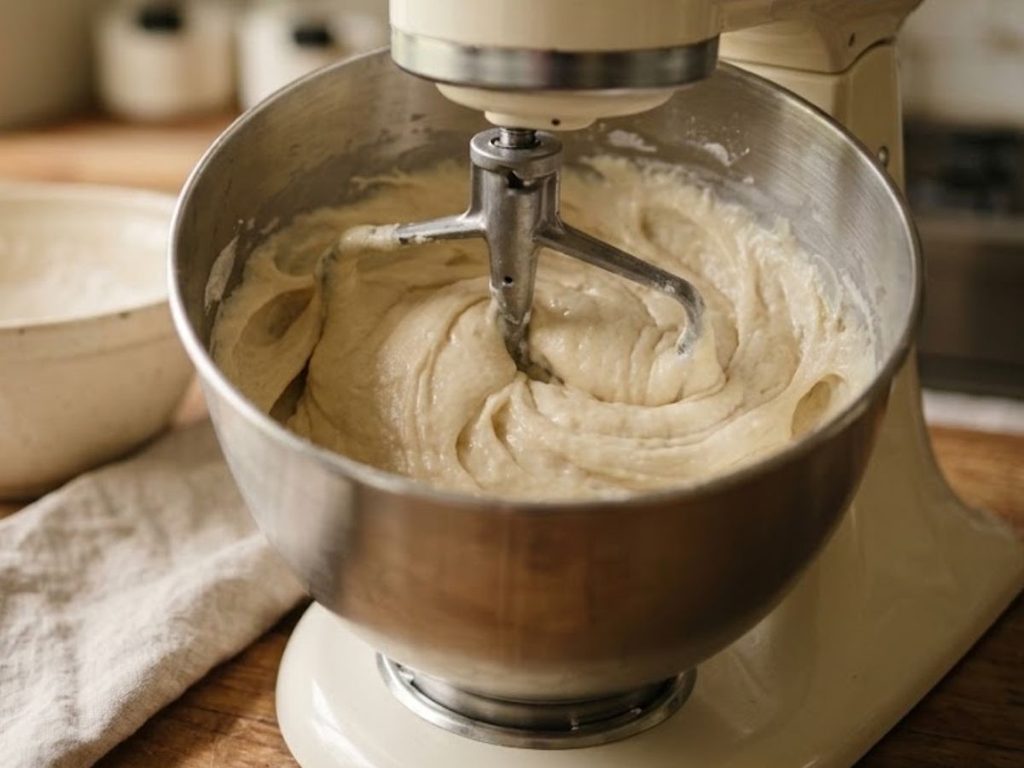
4Scrape the bowl. The dough should look like a thick, smooth cake batter, not a kneadable wheat dough. If it’s closer to a thin paste, beat in another tablespoon of flour. If it’s stiff and dry, beat in another tablespoon of milk. Use a flexible spatula to scrape the bottom as well as the sides, because unmixed flour tends to hide there. After any adjustment, beat briefly again. The dough should slowly settle and cling to the spatula like thick batter.

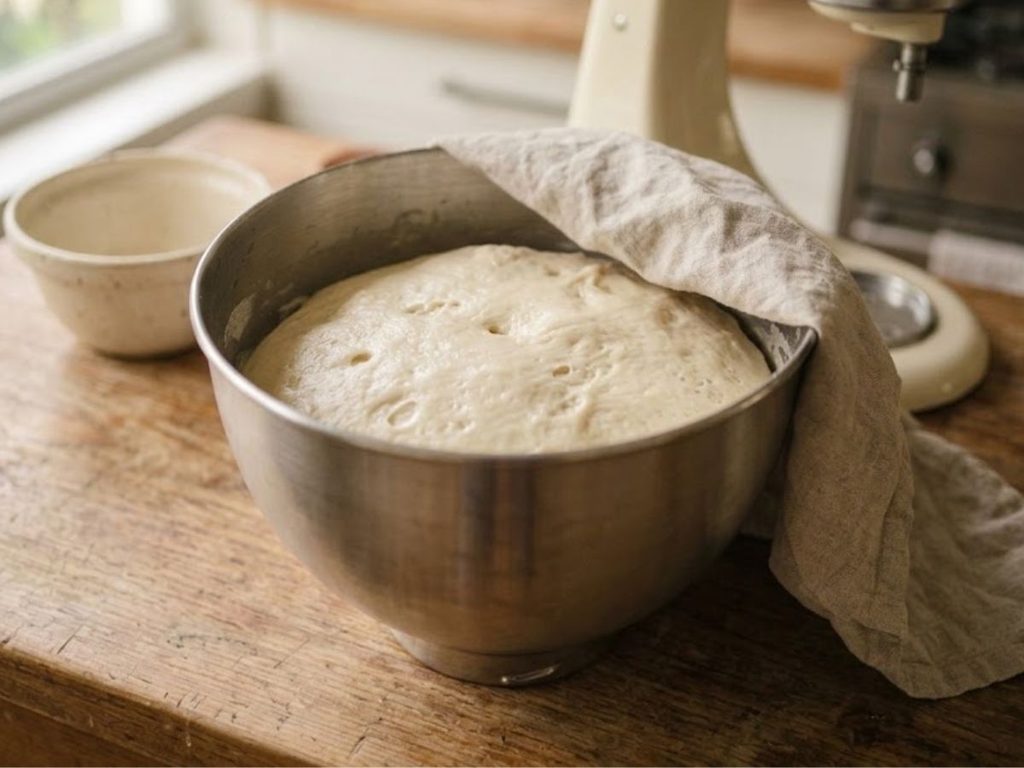
5Cover and let rise at room temperature (or in an oven with just the light on) for 1 to 1.5 hours, until visibly puffy. This is the one reliable bulk rise. It won’t double the way the wheat dough does, and that’s expected. Look for a puffy, slightly domed surface dotted with bubbles, and a dough that jiggles a little when you tap the bowl. A warm kitchen may get there at the short end of the range, so check early.
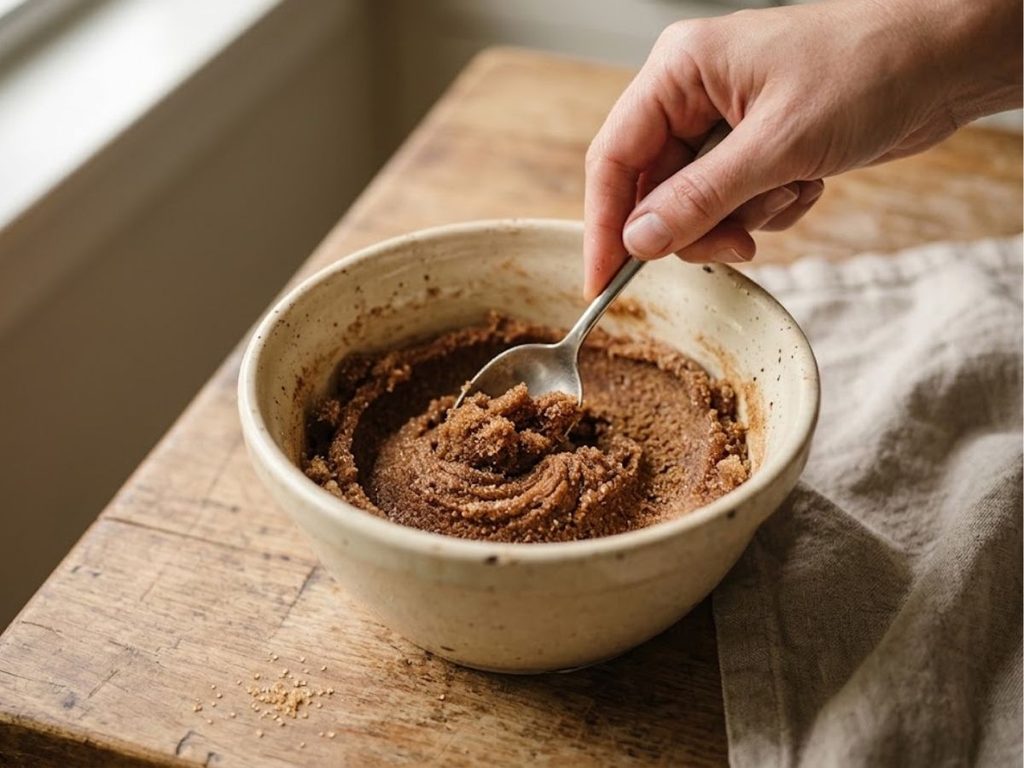
6Mix the remaining 28 g (2 Tbsp) butter with 150 g brown sugar and 2 Tbsp cinnamon for the filling. This part doesn’t change for gluten-free baking, since the filling never had flour in it to begin with. Stir it to a spreadable, damp-sand texture, the same as the original. Mash with a fork until no streaks of butter remain and the mixture holds together when you pinch it. If the butter is too cold it will not blend, and if it is too soft the filling turns greasy.
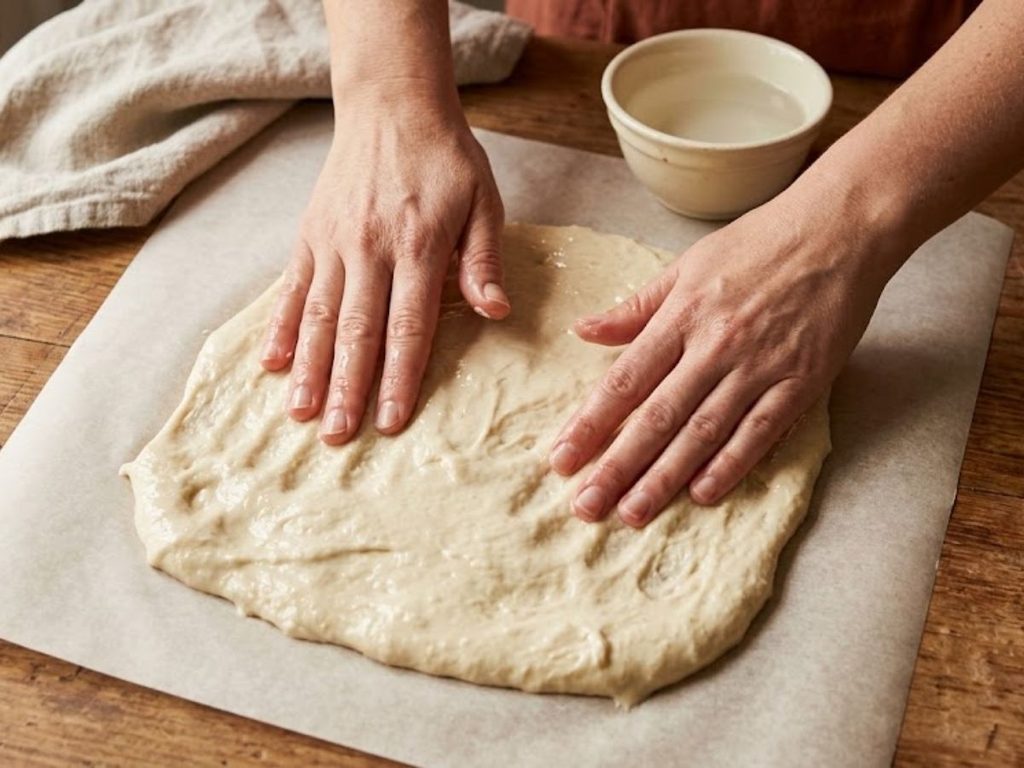
7Line a sheet pan or your counter with parchment. Turn the dough out and, with wet hands, press it, don’t roll it, into a rectangle roughly 16×12 inches and about ½ inch thick. Wet your hands again whenever the dough starts to stick, and press from the center outward for an even thickness. Patch any thin spots with dough from the thicker edges. The dough will feel soft and slightly tacky.
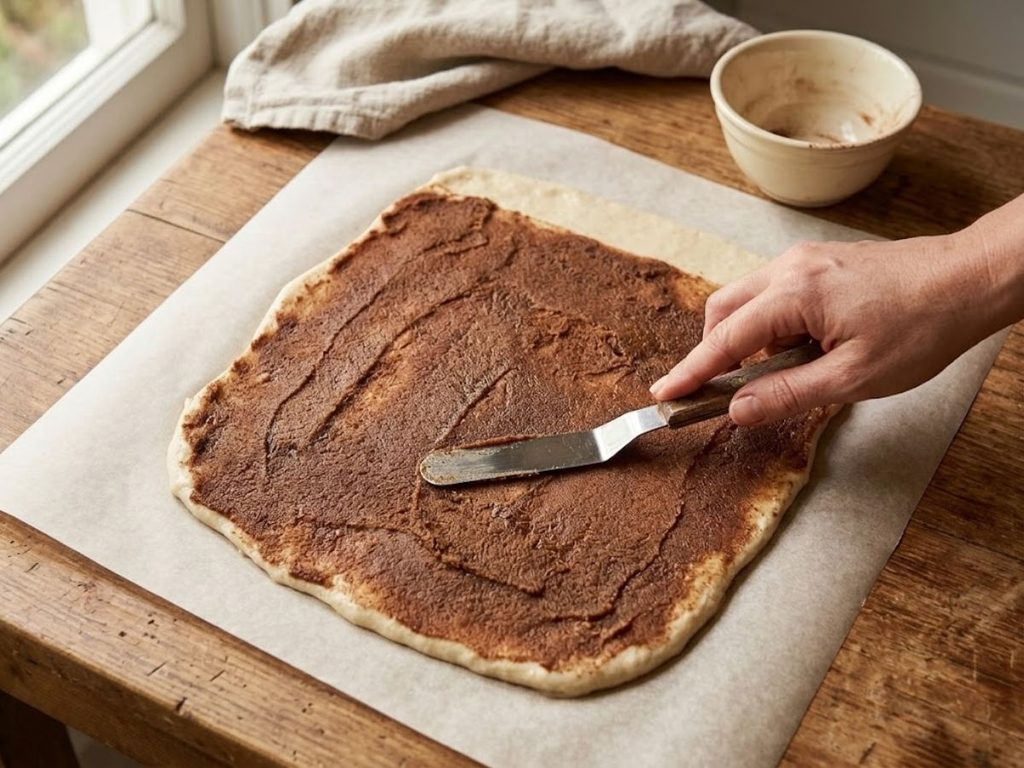
8Spread the filling evenly, leaving a bare 1-inch strip along one long edge. That clean strip is what the dough grabs onto when you roll it into a log, so the seam seals shut instead of popping open in the oven, which matters more here since gluten-free dough has less natural elasticity to hold a loose seam closed. Spread with an offset spatula or the back of a spoon, and press lightly so the filling grips the dough. Loose sugar rolls out of the spiral and can burn on the bottom of the pan.
9Using the parchment to help lift, roll the dough into a tight log starting from the filled edge. Freeze the log, uncovered, for 20 to 30 minutes to firm it up. This matters more here than in the wheat version. Gluten-free dough is too soft to slice cleanly right after rolling. Lift the parchment and let it guide the roll, peeling it back as you go so it does not curl inside the log. After the freezer the log should feel firm but still slightly yielding. Set a timer so it does not freeze solid.
10Slice into 12 rolls with unflavored dental floss or a sharp serrated knife, and arrange cut-side up in a greased 9×13-inch pan. A knife tends to compress this softer dough as it cuts, flattening the spiral, so floss gives the cleaner slice here. Slide it under the log and cross the ends over the top to pull through. Mark the log lightly before cutting, halving it first, so all 12 rolls come out the same size. Space the rolls evenly in the pan, since they will puff and join as they rise.

11Cover and let rise at room temperature for 1.5 to 2 hours, until puffy and the rolls are touching their neighbors. Press a fingertip gently into one roll. The dent should fill back in slowly. Cover loosely so the wrap does not stick to the tops as they puff, and expect the longer time in a cool kitchen.
12Near the end of the rise, preheat the oven to 350°F. Bake 24 to 30 minutes, until golden on top. Check doneness with an instant-read thermometer in the center of a roll. Look for 205 to 210°F, since gluten-free enriched dough can look done on top before the center fully sets. Slide the probe into the center of a roll from the middle of the pan, since the edges finish first. If the tops brown too fast before the center reaches temperature, tent the pan loosely with foil and bake a few minutes longer.
13Cool 10 to 15 minutes, then beat the softened cream cheese with powdered sugar and a splash of milk into a glaze, and spread it over the rolls while they’re still warm. Warm rolls let the glaze soak in slightly for a glossy coat. Rolls that are still piping hot will just melt it into a thin puddle instead. Spread the glaze when the pan feels warm to the touch and not hot. The glaze should be thick enough to ribbon off a spoon. If it is too stiff, add a few more drops of milk.
Tips & Troubleshooting
- Not wheat-free: King Arthur Gluten-Free Bread Flour contains gluten-free wheat starch. Safe for celiac disease and gluten sensitivity, not for a wheat allergy.
- Skip Measure for Measure here: it isn’t built for yeasted dough and doesn’t rise the same way. Use the dedicated Gluten-Free Bread Flour.
- Don’t add extra xanthan gum: the Gluten-Free Bread Flour already has it. More can make the dough gummy.
- Wet hands, not flour, for shaping: dust the dough with more flour and it gets tough. Keep your hands damp instead when pressing it out.
- Weak or sluggish rise: check your yeast is fresh first. A struggling gluten-free starter is a flavor problem, not your main leavening problem here. The instant yeast is doing most of the lifting.
- Dense or gummy centers: likely underbaked. Go by the 205 to 210°F internal temperature, not just color.
- No gluten-free starter yet: building one from rice flour takes about a week of daily feeding, and sometimes up to two, before it’s reliably bubbly. Don’t start this recipe the same week you start the starter.
How to Store
- To store: keep glazed rolls covered at room temperature for up to 2 days, or in the fridge for up to 5. Gluten-free bakes dry out faster than wheat, so don’t leave them uncovered.
- To freeze: freeze unglazed, fully cooled rolls in an airtight container for up to 2 months. Thaw and warm in a low oven, then glaze fresh.
- Reheating: a few seconds in the microwave brings back the softness better than the oven does for these.
Nutrition
Nutrition values are estimates per roll, based on 12 rolls, and will vary based on exact ingredients used.
370
CALORIES
52
CARBS (G)
7
PROTEIN (G)
15
FAT (G)
7
SAT. FAT (G)
24
SUGAR (G)
220
SODIUM (MG)
Desi’s Notes
I’ll say the honest thing up front: this version leans on a little commercial yeast, and the original doesn’t. I made that trade on purpose. Gluten-free sourdough starters are real, but they’re slower and less consistent than a wheat starter, and an enriched dough full of butter, sugar, and eggs is already asking a lot of any wild yeast culture. The starter is still in there for the tang and the complexity. The yeast is there so your Sunday morning doesn’t depend on how your starter happened to feel that week.
The texture is the other place this differs. Gluten-free dough behaves more like a thick batter than a dough you can knead, so you press it into shape with wet hands instead of rolling it with a pin, and you freeze the log briefly before slicing so it holds its spiral. The crumb that comes out is a touch denser and more tender than the wheat version, closer to a soft spoon bread than a classic pull-apart roll. That’s normal for gluten-free enriched baking, not a sign something went wrong.
I should be straight about what “tested” means here. This recipe is built from King Arthur’s own published gluten-free flour guidance and their gluten-free cinnamon roll recipe, plus a published gluten-free sourdough discard cinnamon roll recipe that’s been baked and reviewed by other people. The ratios and technique are grounded in that research, not guessed at. But nobody has physically baked this exact version yet. If you’re gluten-free and this matters to your health, treat the first batch as a test batch, and watch the dough consistency and bake time more than the clock.
Gluten-free dinner rolls are Gluten-Free Sourdough Dinner Rolls.
Before You Bake
Scaling this recipe up or down? Run your numbers through the Sourdough Calculator. And if you want a printable reference for troubleshooting or timing, browse all six Printable Quicksheets.
New to sourdough? Start with the free course
Seven short lessons over 12 days, from mixing your first starter to baking your first loaf with it. Stop anytime.
One short lesson every couple of days. Seven in all, then you’re done. No spam. See our Privacy Policy.
Already have a starter? Bake your first loaf → · Already baking? Browse recipes →


Tried this recipe? Leave a star rating below. It takes 10 seconds and helps other bakers decide what to make next.
Baked this recipe your way? Share it in Community Bakes and inspire other readers.