
Sourdough Pizza, Neapolitan Style
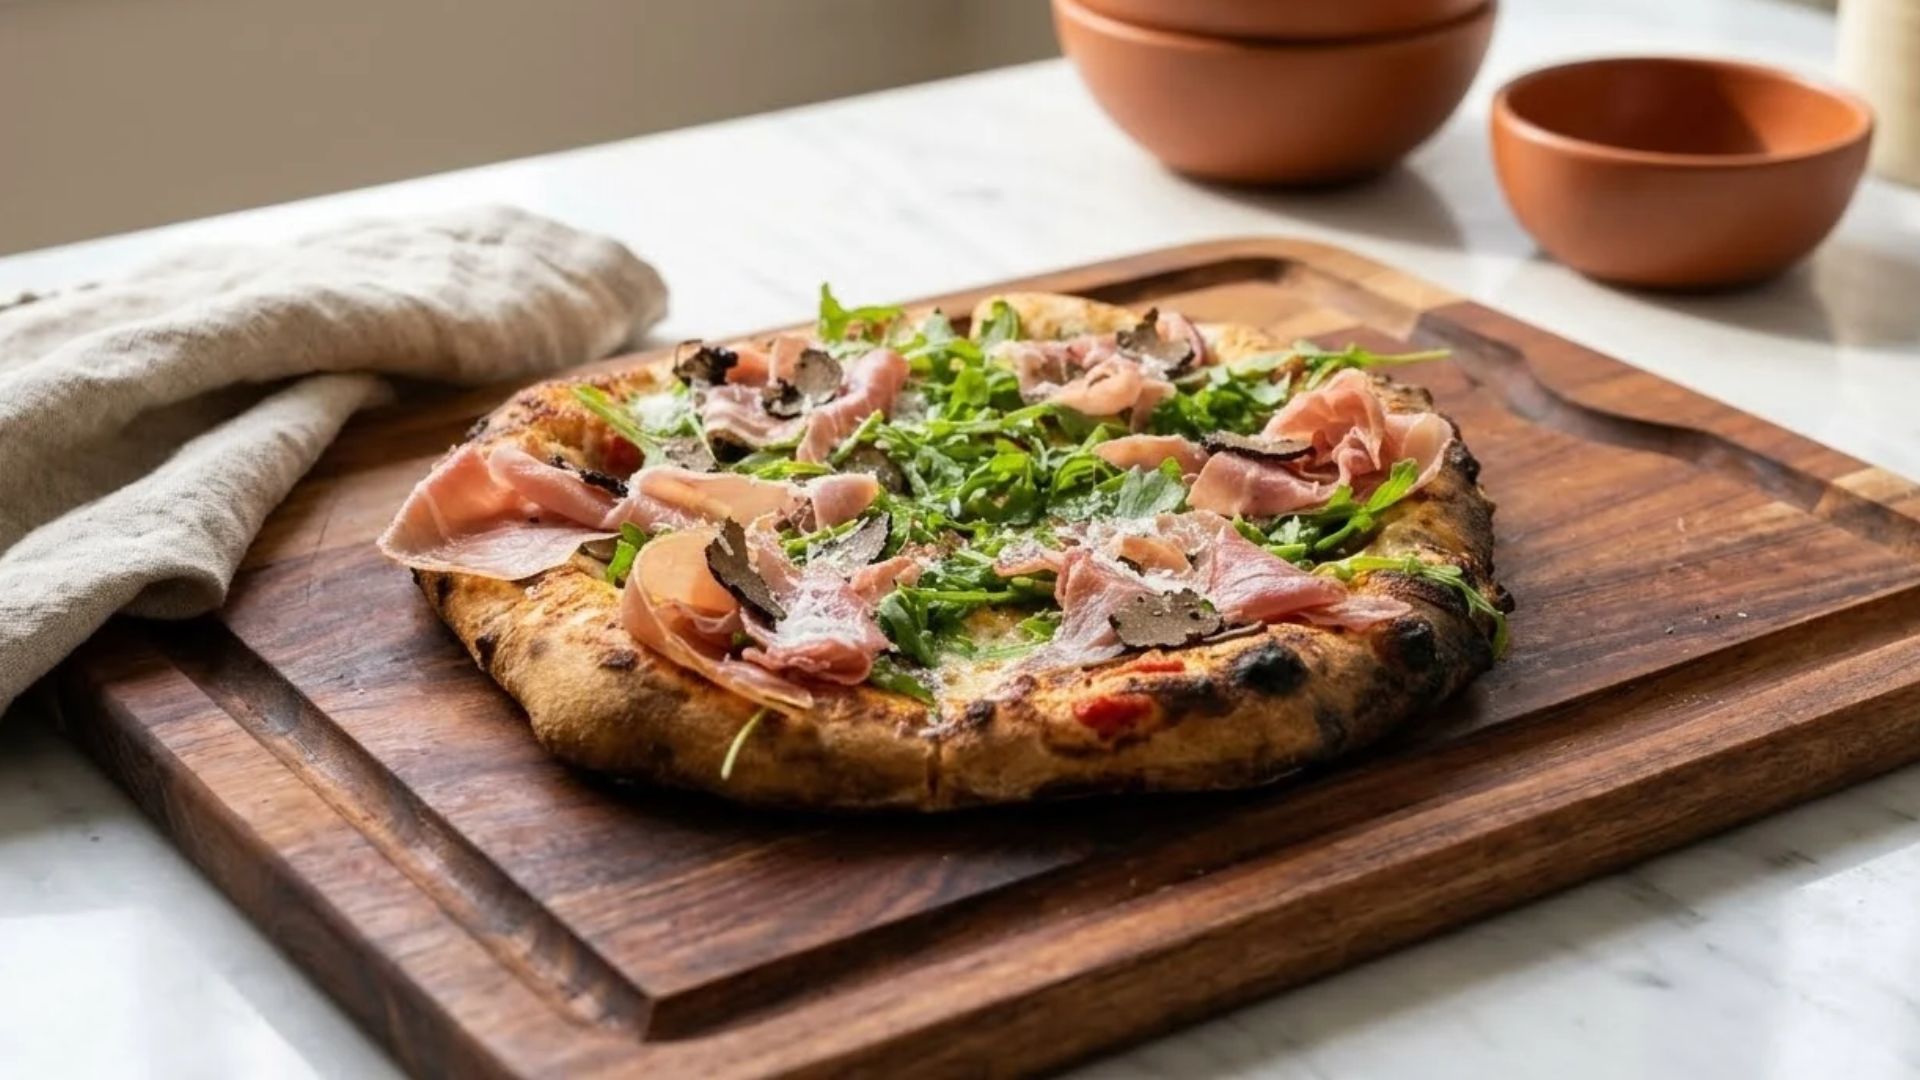
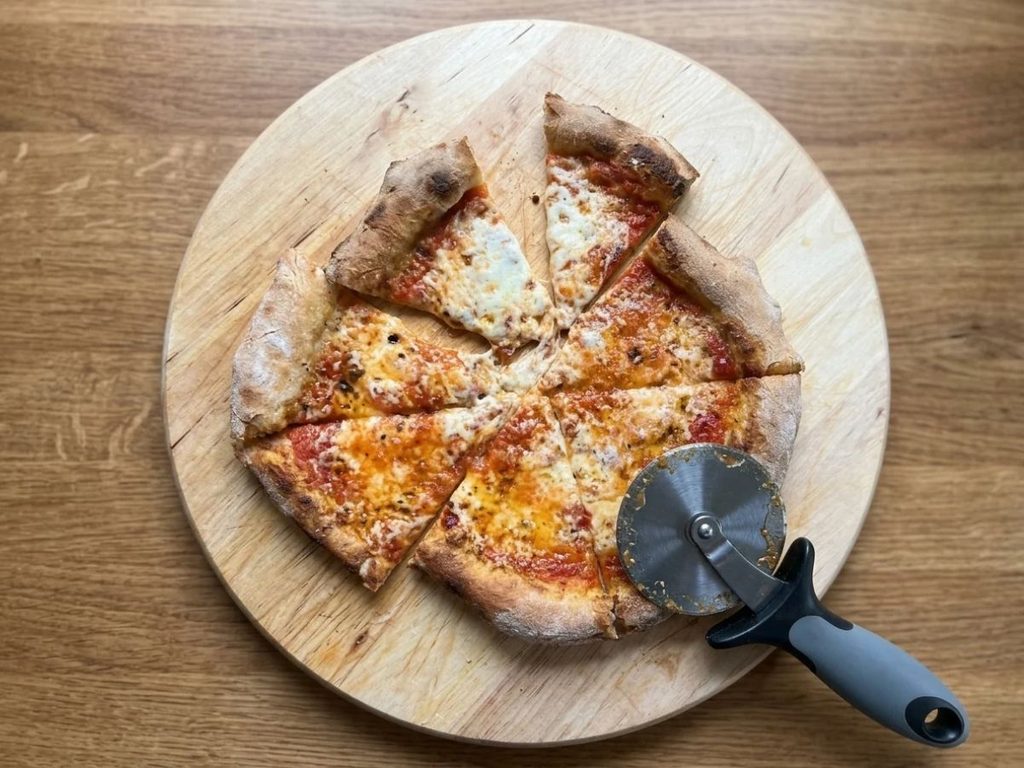
This is Desi’s Neapolitan-style crust, thin, blistered at the edge, and airy underneath the surface. The dough sits on the higher end of hydration, so it takes a bit more care to shape than her other doughs, but that’s exactly what gives you the big, bubbly puff around the rim. She cooks hers in a wood-fired oven at home, but this works just as well on a stone or baking steel in a regular kitchen oven, you just handle the bake a little differently.
Which one is this?Compare all 3 pizza dough recipes
These 3 pizza dough recipes are close cousins. Here is how they differ, so you can pick the right one.
- Sourdough Pizza Dough20 hr 28 min · Makes 2 pizza crusts
Bread flour with active starter and olive oil, shaped into balls and rested in the fridge before baking.
You want a wheat dough you can plan ahead and keep in the fridge.
- Gluten-Free Pizza Crust3 hr 40 min · Makes 8 slices
Psyllium gel with brown rice and sorghum flours, tapioca starch and a gluten-free starter, par-baked before the toppings go on.
You bake gluten-free.
- Sourdough Pizza, Neapolitan StyleYou are here13 hr 14 min · Makes 5 pizza crusts
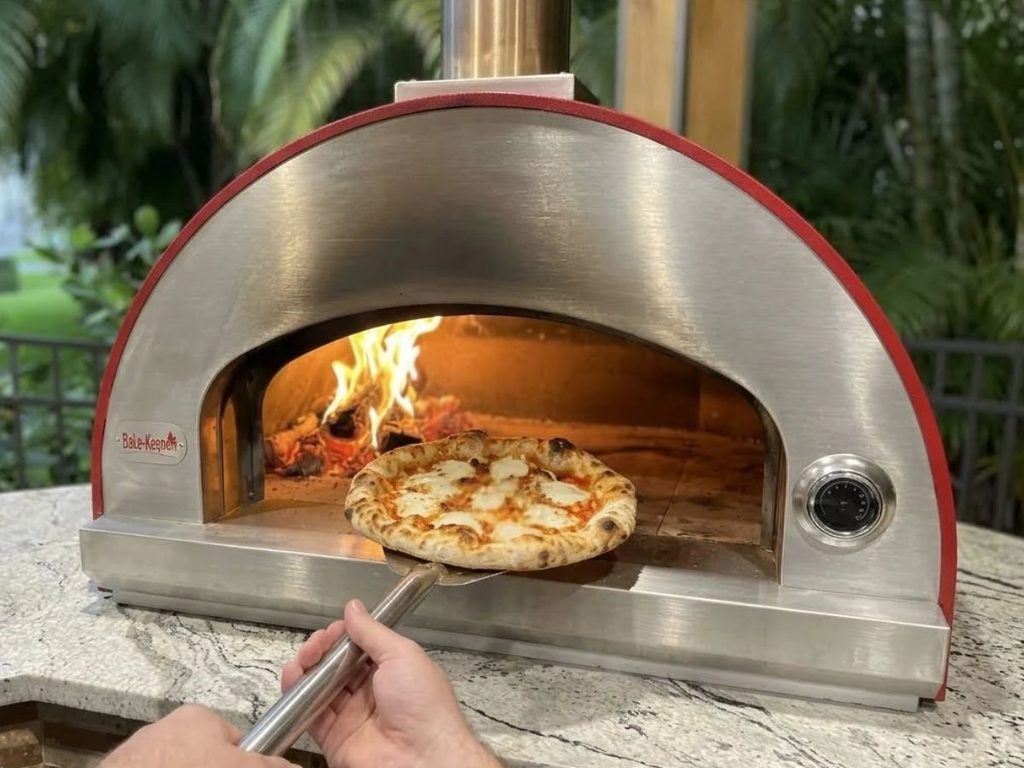
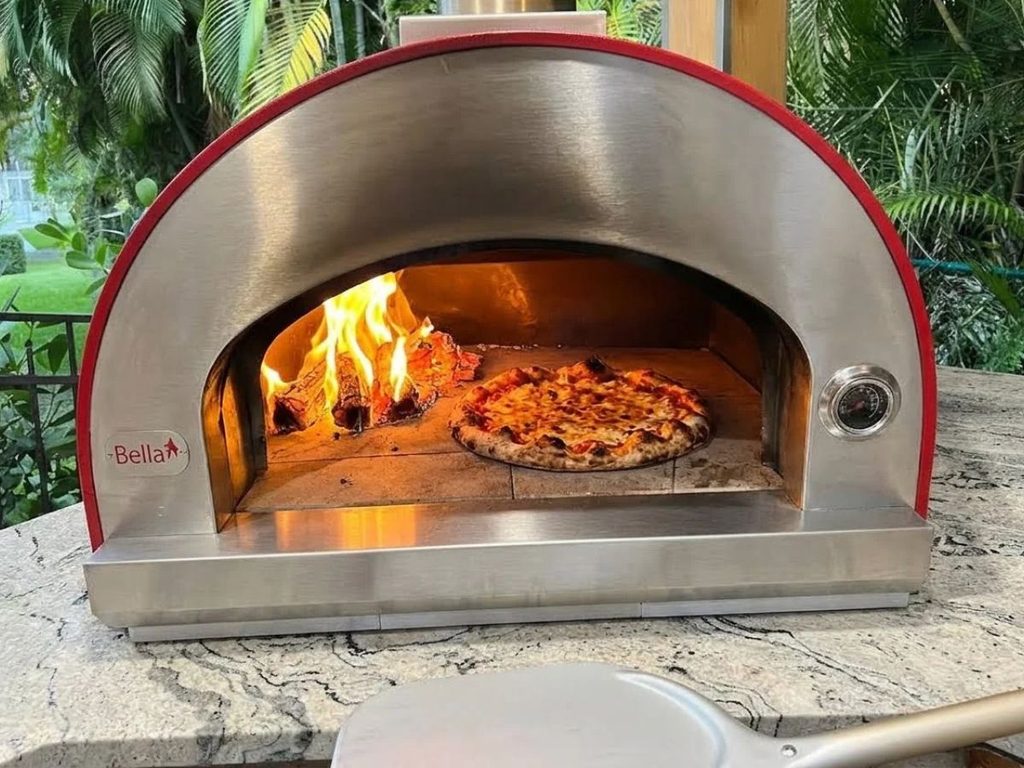
High-protein bread flour at a wetter hydration, no olive oil in the dough, shaped into a thin crust and par-baked for a home oven or finished fast in a wood-fired one.
You want a thin, blistered Neapolitan-style crust and don't mind a wetter, trickier dough.
Why You’ll Love It
- Thin and blistered. A true Neapolitan-style crust with a big, airy puff around the rim.
- Makes 5 pizzas. One batch divides into 5 pizza-sized portions.
- Any oven works. Built for a wood-fired oven, a stone, or a baking steel.
- Flexible timing. Use the dough the same day, or let it proof overnight in the fridge.
- No soggy centers. A par-bake step keeps the crust from steaming under wetter toppings.
Ingredients
Volume measurements are included for convenience, but they’re approximate. A kitchen scale will always get you a more consistent dough, especially for the flour.
This recipe makes 5 pizza-sized portions.
- Active sourdough starter (120 g): needs to be bubbly and active before it goes into the water.
- Honey (5 g): mixed in right after the starter dissolves.
- Water (500 g): the base the starter and honey dissolve into.
- Fine sea salt (20 g): added with the flour, weighing it keeps the ratio consistent.
- High-protein bread flour, 12 to 14% protein (700 g): Desi’s go-to here is Caputo Chef 00, though any high-protein bread flour will work. Watch your hydration if you swap flours.
- Semolina flour, for the work surface: Desi uses Caputo semolina for dusting the counter and coating the dough balls before spreading.
- Margherita toppings, for reference: tomato sauce, fresh mozzarella, Parmigiano-Reggiano, olive oil, and basil, however much you’d like. Feel free to swap in or add any toppings you like. The pizza pictured above is topped Margherita-style plus prosciutto, arugula, shaved black truffle, and an optional balsamic glaze.
Equipment
Gear guides: Sourdough Equipment Guide·Kitchen Scales·Banneton Sizing·Scoring Tools·Storing the Loaf·Pizza Stone vs. Baking Steel·Shop All Picks →
- Large mixing bowl: for mixing and for bulk fermentation.
- Kitchen scale: essential for measuring both the dough and the 5 divided portions.
- Bench scraper or a sharp knife: for dividing the dough.
- Covered container: for holding the shaped dough balls in the fridge.
- Pizza stone or baking steel: either works in a home oven. A wood-fired pizza oven is a different, much faster method if you have one.
- Pizza peel: for transferring the pizza in and out of the oven.
Pizza stone or steel
A steel heats dough faster; a stone costs far less. Preheat either one for 45 minutes.
Desi Recommends
NerdChef Steel Stone, 14.5 x 16 in (1/4 in)
- 14.5 x 16 in
A 14.5 by 16 inch steel plate, a quarter inch thick, made in the USA. It was a co-winner in America’s Test Kitchen’s baking steel testing, and it is the one I would start with.
Desi Recommends
Unicook Pizza Stone, 15 x 12 in (Rectangular)
- 15 x 12 in
A 15 by 12 inch rectangular stone at a fraction of the price of a steel. Stones heat more slowly than steel, so preheat it for the full 45 minutes.
Sample Schedule (2-Day)
Day 1
- Dissolve the starter into the water, then mix in the honey
- Add the flour and salt, mix into a sticky dough
- Rest 30 minutes
- Do 4 rounds of stretch and folds, 30 minutes apart
- Bulk ferment on the counter until risen about 50%
- Divide into 5 portions and shape into balls
- Place in a covered container and refrigerate overnight
Day 2
- Take the dough out 1 to 2 hours before you plan to cook, until it’s come to room temperature and risen a little
- Dust your counter heavily with semolina flour and coat both sides of each dough ball
- Spread the dough from the center outward, being careful not to disturb the outer rim
- For a home oven: preheat a stone or baking steel at 500°F for 30 to 45 minutes
- Par-bake the plain, oiled crust for 4 to 5 minutes, then remove and add toppings
- Return to the oven until the crust and toppings are done
- For a wood-fired oven: top the pizza first, then cook for about 2 to 3 minutes
Sourdough Pizza, Neapolitan Style
Method
- Dissolve the starter into the water, then mix in the honey.
- Add the flour and salt and mix into a sticky dough.
- Rest the dough for 30 minutes.
- Do 4 rounds of stretch and folds, 30 minutes apart.
- Bulk ferment on the counter until risen about 50%.
- Divide into 5 portions and shape into balls.
- Place in a covered container and refrigerate overnight.
- The next day, bring the dough to room temperature 1 to 2 hours before cooking.
- Coat with semolina and spread from the center outward, avoiding the outer rim.
- For a home oven: preheat a stone or cast iron pan to 500°F for 30 to 45 minutes, par-bake plain for 4 to 5 minutes, then top and finish baking.
- For a wood-fired oven: top first, then bake about 2 to 3 minutes.
Notes
Save This Recipe
Get it emailed to you now, plus new recipes as they go up.
Your email is safe with me. I’ll send this recipe straight over. No spam, ever. You can unsubscribe anytime.
How to Make It
1Dissolve the starter. In a large bowl, dissolve the active starter into the water, whisking until no lumps remain. Add the honey and mix well. The water should turn cloudy and faintly sweet-smelling once the starter is fully worked in.
2Add the flour and salt. Add the flour and salt and mix everything together by hand or with a stand mixer on low. The dough will be quite sticky and shaggy at this stage, clinging to your fingers or the sides of the bowl, that’s expected with a dough this wet.
3Rest. Let the dough rest for 30 minutes, covered. This short autolyse-like pause lets the flour fully hydrate before the first stretch and fold, and the dough will feel noticeably smoother afterward.
4Stretch and fold. Do four rounds of stretch and folds, spaced 30 minutes apart. Each round, grab one side of the dough, stretch it up, and fold it over the center, rotating the bowl a quarter turn between pulls. The dough should feel tighter and less sticky with each round.
5Bulk ferment. Let the dough ferment on the counter until it’s risen about 50%. In a warm South Florida kitchen this can move faster than you’d expect, so check it rather than going by the clock alone.
6Divide and shape. Divide the dough into 5 portions using a bench scraper or sharp knife, or adjust the count for the pizza size you want. Shape each piece into a ball by gathering the sides in and tucking them under, then flipping it over and using both hands to build tension on the surface. This dough runs on the higher side of hydration, so shaping may feel a little trickier than you’re used to, go slow.
7Refrigerate. Place the shaped dough balls in a covered container and refrigerate overnight. If you’re in a hurry, you can use the dough the same day instead, just let the balls rest on the counter for at least 30 minutes first.
8Bring to room temperature. The next day, take the dough out 1 to 2 hours before you plan to cook, depending on your kitchen, so the balls come to room temperature and rise a little. This makes them much easier to spread.
9Spread the dough. Dust your counter generously with semolina flour. Dip one side of a dough ball into the semolina, then flip and dip the other side so it’s fully coated. Starting from the center, push and spread the dough outward toward the edges. Stretch it further by gently pulling an inch or so of dough at a time, working your way around. Handle the outer rim as little as possible, disturbing it will keep it from puffing up properly in the oven.
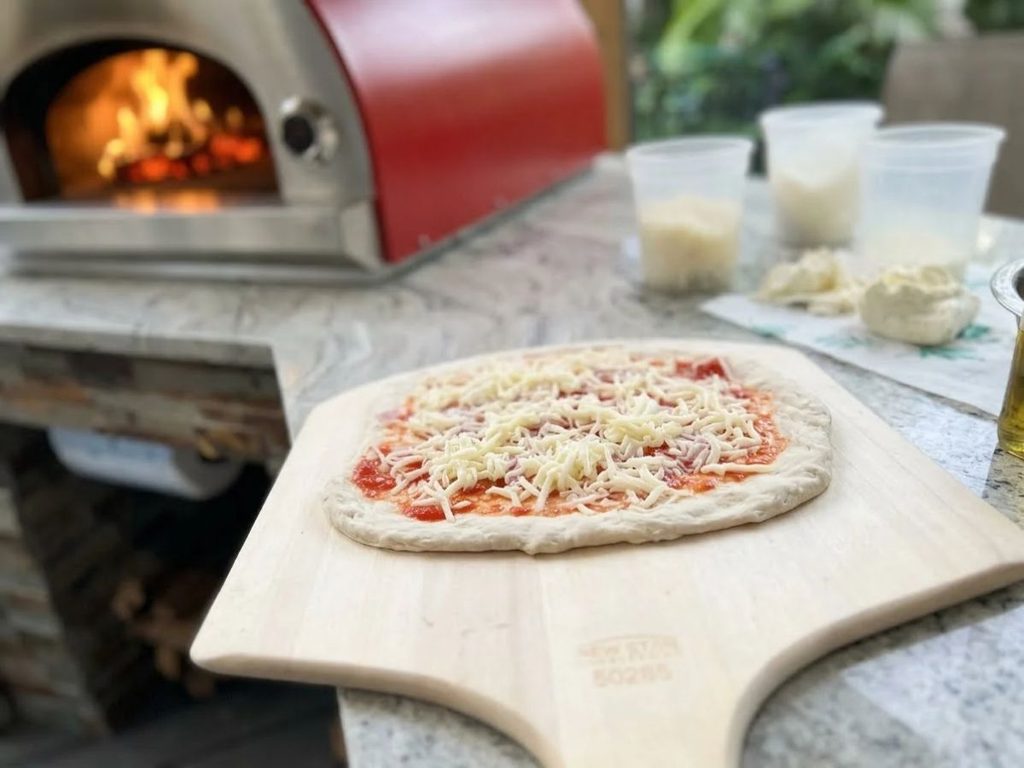
10Cook in a home oven. Preheat your oven to 500°F with a pizza stone or baking steel inside for 30 to 45 minutes, long enough for the stone or steel to fully heat through. Brush the spread dough with a little olive oil and par-bake it plain, no toppings yet, for 4 to 5 minutes. Remove it, add whatever toppings you like (tomato sauce, fresh mozzarella, Parmigiano-Reggiano, a drizzle of olive oil, and basil for a classic margherita, or swap in or add your own), and return it to the oven until the crust and toppings are fully cooked, usually another 6 to 10 minutes.
11Cook in a wood-fired oven. If you have a wood-fired pizza oven, top the pizza before it goes in, there’s no need to par-bake first. It cooks fast, usually about 2 to 3 minutes, giving you a crisp bottom and a soft, airy, bubbly crust with real leopard-spotting on the rim.
Tips & Troubleshooting
- Dough feels harder to shape: this recipe runs on the higher side of hydration, so it will feel stickier and a little less cooperative than a standard loaf, that’s normal, not a mistake.
- Crust not puffing: check how much you handled the outer rim while spreading, disturbing that edge is the most common reason it won’t puff.
- Home oven versus wood-fired: a home oven needs the par-bake step since it can’t match the heat or speed of a wood-fired oven, skipping it risks a soggy center under wetter toppings.
- Stone versus baking steel: both work, a baking steel holds heat a bit longer and gives a better bottom crust. See our full stone vs. steel comparison for the details.
- Sizing: 5 portions is Desi’s usual split, adjust the count up or down depending on how large you want each pizza.
How to Store
- Dough balls: keep them covered in the fridge and use them within a day or so for the best texture and rise.
Nutrition
Nutrition is estimated from the dough ingredients only, not toppings, and is based on a 5-crust batch. It’s an estimate for convenience, not a substitute for a precise calculation.
556
CALORIES
116
CARBS (G)
15
PROTEIN (G)
2
FAT (G)
4
FIBER (G)
1570
SODIUM (MG)
Desi’s Notes
This dough sits on the higher side of hydration, not extreme, but enough that shaping takes a bit more care than my other doughs. Go slow and you’ll get the hang of it.
Whatever you do, don’t disturb the outer rim while you’re spreading the dough out. That undisturbed edge is what puffs up into the big, airy crust once it hits the heat.
Between a stone and a baking steel in a home oven, I reach for the baking steel. It holds onto high heat longer and gives you a better bottom crust, though both will get you a good pizza.
Before You Bake
Make sure your starter is bubbly and active before you start, since there’s no instant yeast backing it up here. Confirm your oven and stone or baking steel are fully preheated for the full 30 to 45 minutes too, a pizza stone or steel that hasn’t soaked up enough heat is the most common reason a home-oven crust comes out pale and soft instead of blistered.
New to sourdough? Start with the free course
Seven short lessons over 12 days, from mixing your first starter to baking your first loaf with it. Stop anytime.
One short lesson every couple of days. Seven in all, then you’re done. No spam. See our Privacy Policy.
Already have a starter? Bake your first loaf → · Already baking? Browse recipes →



Tried this recipe? Leave a star rating below. It takes 10 seconds and helps other bakers decide what to make next.
Baked this recipe your way? Share it in Community Bakes and inspire other readers.