Sourdough Bulk Fermentation Time by Temperature Chart
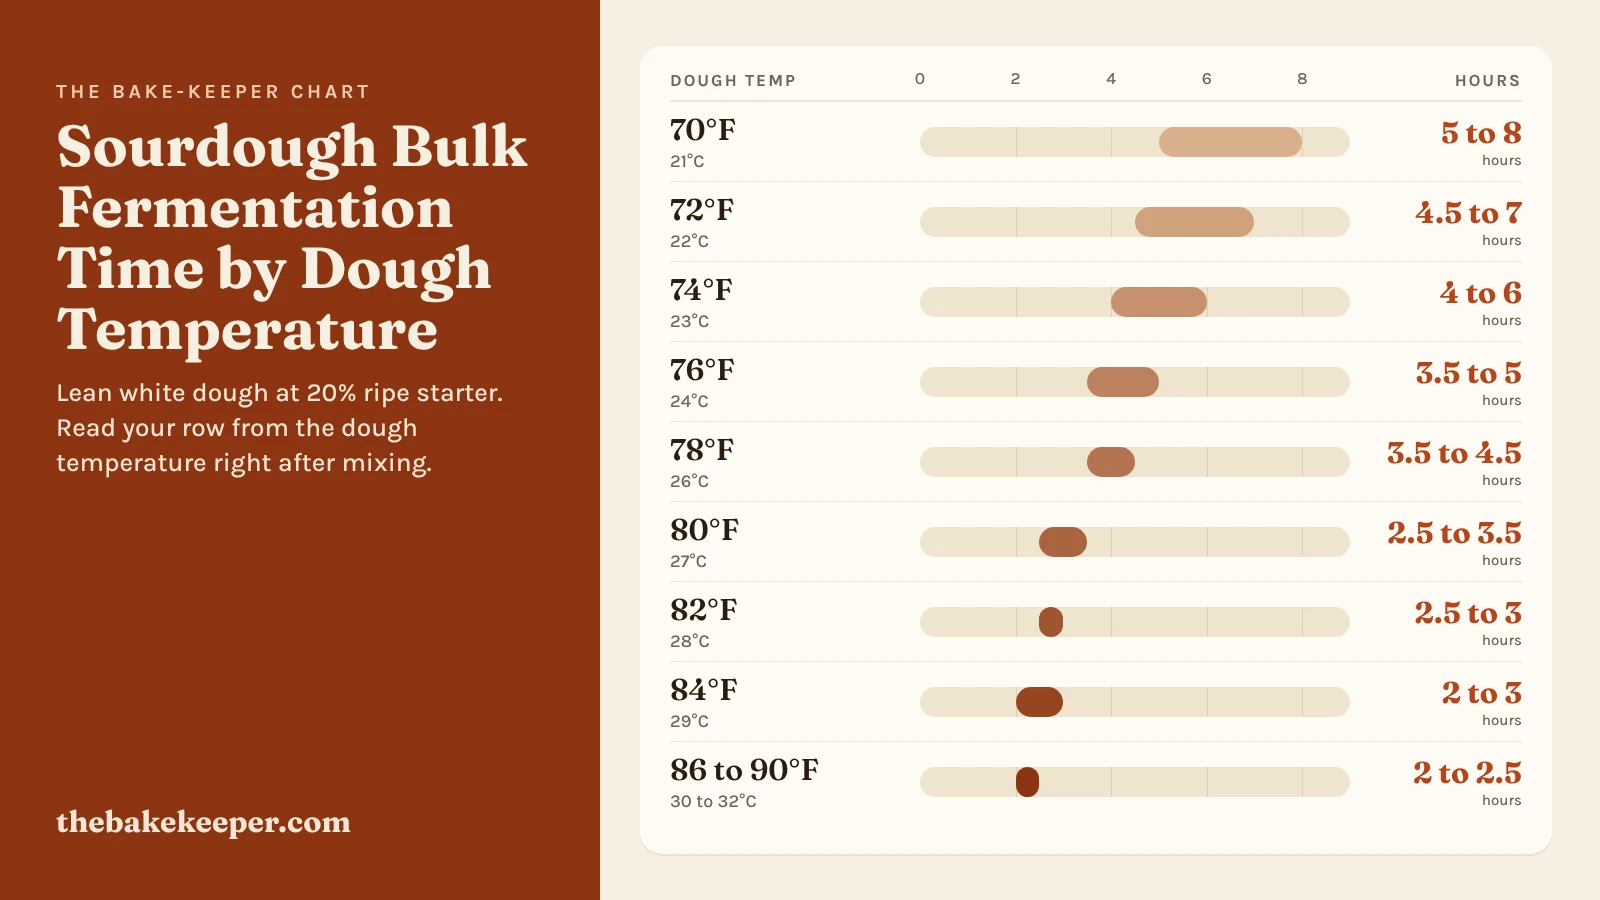
At 20% starter, sourdough bulk fermentation takes roughly 5 to 8 hours with the dough at 70°F (21°C), 3.5 to 4.5 hours at 78°F (26°C), 2.5 to 3.5 hours at 80°F (27°C) and only 2 to 2.5 hours once the dough sits at 86 to 90°F (30 to 32°C). The number that drives those times is the temperature of the dough itself, which can differ from the room by several degrees. Use the chart below as a starting estimate, then let the rise and the bubbles tell you when bulk is finished.
The Short Answer
Every 15°F (8°C) or so of extra warmth roughly doubles fermentation speed, so a bulk that needs 5 hours in a mild kitchen can be done in half that in a hot one. Measure your dough right after mixing and start checking it well before the low end of its range on the chart.
The chart: bulk fermentation time by dough temperature
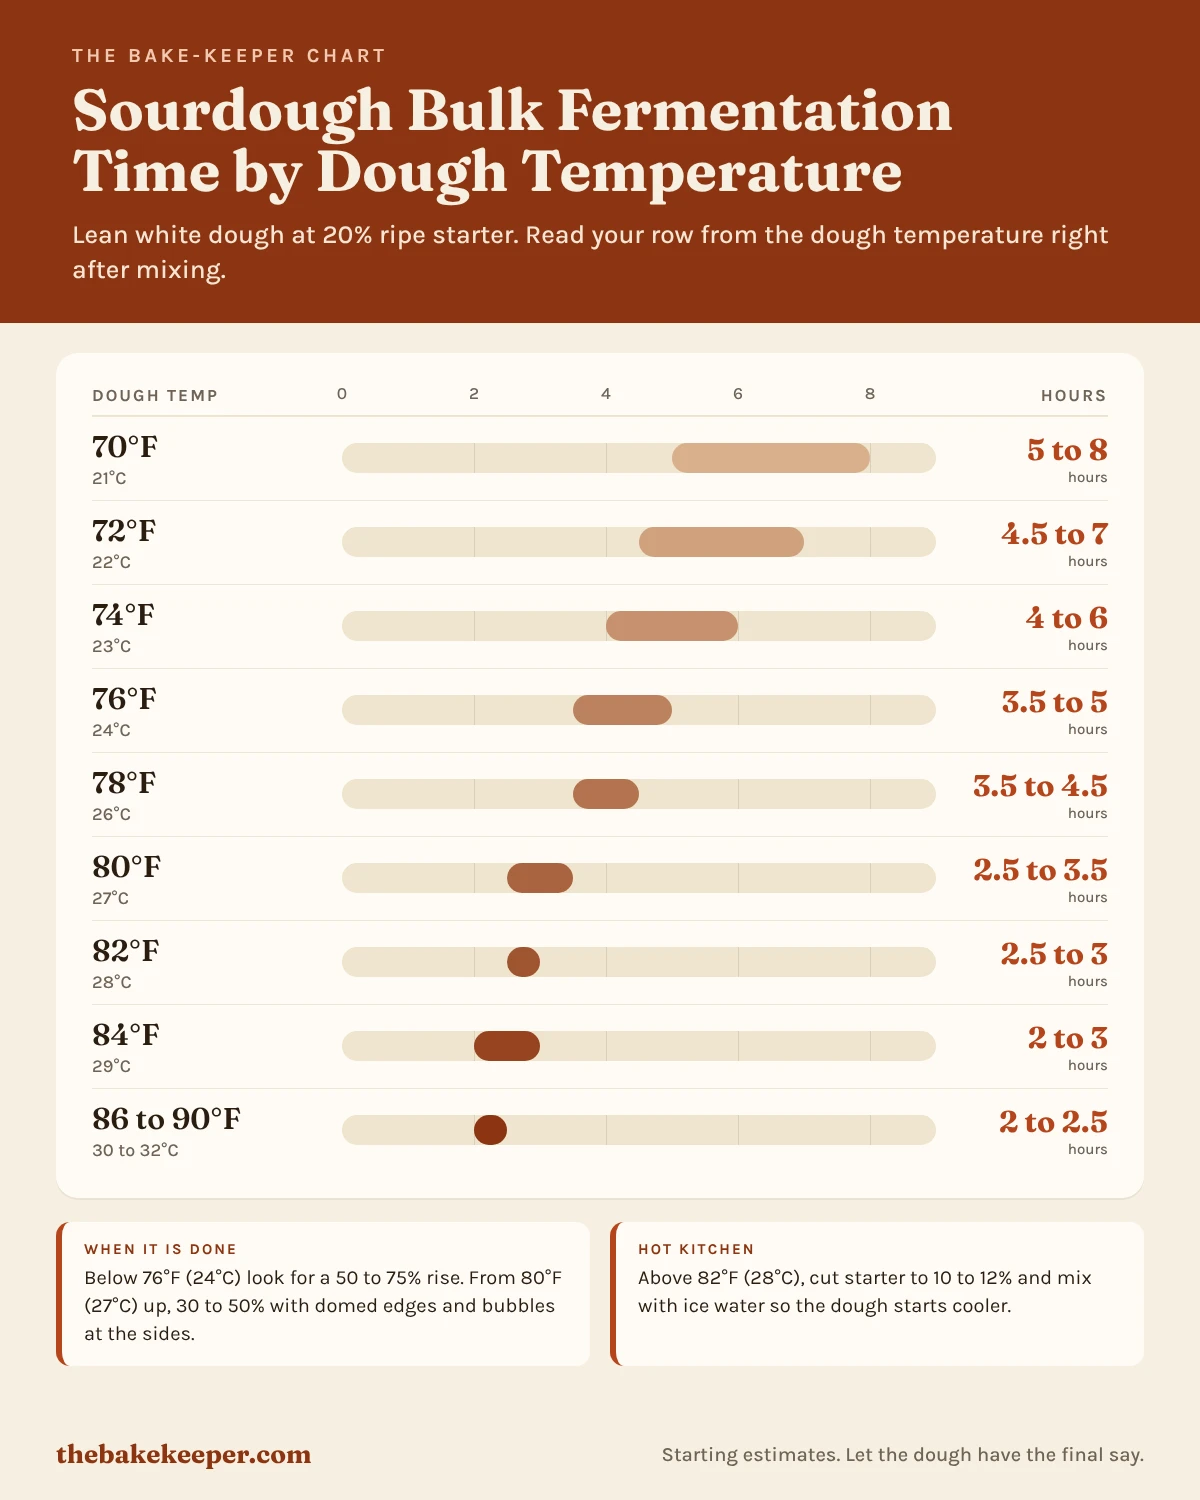
These times assume a lean white dough, 20% ripe starter (baker’s percentage, so 100 g starter per 500 g flour), around 2% salt and moderate hydration. They are ranges because the published sources disagree, and I would rather show you the spread than hide it.
| Dough temperature °F (°C) | Bulk time, 20% starter | What to look for | Adjust if you want more time |
|---|---|---|---|
| 70°F (21°C) | 5 to 8 hours | 50 to 75% rise, bubbles along the sides | No change needed, this is a relaxed pace |
| 72°F (22°C) | 4.5 to 7 hours | 50 to 75% rise, a domed surface | No change needed |
| 74°F (23°C) | 4 to 6 hours | About 50 to 75% rise, jiggles when you shake the container | Mix with cool tap water |
| 76°F (24°C) | 3.5 to 5 hours | About 50% rise, domed edges | Mix with colder water next bake |
| 78°F (26°C) | 3.5 to 4.5 hours | About 50% rise, airy and jiggly | Chill the covered container 15 to 30 minutes at the start |
| 80°F (27°C) | 2.5 to 3.5 hours | 30 to 50% rise, domed edges | Ice water at mixing, start checking at hour 2 |
| 82°F (28°C) | 2.5 to 3 hours | 30 to 50% rise, bubbles at the sides | Ice water plus starter cut to 10 to 12% |
| 84°F (29°C) | 2 to 3 hours | 30 to 50% rise, jiggly when shaken | Starter at 10 to 12%, shape early and retard in the fridge |
| 86 to 90°F (30 to 32°C) | 2 to 2.5 hours | 30 to 50% rise, check every 30 minutes | Starter at 10 to 12%, ice water, a fridge retard for the shaped loaf and the coolest room you have |
Below 70°F (21°C) the clock stretches fast. Our guide to sourdough in a cool kitchen picks up where this chart stops.
How to read the chart, and why temperature matters so much
Find the row closest to the temperature your dough reads after mixing. If it reads 79°F (26°C), split the difference between the 78°F (26°C) and 80°F (27°C) rows and plan on about 3 to 4 hours. Then set a timer for the low end of the range and go look.
The reason the rows shrink so quickly is plain biology. Wild yeast and lactic acid bacteria both speed up as they warm, and the common rule of thumb is that fermentation roughly doubles in speed for every 15°F (8°C) of added warmth. Rose Levy Beranbaum puts it that way in The Bread Bible, as quoted by ThermoWorks, and baker and tester Tom Cucuzza uses the same 15°F (8°C) rule and says it holds up in practice.
The Perfect Loaf’s guide to dough temperature lists 4 to 4.5 hours at 75°F (24°C) and 3 to 3.5 hours at 80°F (27°C). It also says a 4 to 5 hour bulk can finish in 2 to 2.5 hours in an 82 to 90°F (28 to 32°C) kitchen. That figure matches what we see in how Florida heat compresses a sourdough schedule.
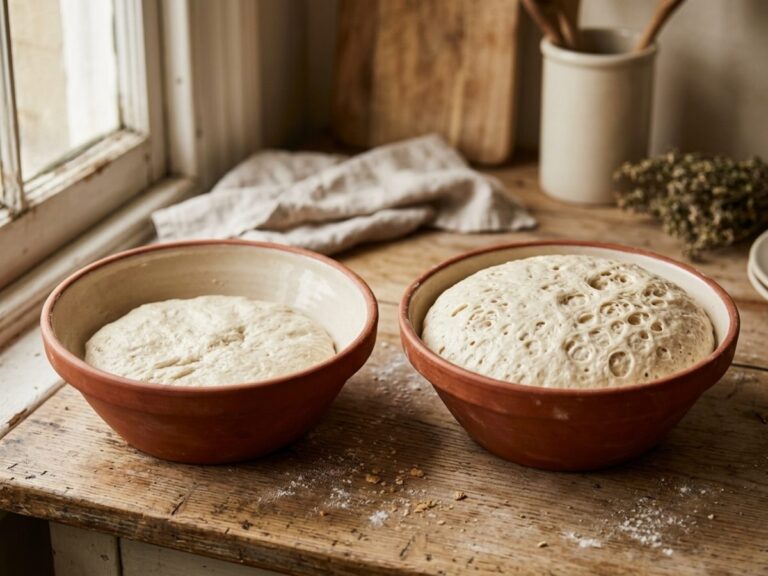
The rise target shrinks too. Warm dough tends to be ready at a smaller rise than cool dough, and Cucuzza suggests aiming for about 30% at 80°F (27°C) and closer to 75% at 70°F (21°C). The Perfect Loaf goes further and warns that volume alone can mislead, which is why every row pairs a percentage with a second cue.
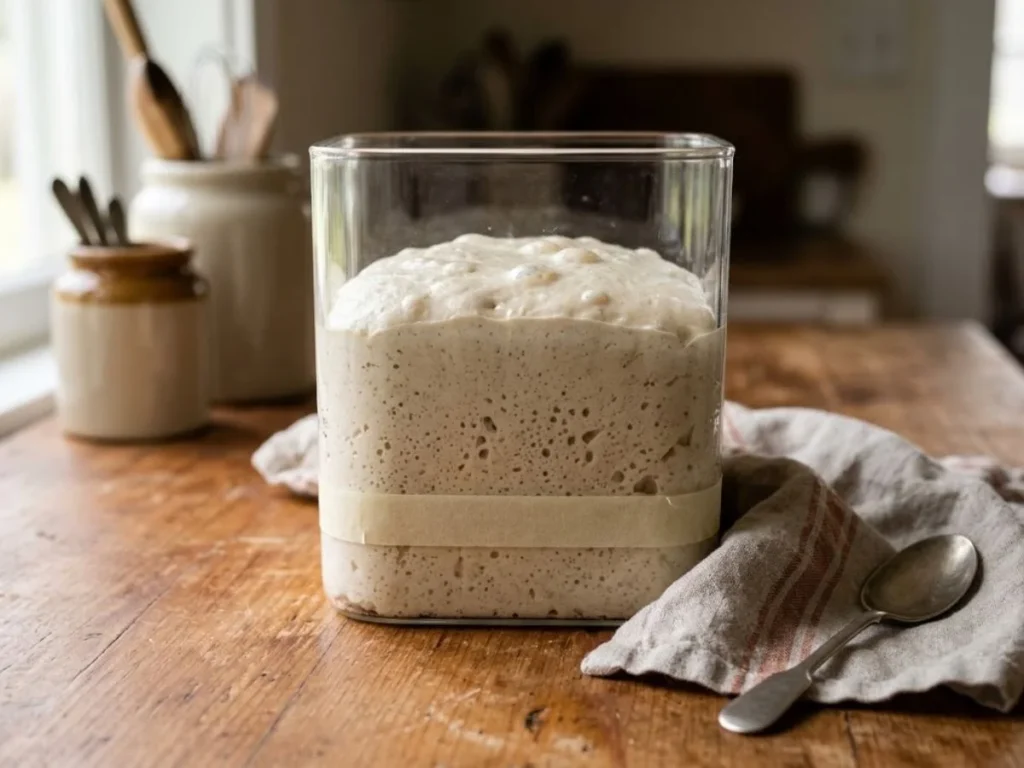
How to measure dough temperature
Push an instant-read thermometer into the middle of the dough as soon as you finish mixing, and read your row from that number. Check again mid-bulk if your kitchen is warm, because dough drifts toward the room it sits in.
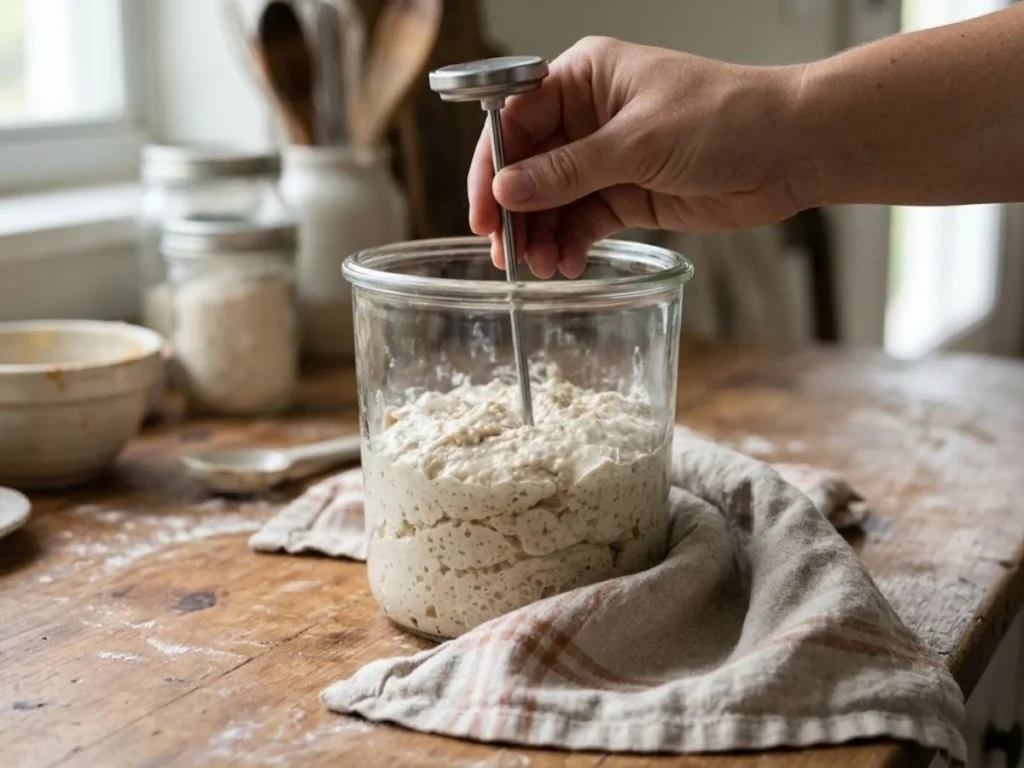
To land on a target instead of hoping for one, bakers use the desired dough temperature (DDT) formula. King Arthur’s explanation of desired dough temperature multiplies by 3 for a straight yeast dough and by 4 when a preferment like sourdough starter is in the bowl. For a sourdough loaf, the version The Perfect Loaf uses looks like this.
Water temperature = (DDT × 4) minus (starter temperature + flour temperature + room temperature + friction factor)
Here is a South Florida example. You want the dough at 76°F (24°C). The room is 84°F (29°C), the flour is 82°F (28°C), the starter is 80°F (27°C) and you are mixing by hand, so friction is 0.
76 × 4 = 304
304 minus (80 + 82 + 84 + 0) = 58°F (14°C) water
So the 375 g of water for a 500 g flour, 75% hydration loaf goes in at about 58°F (14°C). That is cold tap water in winter and ice water most of the summer. A stand mixer adds friction heat, so its number goes in the brackets too, and the formula works the same way in Celsius.
Adjustments for a hot kitchen
Most published bulk times assume a dough around 75 to 78°F (24 to 26°C). In a kitchen that runs hotter, you have four honest levers, and you rarely need all of them at once.
Use less starter. For a 500 g flour loaf, 20% starter is 100 g. The Perfect Loaf suggests 10 to 12% in an 82 to 90°F (28 to 32°C) kitchen, which is 50 to 60 g. If your starter is 100% hydration, dropping from 100 g to 50 g removes 25 g of flour and 25 g of water from the dough. Add those back if you want the hydration to stay put. In Cucuzza’s controlled timetables, cutting starter from 20% to 10% added about 3.5 to 4 hours at 70 to 74°F (21 to 23°C). I suspect the gain is smaller in clock hours in a hot kitchen, since everything else runs faster too.
Mix with cold water. Use whatever the DDT math says, even if that means ice cubes. King Arthur’s summer rule is simple, the hotter the kitchen, the cooler the liquid.
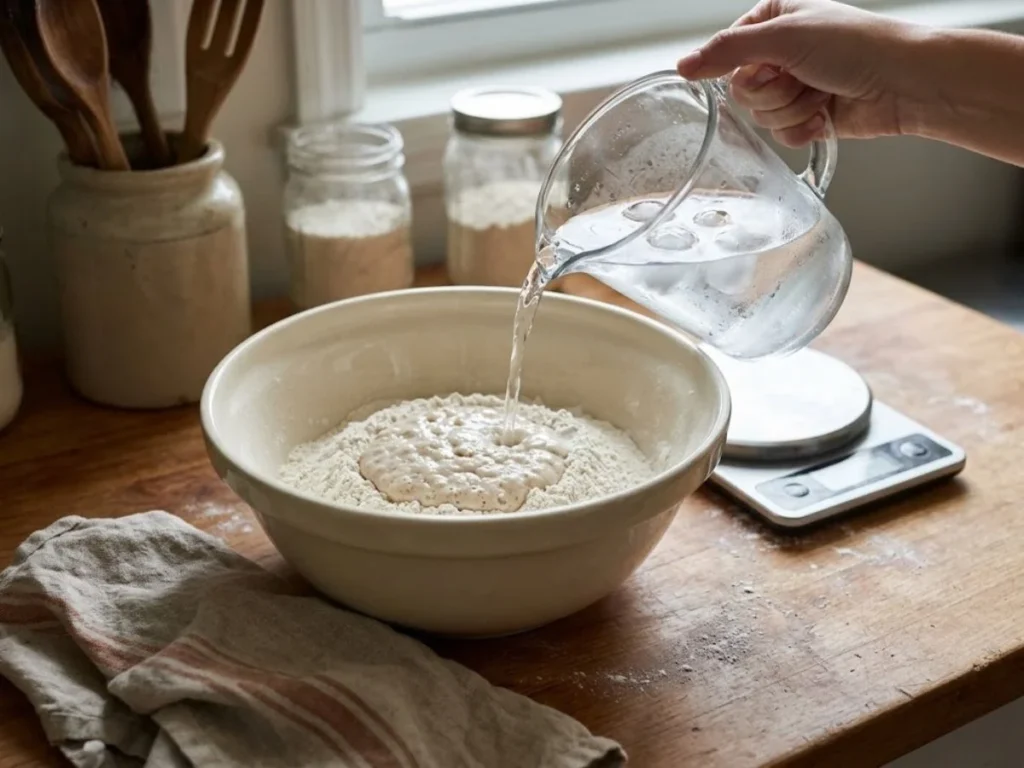
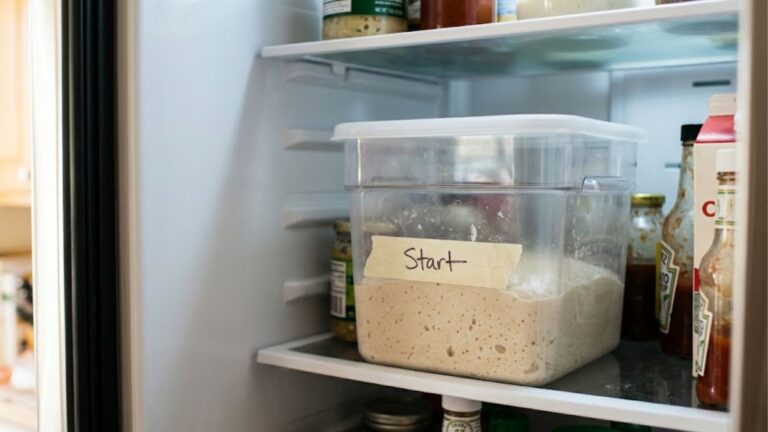
Use the fridge during bulk. The Perfect Loaf chills a too-warm dough in its covered container for 15 to 30 minutes at the start of bulk. If you need a longer break, our guide on how to pause bulk fermentation in the fridge walks through the timing.
Shorten bulk and cold retard the shaped loaf. End bulk at the first signs on the chart and shape straight into the fridge. Our pause guide, drawing on King Arthur’s advice, aims for shaped dough at 75 to 80°F (24 to 27°C) going into the fridge, since a warmer loaf may not cool fast enough to slow down in time. For most of the year in South Florida, the overnight retard is the default, which is the same advice you will find in baking sourdough in Florida heat and humidity.
Desi’s Note
My kitchen sits in the high 70s to low 80s°F (about 25 to 28°C) in July, so I aim for a dough temperature of 74 to 76°F (23 to 24°C) at the end of mixing, which usually means ice water. I check it again mid-bulk and before shaping, because dough drifts toward the temperature of the room it sits in.
When the chart will be off
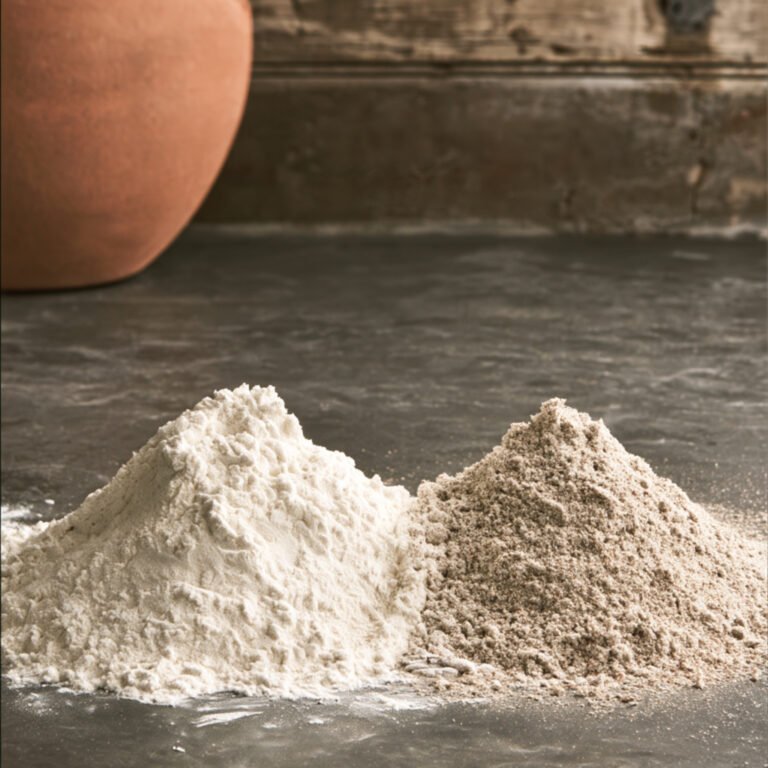
Whole grain flour ferments faster. In our guide to how dough type changes your schedule, a lean white dough runs about 4 to 6 hours in bulk and a whole wheat dough about 3 to 5. The Perfect Loaf also lowers its target dough temperature for high whole grain doughs to around 75°F (24°C).
Starter strength shifts every row. Cucuzza notes that a faster or slower starter moves times in proportion. If a bulk runs far behind the chart, check the starter before you blame the weather.
Salt slows fermentation a little. The chart assumes about 2%, the same preset the Bake-Keeper calculator uses. Hydration matters as well, since a wetter dough ferments faster. In a humid kitchen your flour pulls in moisture from the air, so a 75% dough can behave more like a 78 to 80% one on the counter.
Reading your crumb: fermentation
Let the loaf cool for a full hour before you cut it, then find the closest match.
Swipe each row to see all three.
Under-fermented
Uneven bubbles and a dense, gummy crumb, with sometimes a few big tunnels under the top crust. The dough did not make enough gas before it went into the oven.
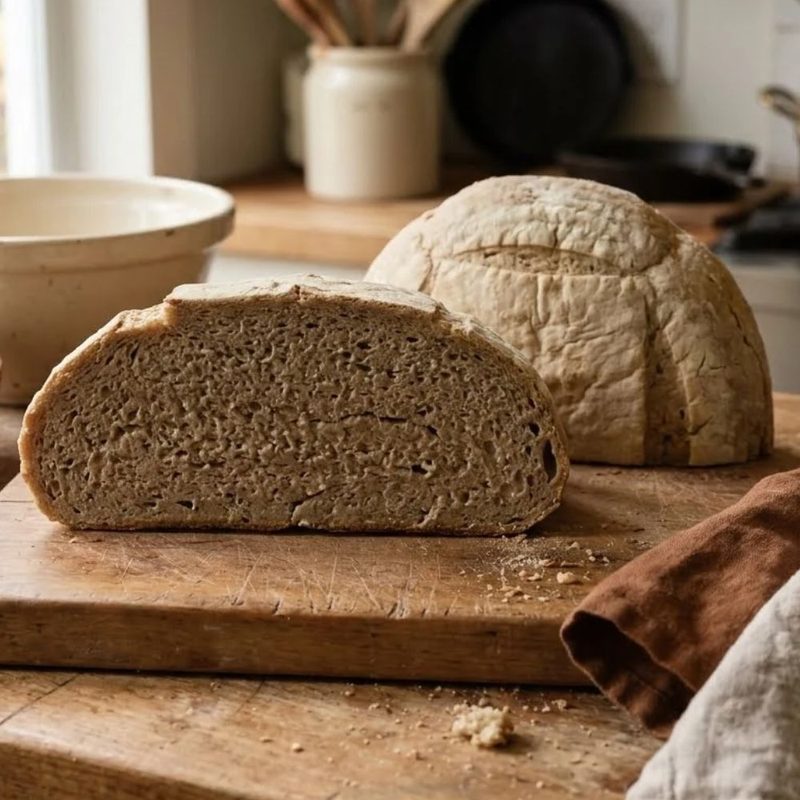
ExtremeVery dense and tight, with only tiny holes.
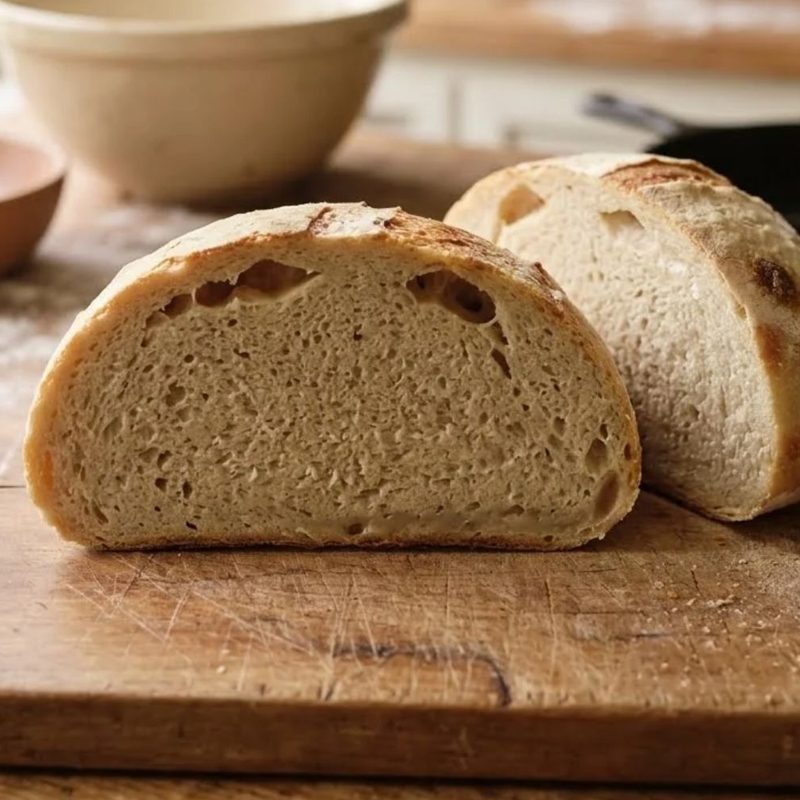
ModerateA few big tunnels over a tight, doughy crumb.
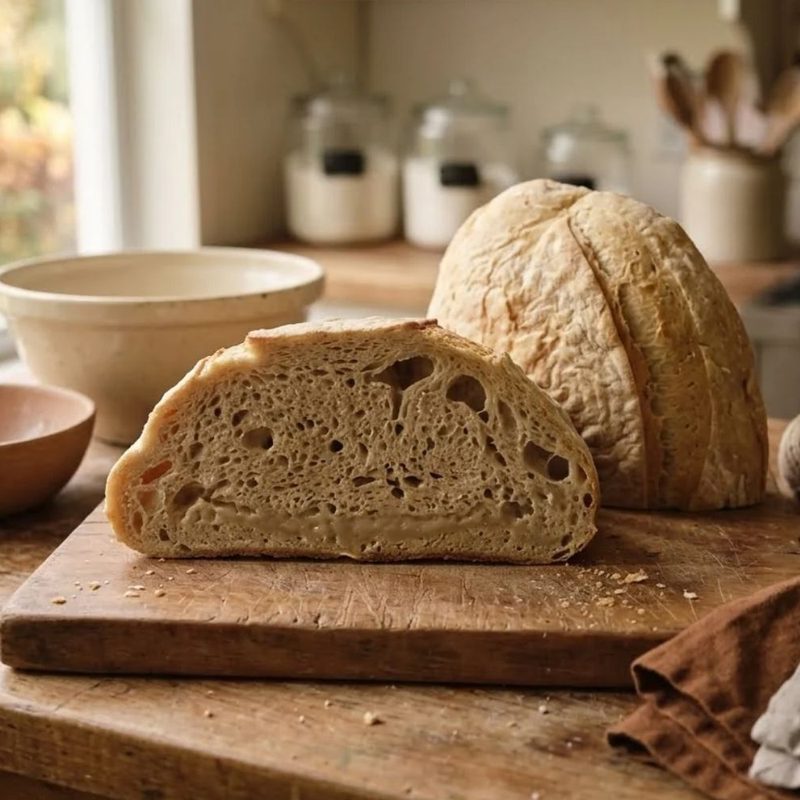
MildSome holes near the top and a gummy band along the bottom.
Nicely fermented
Bubbles of mostly similar size spread evenly through a light, springy crumb. An ear is a bonus, since a good loaf can bake without one.
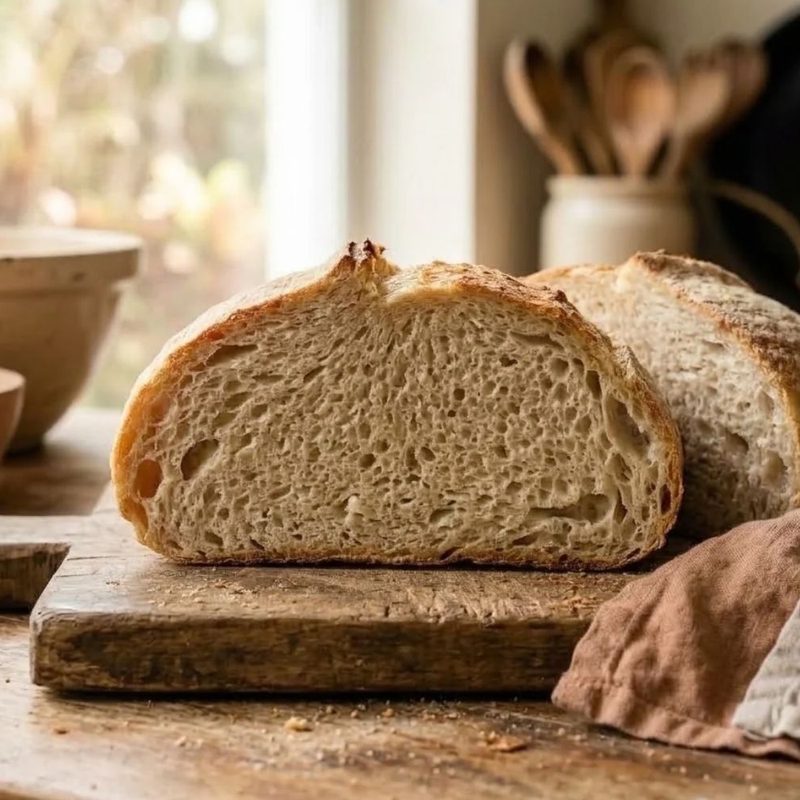
TighterA softer, tighter crumb with small, even holes.
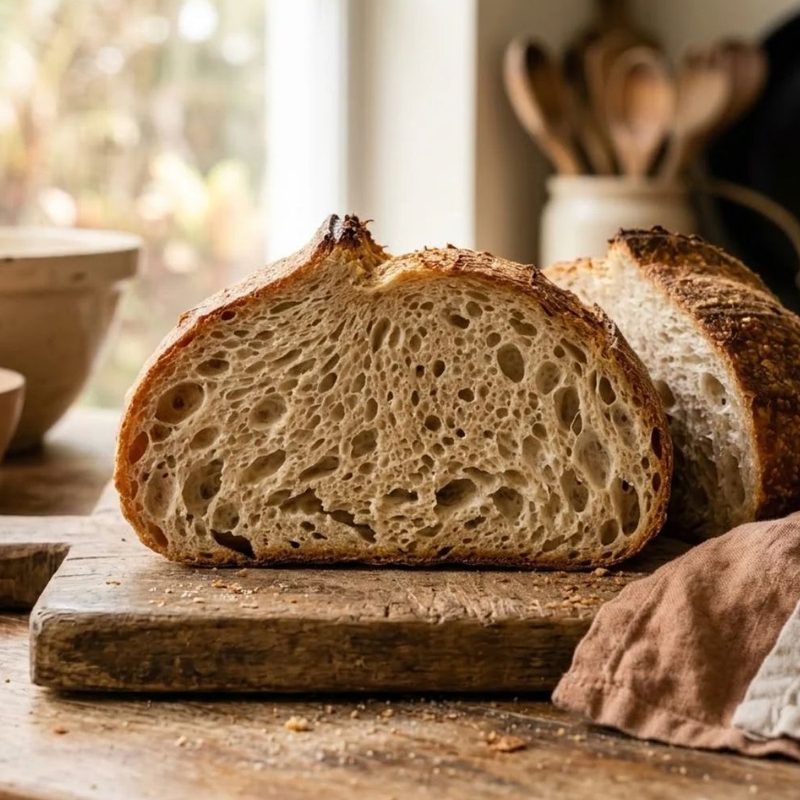
StandardEven, medium bubbles and a tall, rounded loaf. A good everyday crumb.
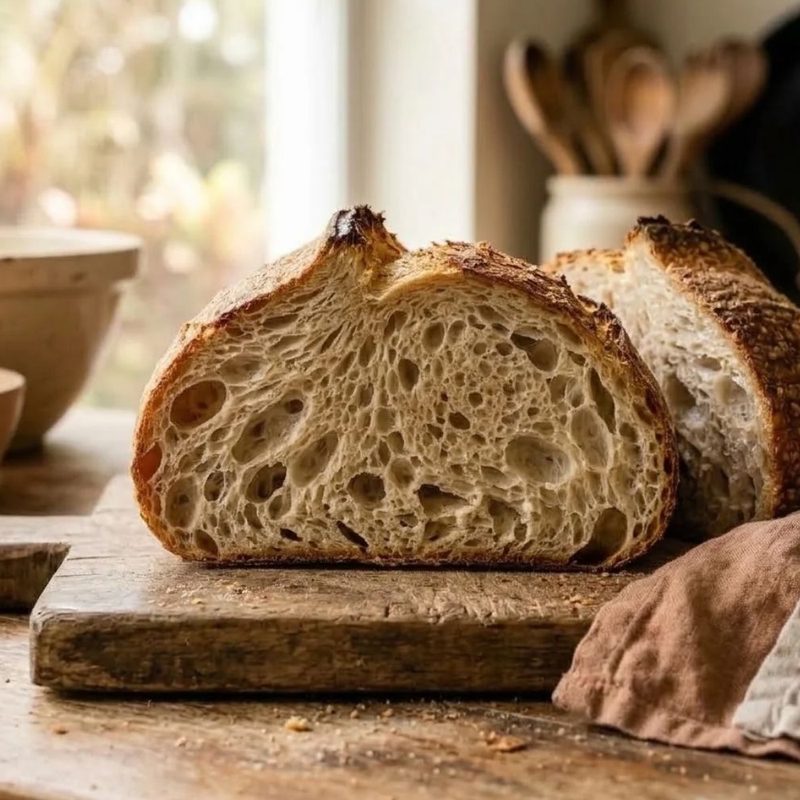
OpenLarge glossy bubbles with thin walls and an ear.
Over-fermented
The structure is weak and the holes are small and shriveled. The loaf spreads flat because the dough ran out of strength before it baked.
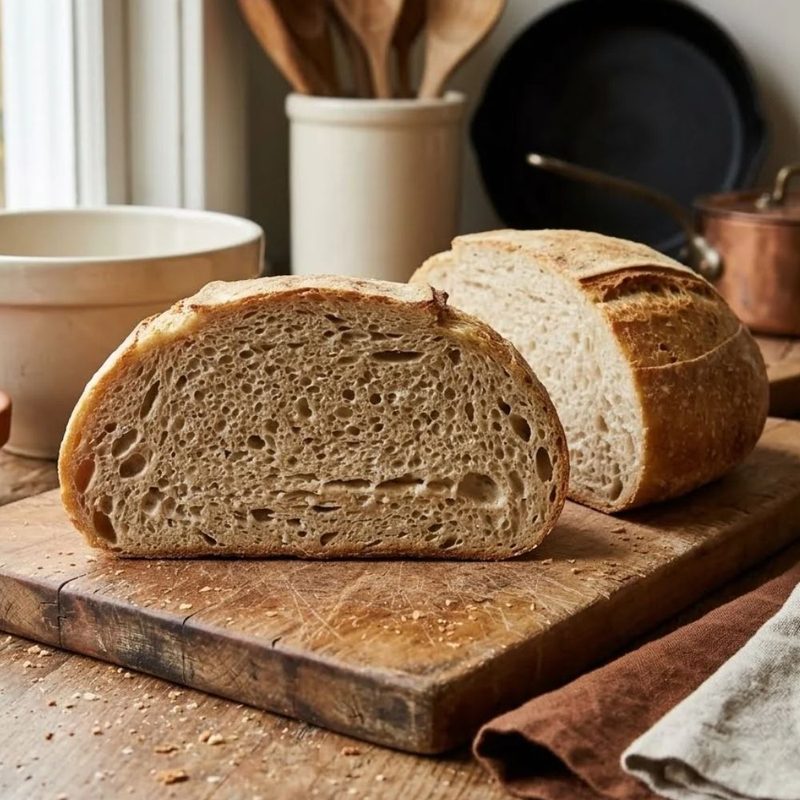
MildA soft, slightly damp crumb with small, tired-looking bubbles.
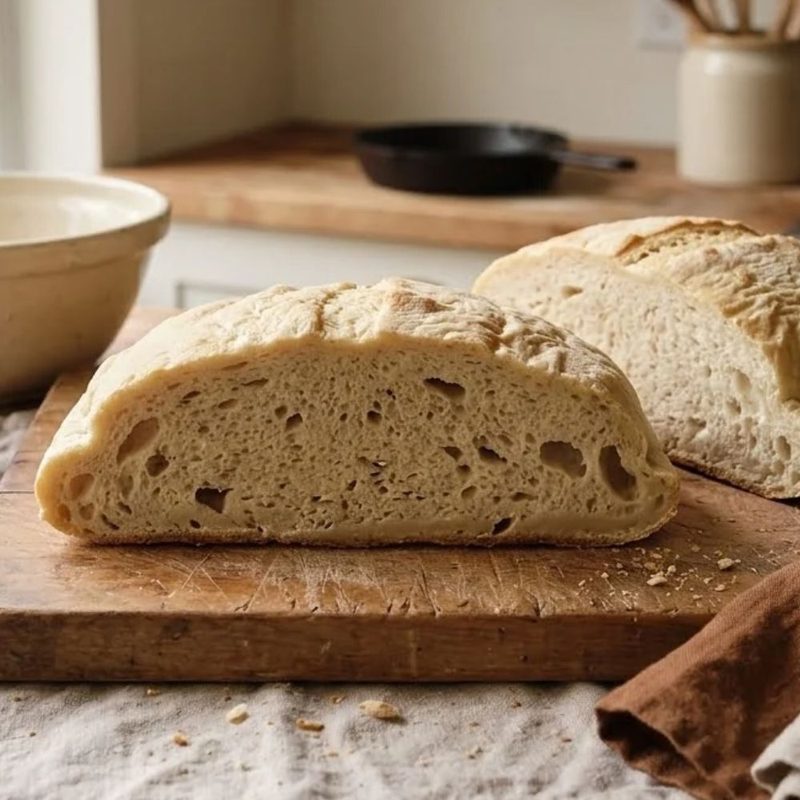
ModerateA pale, wide loaf with torn-looking holes and a gummy base.
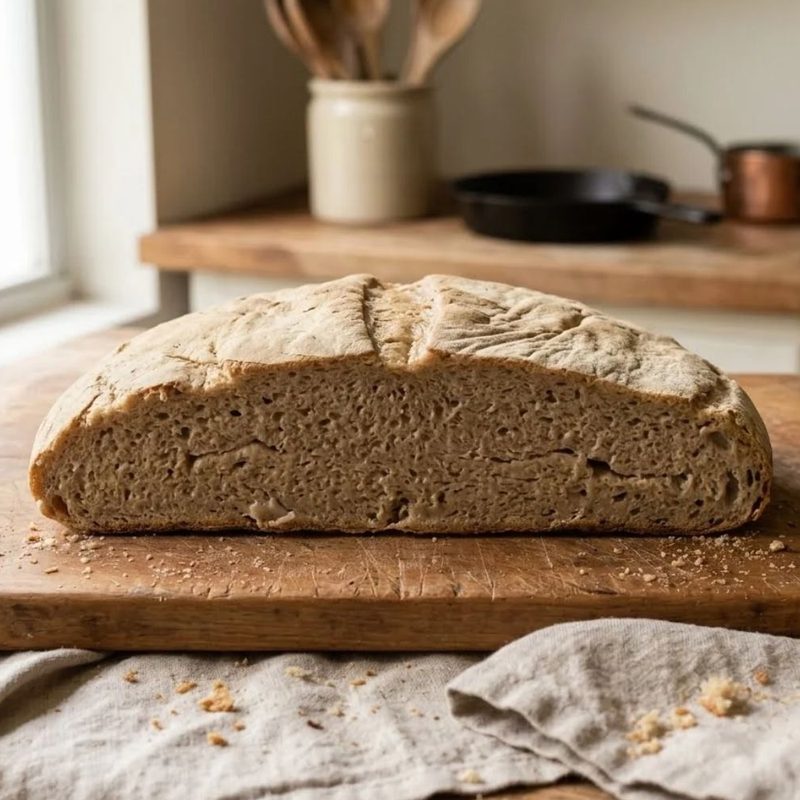
ExtremeA flat, spread loaf with a dense, damp crumb and no structure.
How to use this chart
Print it and tape it inside a cabinet door near your mixing bowl. Write your own times in the margin next to each row, along with the room temperature, and after a few bakes you will have a version calibrated to your flour and your starter.
If you would rather let a tool do the arithmetic, the Bake-Day Timeline tab in the Sourdough Calculator works backward from your bake time, and the Sourdough Schedule Finder matches a full schedule to your week.
Free to share: you are welcome to share or print this chart for your baking class or your blog, as long as you link back to this page.
Questions people ask
How long should I bulk ferment sourdough at 80 degrees?
With 20% starter and the dough at 80°F (27°C), plan on about 2.5 to 3.5 hours. Start checking at the 2 hour mark and look for a 30 to 50% rise with domed edges.
Does room temperature or dough temperature matter more?
Dough temperature. The room matters because the dough slowly drifts toward it, and a dough mixed with ice water in a hot kitchen can spend its first hour or two several degrees cooler than the air.
How much should sourdough rise during bulk in a warm kitchen?
Less than in a cool one. Cucuzza suggests about 30% at 80°F (27°C) against about 75% at 70°F (21°C), and The Perfect Loaf cautions against judging by volume alone. Look for domed edges and bubbles at the sides of the container.
What is the best dough temperature for sourdough bulk fermentation?
King Arthur and The Perfect Loaf both point to 75 to 78°F (24 to 26°C) for most wheat doughs. At 20% starter that range gives you a bulk of roughly 3.5 to 5 hours.
Related Reading
- Sourdough in a Cool Kitchen
- How Florida Heat Compresses a Sourdough Schedule
- Baking Sourdough in Florida Heat and Humidity
- How to Pause Bulk Fermentation in the Fridge
The single most useful habit is writing down the dough temperature right after mixing, before you do anything else. That one number tells you which row you are on for the rest of the day.
More Resources
Want more printable references? Browse the Printable Quicksheets, or let the Sourdough Calculator build a bake-day timeline for your kitchen temperature.
Knead to Know?
New recipes and sourdough troubleshooting, delivered before your starter even finishes its next rise.
Get the latest insights with no spam, just new recipes and baking tips. Unsubscribe anytime. See our Privacy Policy.